If You Give a Mouse a GPU…

Editor’s Note: For those that didn’t catch the reference, it’s a play on the ‘If You Give a Mouse a Cookie’ story. Essentially, if give a mouse a cookie, he’s going to want some milk to wash it down with… and straw to drink the milk… and and a napkin to wipe his face… and so on…

In the Beginning…

About 3.5 years ago, I replaced my aging GTX 1080 gaming desktops with a couple of 30-series systems. Between inflation, parts availability, and AI demands, the market wasn’t great, and it’s only gotten worse.

At the time, I’d planned to buy another iBUYPOWER system, but due to shipping delays, I had to cancel the order and spend over $500 per system more than I originally budgeted. I usually target the upper end of the previous generation of hardware, I feel I missed the mark this time around…

Not long (perhaps a week or two) after I pulled the trigger on our two PCs, and before they began the build, they’d upgraded the model I’d bought from 12th gen to 13th gen, but did not create a new item in their sales system, so I found about it because subsequent updates to my order read “13700K” and “13600K ” respectively rather than the 12th gen series I actually bought. I did reach out to them to see if I’d get a free upgrade, but that was too much to hope for…

By then, DDR4 (what these systems shipped with) was getting long in the tooth, and DDR5 had been around for at least two years. Beyond that, there were other issues with their packing, resulting in feet being shorn off, and while the system pictured in the ad featured strimmers, it turned out they wanted an extra $120 per system…

I used them once again to purchase a pre-built system to replace Jim’s aging laptop. They weren’t my first go-to (I started with Amazon, but had to abandon that route due to logistical issues), but to their credit, they went out of their way to accommodate shipping to Mexico. Unfortunately, Jim didn’t get much use out of it as he passed 3 weeks later… So far as I can tell, he was happy with the purchase, and the price was right ($~1,100, closer to $1,400 with shipping).

Even so, I wouldn’t make another purchase from them today, nor can I recommend them for reasons I’ll get into later…

Treat Yo’self [sic], as the Young People Say…

After a long and expensive home renovation, I decided to treat myself to a GPU upgrade (call it a late birthday present ^_^), so I started looking at 5080 series cards. I considered waiting for a 5080 Ti or Super to come out, but my research suggested they weren’t going to hit the shelves anytime soon, or at an attractive price point.
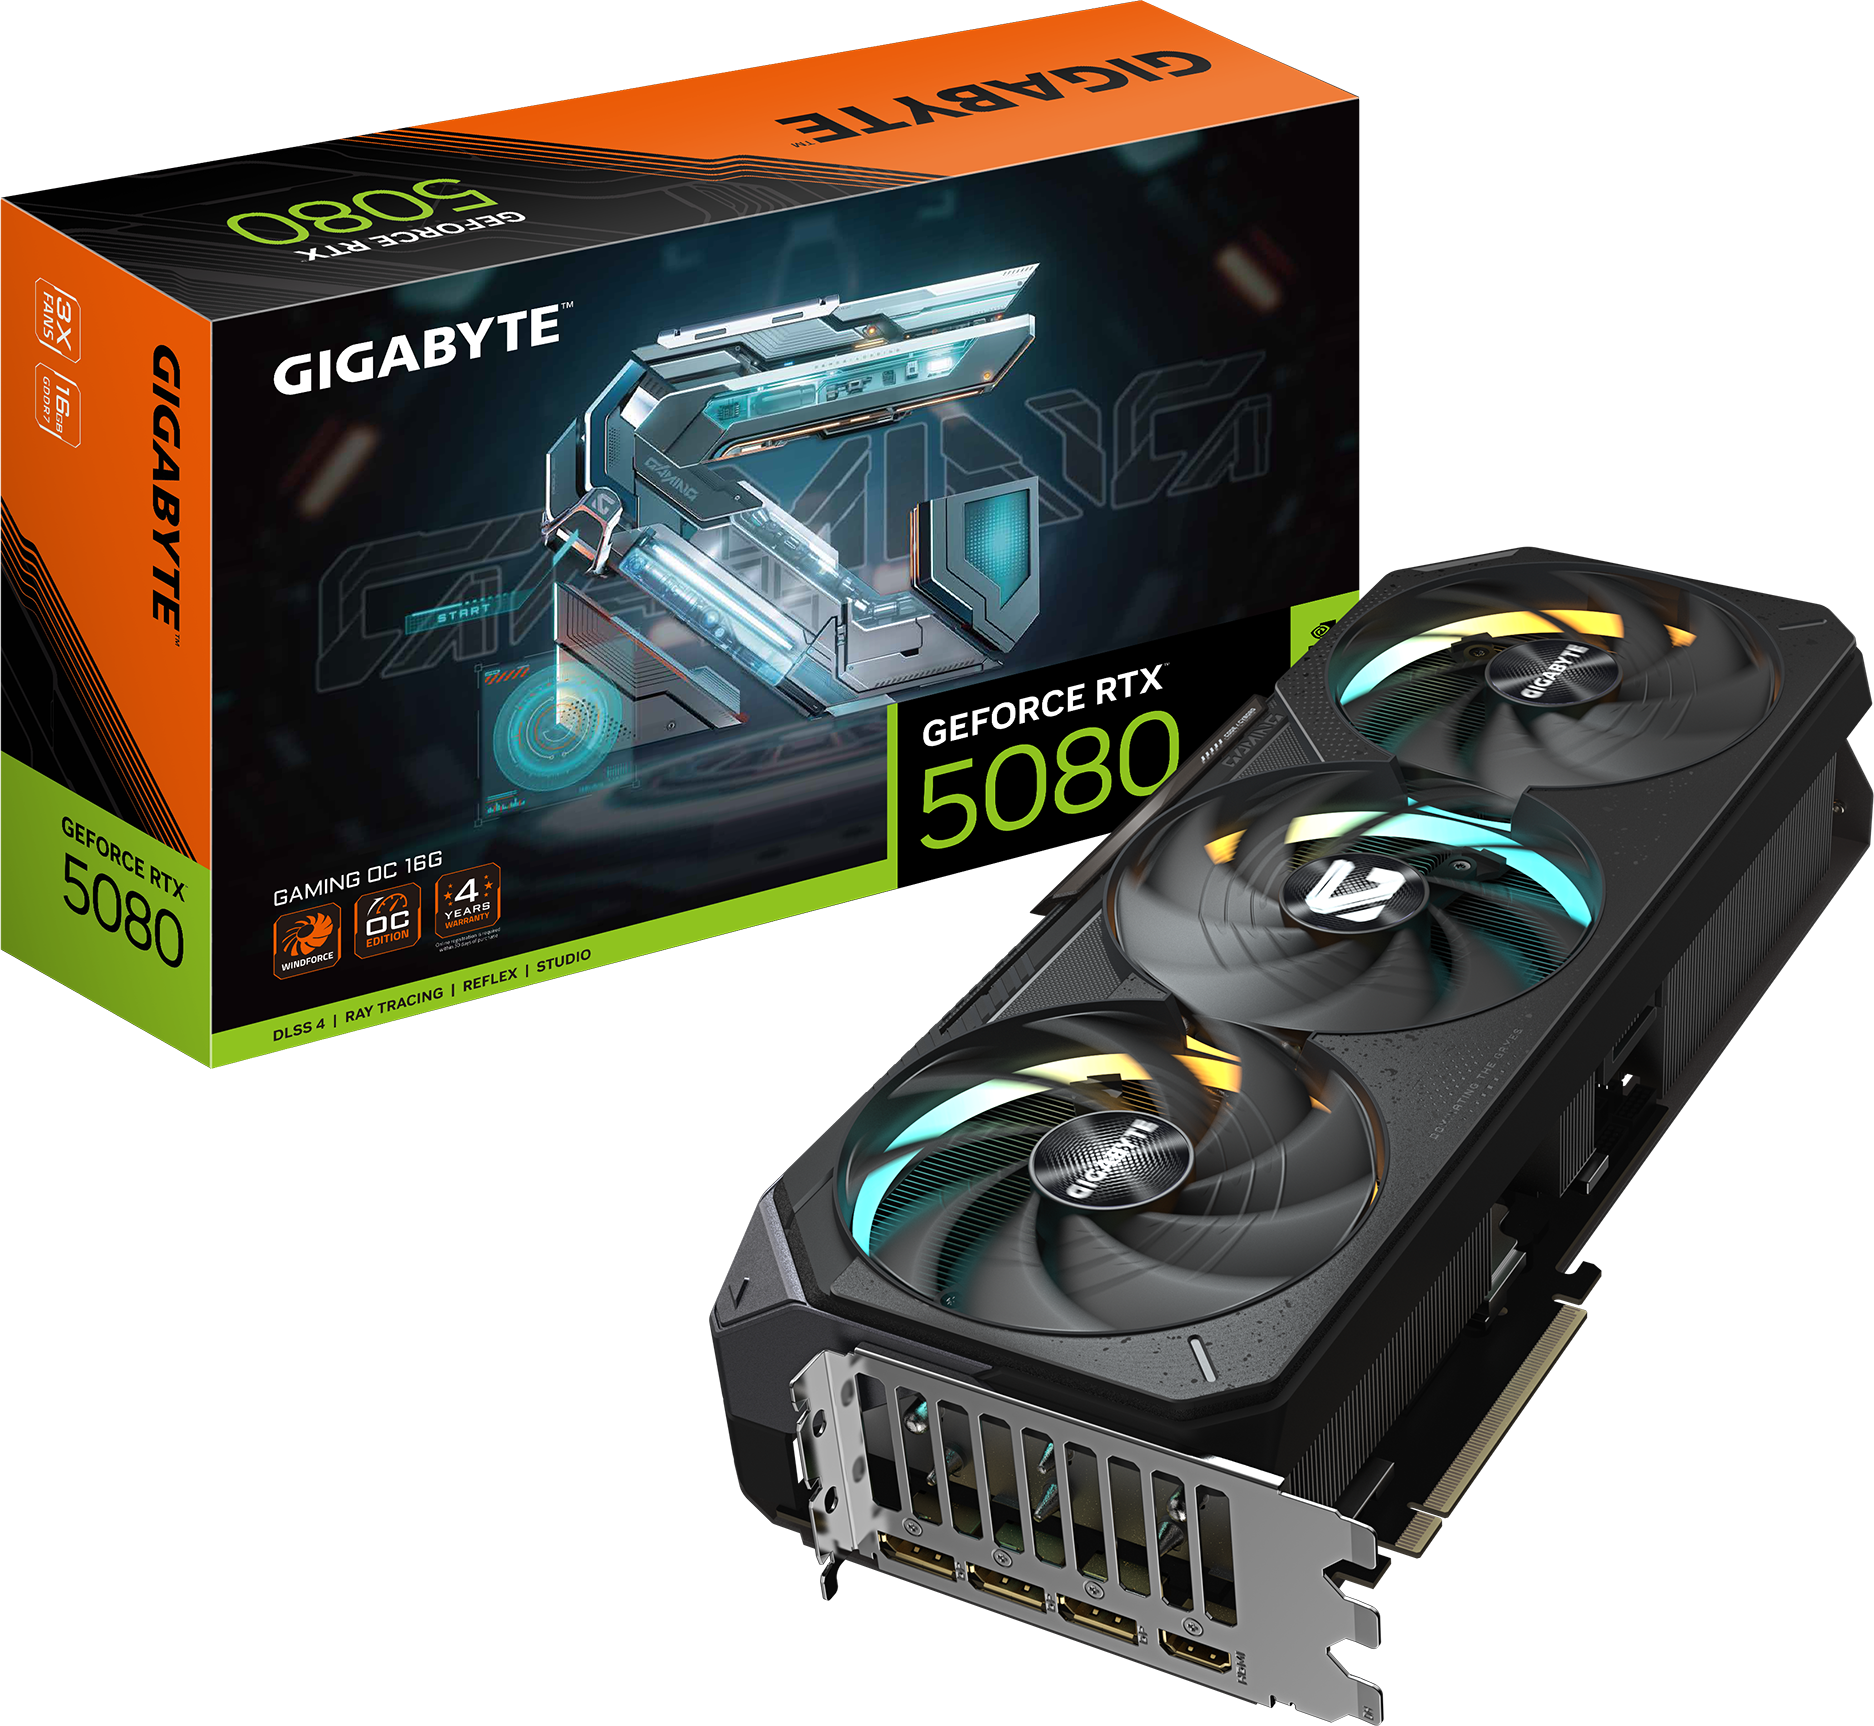
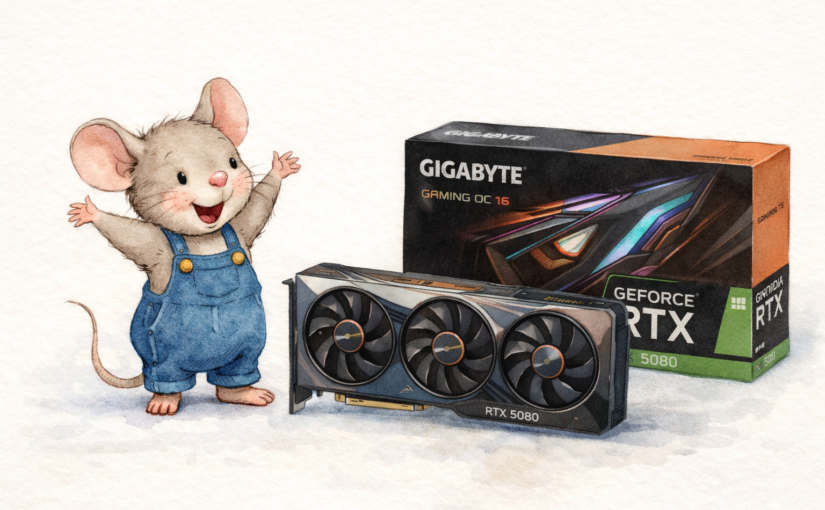
I settled on a GIGABYTE GeForce RTX 5080 Gaming OC 16G, which was a good combination of cost ($1,500 + tax), performance, cooling, and noise. I looked at some more expensive 5080s, but as far as I could tell, the performance was comparable (or even a little worse), and they were asking $200-500 more for slightly cooler/quieter fans.

I figured since I was splurging on a fancy new GPU, I may as well upgrade my RAM as well, but after going down the voltage/timing rabbit hole, I realize things aren’t like they used to be, and I can’t just slap another two identical sticks in the spare sockets and call it a day without risking a hit to performance and/or stability, but not before pulling the trigger on the purchase (another $300), which I’m just went ahead and returned unopened.

What I also failed to realize is that my 850W PSU would be the bare minimum for an RTX 5080 and would need a 12V-2×6 (16-pin) connector instead of the triple 8-pin connectors I’m using now for the RTX 3080… Yes, I could just use the adapter that comes with the GPU, but if I was already spending $1,500 on a GPU, what’s another $180 for some peace of mind… I ended up purchasing another Corsair RM1000x ATX 3.1 (1000W), which should give the card plenty of headroom…

Decisions, Decisions!

At this point, I started thinking about what it would cost to just go ahead and upgrade the motherboard, RAM, and CPU as well. If I were to go that route, and that’s a BIG if, I’d be looking at…

  • $200 for a new Z890 Motherboard
  • $350 for an Intel Core Ultra 7 270K Processor
  • $750+ for 64GB of DDR5 5600 CL28 RAM

In total, about $1,300 + Tax…

Of course, we haven’t even talked about my monitor yet!

I currently have an old Acer Predator XB241H, a 24″ 1080p 144Hz gaming monitor. I bought it in 2018, and it’s served me faithfully for years. Conventional wisdom suggests that lower resolution is better for higher frame rates, which is true, provided your CPU can keep up! My CPU cannot, and so I end up with a huge swing between high and low FPS…

Upping the resolution means the GPU has to work harder, balancing the equation of CPU, GPU, and Resolution. At first, I figured I may as well make the jump to 4K, but after talking it over with a friend, I was convinced to consider 1440p instead. I currently have three monitors on my PC in a TIE Fighter configuration:

While I’m gaming, I can have Discord on one side and a web browser on the other, and look things up as I need to while saving on horizontal space. The trouble is, I don’t have a lot of room on either side, since the triple-monitor stand I’ve had since 2014ish in Saudi Arabia was only intended for 21-24″ monitors, and most 1440p (and 4K) monitors are 27″ and larger.

I considered buying a 27″ 4K Gigabyte OLED monitor for $534 (heavily discounted open box special), but decided not to chance it, and after further consultation with my friend, I decided to go with an AOC Gaming Q27G4ZMN:
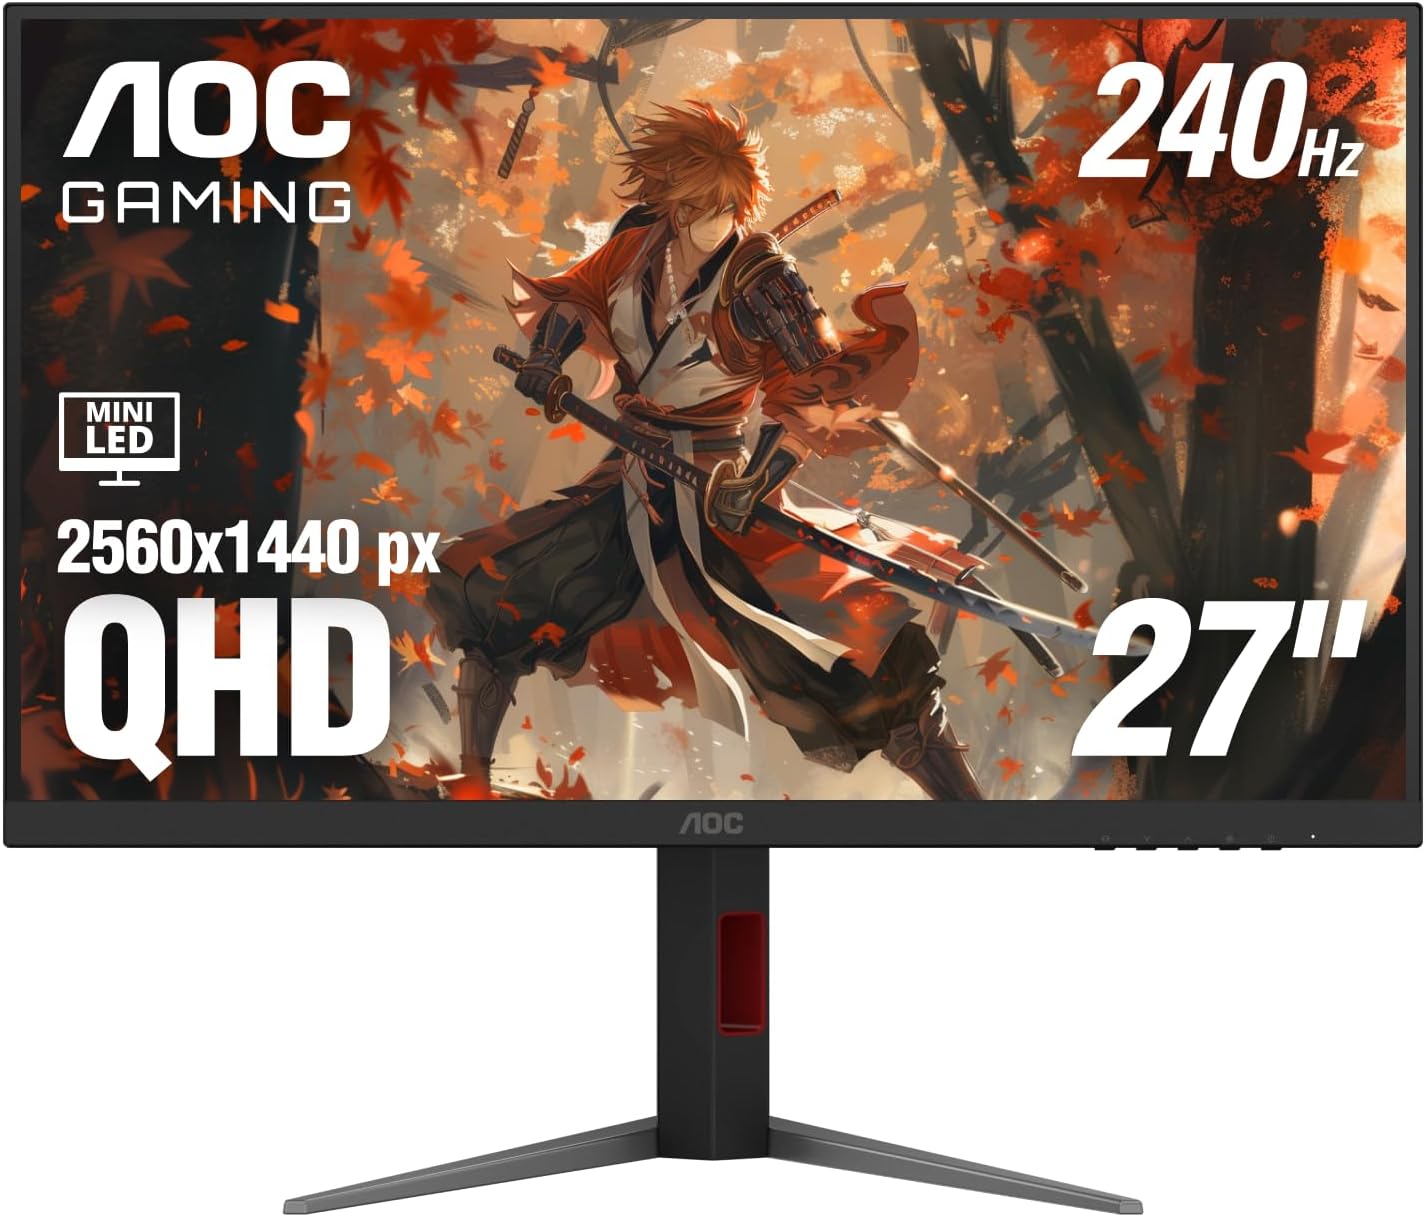
It was $300 for the 180Hz version, but I decided to pay an extra $30 and get the 240Hz model. This was a good balance of resolution for the size of the monitor, color range, contrast, refresh rate, and durability (OLEDs can, and do, burn in, and they’re about double the price). Of course, then I needed to spend another $65 on a bigger triple-monitor stand, but I’m sure I’ll find a use for the old one :).

Too Good to Pass Up!

The rest of the build was still nagging at me, and while I argued with myself back and forth, Newegg decided for me:
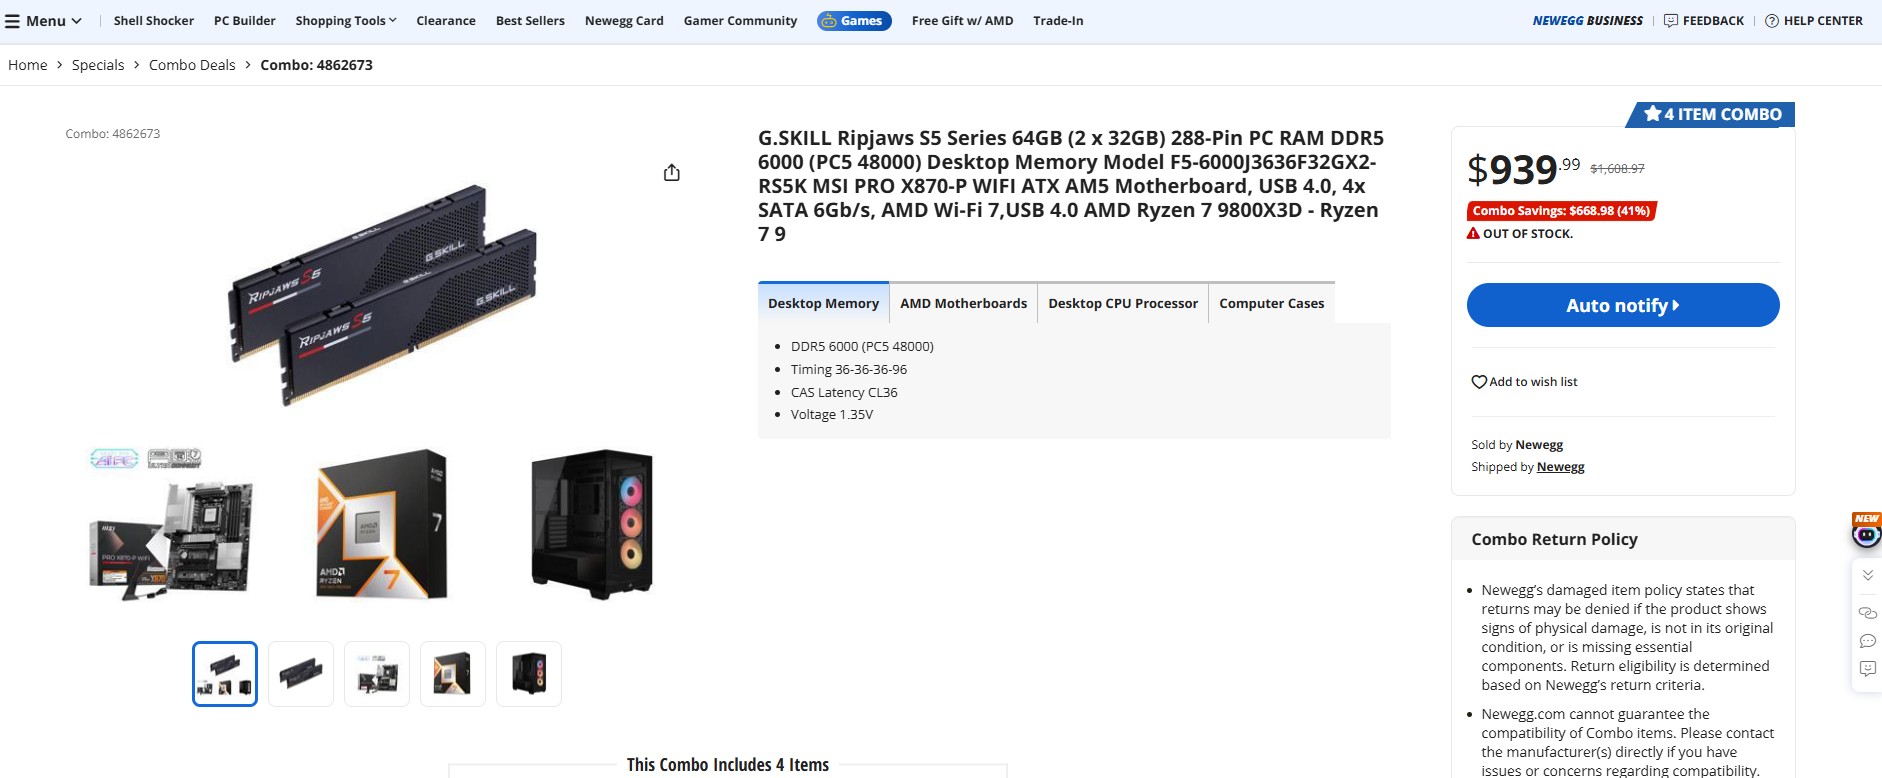
  • G.SKILL Ripjaws S5 series 64GB DDR5-6000 CL36 RAM ($885)
  • MSI PRO X870-P WIFI ATX AM5 Motherboard  ($180 on sale, not the best-in-class, but not bad!)
  • Ryzen 7 9800X3D CPU ($465)
  • Corsair 3500X RS-R ARGB case ($80)
  • MSI MAG Coreliquid A13 240 AIO CPU Radiator/Cooler ($85) – Free gift, not listed in the ad

That’s nearly $1,700 worth of kit for $940? Even Gollum couldn’t say ‘no’ to that!

4/17/2026 – NOTE: The astute among you will notice that the screenshot above shows that this combo is Out of Stock, which it is (at the time of writing), but it was available this morning when I placed my order :).

Aside: Intel versus AMD Processors

Throughout my 20s, I could not afford high-quality computer parts, so I built computers as cheaply as possible. That often meant the least expensive AMD Processors and Radeon graphics cards.
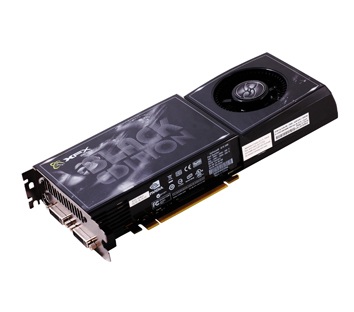
After graduating from college and a year or so into my first ‘big boy’ job, I’d spent some money and upgraded my desktop PC to a Core 2 Duo Q6600 with 6GB of DDR2 RAM and a modest 120GB SSD. I decided to spend $300 (a lot of money in 2008) on an XFX GeForce GTX 260 Black Edition video card. It ran at 75° C (which I was told was normal), and crashed more than I would like, even after two RMAs. This was my first taste of real GPU power! But it was a fickle beast, and even with my Antec 900 case with its ridiculous 200mm exhaust fan, two 120mm front fans, 120mm exhaust fan, and the option 120mm side fan, I STILL couldn’t keep the damn thing cool enough to keep it stable, and begrudgingly went back to a cheap, mid-range AMD GPU (a Radeon HD 5770) a couple of years later before ultimately sticking to Intel/Nvidia going forward.

“2Kliks” Philip Dyer did a great video a few years back that really articulated the history of Intel versus AMD far better than I have here, and it’s well worth the watch. In doing so, it seems to me my biases were justified, at least at the time! But times change, at least on the CPU front…

AMD’s Ryzen series has made a big comeback in the last few years, but nevertheless, I’ve stuck with Intel as my default.  Even when my research seemed to suggest that, for gaming, the Ryzen 7 9800X3D was one of the best processors money could buy, I dismissed this, instead, seeking out my familiar Core i7 equivalent, which I’d pegged as the gold standard for Desktop and Mobile CPUs. Sure, there was eventually a Core i9 series, but that just meant more cores, and I wasn’t even using all of the ones I had now…

I tell myself that more cores = better, and that the Ryzen X3D series isn’t as good as Intel Core Ultra for multitasking and productivity. What if I wanted to host my own LLM GML coding buddy, or spin up a few VMs to test new games on?

“Look, Nattie. That’s called ‘Copium’!”

The plain truth is, if it weren’t for the ridiculous prices of DDR5 RAM, or if there were an equivalent combo deal for an Intel 270K Plus for the same price (despite the Intel processor retailing for $100 less than the AMD 9800X3D), I would have bought that instead…

Fool, though I might be, I know a deal when I see one! Given how quickly these sold out, I feel sure I will end up with a more performant system despite my long-standing biases working against me.

What Are My Plans for the Rest of the Kit?

The existing Corsair iCUE 100i Capellix Elite is still nicer than the MSI one I got with the bundle, however, because I don’t have the box/accessories it came with, I would need a $12 AMD CPU Adapter Bracket and Standoffs so I can reuse it for the 9800X3D. The same goes for the Corsair 3500x case, which is objectively inferior to my Corsair 4000D (more on that below).

Although it will be more work, I figured the best long-term solution would be to put my old Intel System in the new case, which I could keep around as a spare… maybe use it as a server!

What Was the Damage?

All in, this little jaunt has cost me:

  • $1,500 for the RTX 5080 GPU
  • $180 for the 1000W PSU
  • $940 for the CPU, Motherboard, RAM, a spare case, and an AIO CPU cooler
  • $400 for a new monitor and stand

Total: $3,020 ($2,620 without the monitor and stand)

I wanted to get a sense of what this would cost from the builder who put together my current systems, and they were asking $5,198, or about twice what I paid…

To be fair, adding up the parts in their spec sheet came to $4,367.39, or about a 20% mark-up. They did come through for me for Jim’s PC, so I have to give them credit there. In any case, I wouldn’t use them again for myself, and can’t recommend them as a builder given how expensive everything is on its own these days…

No, sir! I’m going back to my roots and building my own from now on…

Coda

Primary System

The parts arrived, and the new CPU, motherboard, and RAM were installed in my old case. I’d purchased an AM5 adapter so I could utilize my old AIO. I also transferred both NVMe drives, and the OS took it like a champ, though I did have to remove some software I no longer needed.

I also took the opportunity to give the old case a thorough cleaning, getting into spots I couldn’t easily reach without a complete disassembly, and cleaned up the cabling. My old Corsair AIO included a Fan/RGB controller, but for whatever reason, I elected not to run all of my case fans through it, splitting them between the controller and the motherboard. This means that controlling fan speeds was also split between the iCUE software (used by the AIO) and Armory Crate. There was plenty of room on the controller, so I can’t imagine why it was done this way, and I won’t guess. In any case (no pun intended), it’s corrected!

I had to enable EXPO in the BIOS to get the RAM to run at 6000 MT/s instead of 4800, and spent several hours tinkering with the new monitor’s HDR settings to keep the brightness from blowing my eyeballs out…

Secondary System

I hadn’t realized how much I missed the fiddling pleasure of assembling a PC until I upgraded my primary system! I couldn’t bear to see my old parts go to waste, especially when I had most of the parts I needed to build a second system, save for a couple of odds and ends…

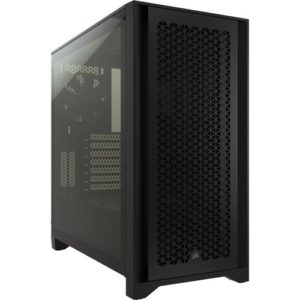
So I started by mounting my old CPU, motherboard, and RAM in the new Corsair 3500X. This case isn’t something I would have chosen for myself, and it seems to prioritize form over function; it looks nice in photos and is great for showing off your components, at the cost of a few degrees-worth of direct airflow.

The MSI MAG Coreliquid A13 240mm AIO is… fine. It didn’t come with a controller like my old AIO

I have to admit it makes for a handsome presentation, and the removable front panel gave me plenty of room for wiring up the IOs, fans, and RGB.  Power was another story…

I could have used my old PSU and my wife’s old EVGA RTX 3070 FTW3 8GB GPU for this build, but I gifted both to a friend to replace his MSI GeForce GTX 1060 Gaming 6GB GPU and Corsair RM650 650W PSU. He’d offered to give me his old parts, but I declined as they wouldn’t be very useful to me.

Instead, I bought another Corsair RM850 (identical to my old one). The cable management on the 3500X case was nonexistent, leaving me little room for CPU, GPU, and Motherboard power cabling. There was barely enough clearance to slide the PSU into its cubby, but I got there in the end.

###

That still left the GPU question… As a secondary PC, I didn’t want to spend an obscene amount of money on what would essentially be a spare system. So what were my options in the $300-400 range?

  1. Nvidia GeForce RTX 5060 8GB (~$330-360)
  2. AMD Radeon RX 9060 XT 8GB (~$340-380)
  3. Intel Arc B580 12GB ($310)

Nvidia would be the obvious choice, I would not begrudge spending $50 more for a much better-supported card, but the 8GB of RAM killed that option. PNY had an RTX 5060 Ti 16GB card for $490, but another $140 would get me an RTX 5070, but by then, I’m spending twice as much ($635+).

AMD was worse, slightly more expensive than the 5060, though you can get a 16GB RX 9060 XT for $460. Even so, I’ve had AMDs more of my adult life, and wasn’t going to rush out and buy another one.

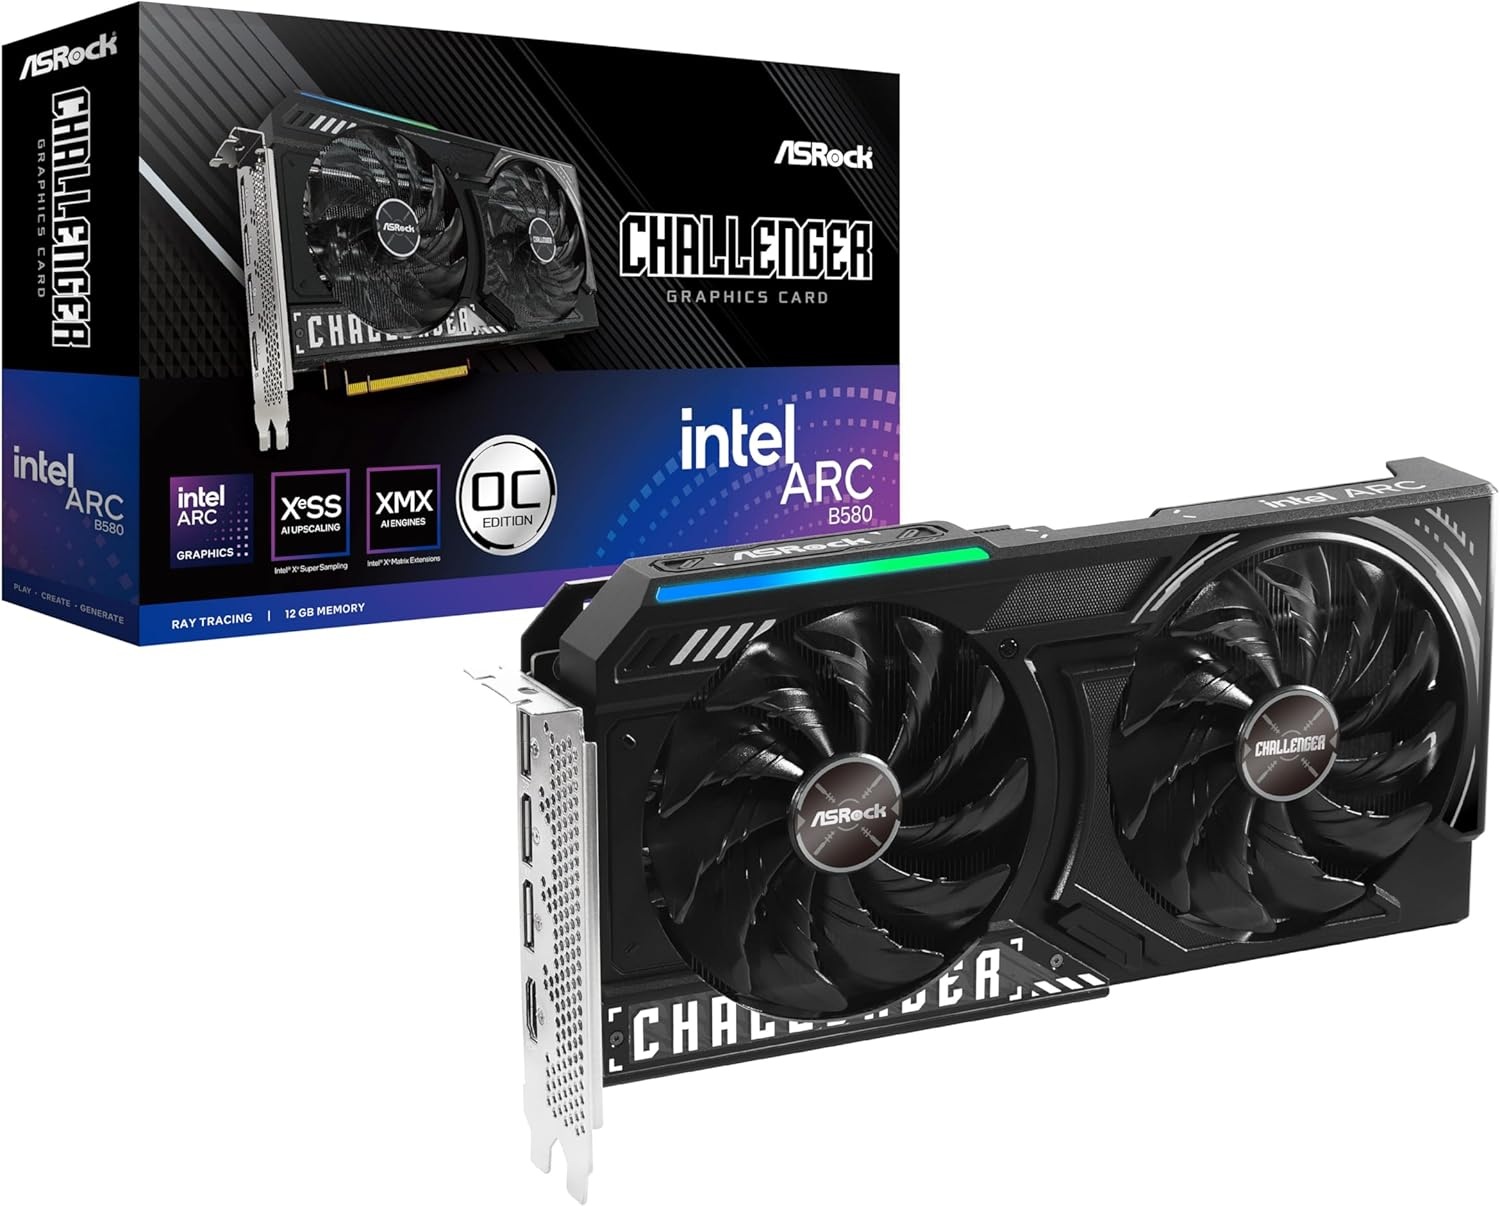
Intel was a bit of a dark-horse candidate, and I’ve heard nothing but good things about their cards. I considered a used A770 16GB for $400, but opted for a new ASRock Intel Arc B580 Challenger 12GB OC for $310. Sparkle offers a 3-fan model of the same card, but they wanted $60 for it…
Since both of my NVMe drives were transferred to the new system, I picked up a $160 Kingston 1TB NVMe drive. My old motherboard had a nice NVMe heat sink, but I had to get another $5 thermal pad as the old one was pretty nasty. I got everything put back together, and it fired up just fine! I was able to install the OS, and it works great, but…

~~~

For a display, I was using my quadruple (2×2) HP N246v 24″ LCD 60Hz monitors, which work great for my work-from-home setup, but are atrocious for gaming… I still had my old Acer Predator HB241H 24″ LCD 1080p @144Hz gaming monitor…

My old triple monitor stand (SilverStone Technology ARM31BS)l is about 4″ too wide for my work [from home] desk, but a similar triple monitor stand as I’d bought for my gaming setup would work just fine! I could remove the two monitors from my double monitor stand and do another TIE Fighter configuration for my secondary machine with the 144Hz monitor as the middle/primary display, and keep my quad monitor setup as-is, granting two of the monitors for my work [from home] laptop, and two for the miniPC I bought for my second job, and control them both seamlessly using something like Mouse Without Borders. Yes, I currently have 10 monitors in my office, thanks for asking :).

While I’m at it, I’ll replace the DVI to DisplayPort adapters on my quad monitor setup with DisplayPort to HDMI cables (the quad monitor setup supports VGA, DVI, and HDMI… I told you it was old :), I’ll get an extra 140mm to use as an intake for the bottom of the case, and some cable extenders to pretty things up.

So add to the total…

  • $310 for the GPU
  • $160 for the 1TB NVMe SSD
  • $90 for the 850W modular PSU (renewed)
  • $140 for miscellaneous odds and ends (power cable extensions, second triple monitor stand, 140mm case fan, thermal pad for the NVMe heat sink)

Total: $560 ($700 if you count the optional bits, but some of that’s going to maintenance and long-over cable management 🙂

Worth it? Yes, I’d say so. Until next time!

Remembering Jim

Forward

On February 17th, 2025, my friend James Carlson (Jim) passed away just four days after his 50th birthday. Although Jim had many interests, one we shared, and I encouraged him on many occasions to cultivate, was Game Development.

The purpose of this post is to fondly recount the good times we’d shared, joking, plugging away at silly game ideas, and daydreaming about what it would be like to do this for a living…

I don’t think either of us really believed we’d make a career out of it… At best, I’d impart technical skills that might have helped him to escape the endless procession of entry-level, dead-end jobs he’d often lamented. At worst, it would have been a pleasant distraction.

In the Beginning…

“We should make him eat acorns!”
– James R. Carlson, 2/13/1975-2/17/2025

Jim and I met online in late 2014 when he logged on to an MMO I was active on to tell us that his brother had died in a car accident. I befriended Jim, and we eventually began corresponding over email. Later that year, Jim announced that he’d hit rock bottom and dreaded the new job he was starting at a Pizza and Fried Chicken buffet restaurant. We brainstormed other career ideas he might pursue, and after a couple of false starts, he decided to try his hand at blogging.

I created a website (www.porkcircus.com) for him, and for the next couple of weeks, Jim posted, and I edited (formatted, corrected spelling and grammar, etc.). Jim had a real talent for off-the-wall commentary that would give Matthew Inman a run for his money… For the next couple of weeks, we posted articles, recipes, [mis]quotes, and so on. I had a backlog of post ideas, kept a regular publishing schedule, and got a lot of enjoyment out of it for a brief while.

Unfortunately, Jim’s interest in the project waned within a couple of weeks, and his contributions only accounted for about 1/7th of the total posts, not including the half-dozen he’d started but never finished.

2016 was a tumultuous year for me. I worked 80 hours a week trying to shape up the Project Management Office of a corrupt Saudi solutions broker, but ultimately failed. Unable to find a new job, I took my savings and returned to the US. Unemployed and with nothing but time, I decided to try to teach myself game development in earnest. After completing the GPC (or at least as much as I could), and as Eric had dropped out, I decided to engage Jim.

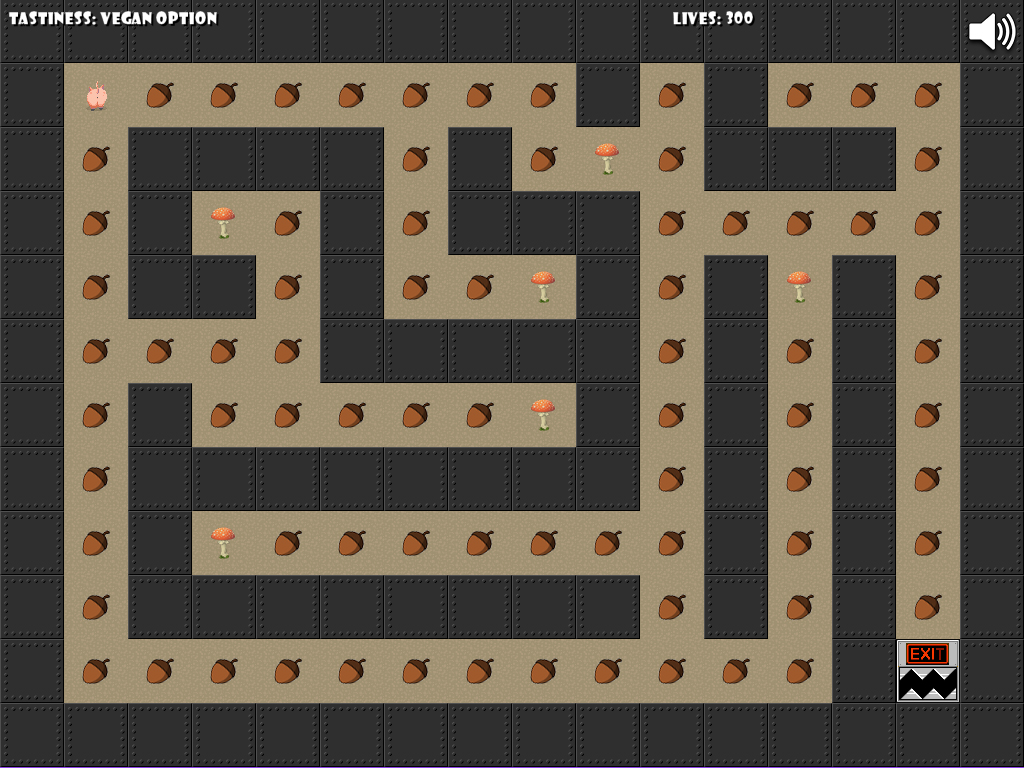
On January 28th, 2017, Jim and I spent about 6 hours on a Google Hangouts call, developing the first iteration of what would become Porker: The Quest for Tastiness. While Jim drank beer and shouted suggestions and obscenities, I furiously coded, photoshopped Creative Commons-licensed artwork, and edited royalty-free sound effects. Over the next couple of days, we had:

  • An Objective: Collect Acorns to increase your “Tastiness” score
  • A Win Condition: Complete all five levels
  • A Lose Condition: Lose all of your lives by colliding with dangerous obstacles

My goal was to publish a game, ANY game, no matter how simple, as long as it was complete and playable. I couldn’t rightly call myself a ‘Game Developer’ until I’d published a Game, and following the advice of the Extra Credits series on the topic, I did just that and moved on.

Fleeting Fame

A couple of weeks later, I discovered that someone had created a Let’s Play video for Porker, which inspired me to expand on it further. My mind raced with the possibility of it becoming a viral hit, but at the time, I’d been out of work for nearly a year, and my savings were dwindling. Somehow, around mid-April of ’17, I managed to complete and republish Porker. My “marketing campaign” didn’t go anywhere, and Jim had problems of his own…

Return to Reality

By May, I’d started a new job, and for the rest of the year, I was catching up on half a decade of advancements in Enterprise Information Technology… By December, I was dabbling with the GPC again, coming to grips with the reality of being a solo game developer, and itching to start creating again.

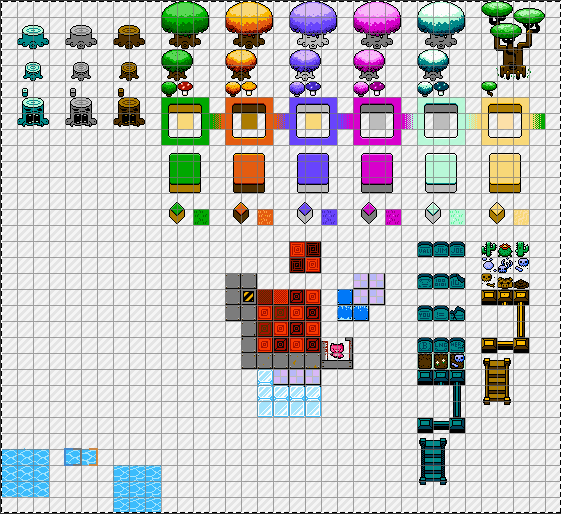
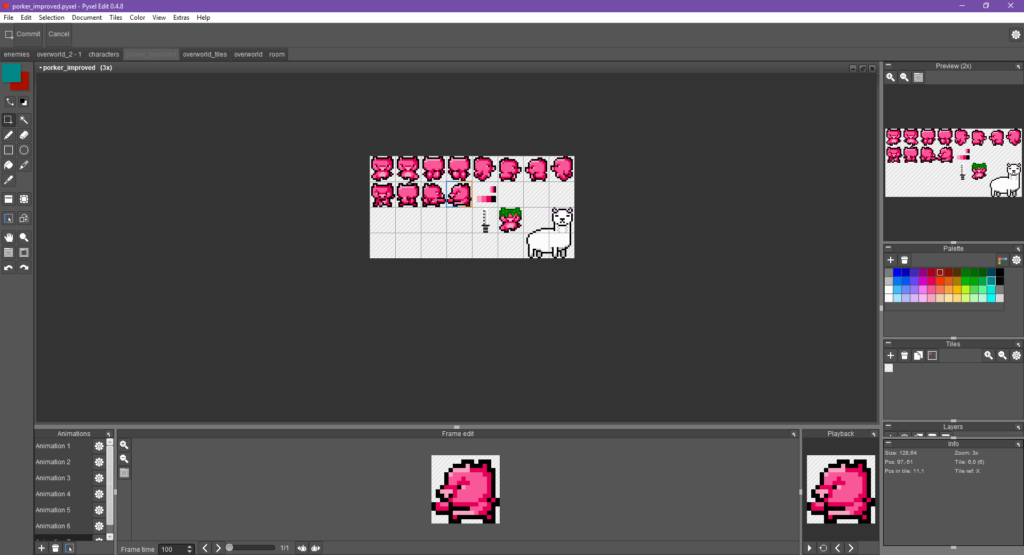
Jim and I flirted with the idea of a sequel, “Porker II: The Adventure Begins,” which was intended to be a top-down Legend of Zelda-style [primitive] Action RPG. I’d begun creating tilesets for it:

Unable to pique Jim’s interest, I partnered with a co-worker, Jason (an application developer by trade), instead, and we created Milk Smugglers. Unfortunately, it was never published for reasons not worth dredging up.

Intermittent Interests

Jim and I never formally resumed our work on Porker II, but over the years, we would occasionally kick around the idea and brainstorm what that might look like. James was also a big fan of Shoot ’em Ups (SHMUPs), and while I was beginning work on Purgatory Purgers, Jim took a passing interest in creating SHMUP…

“damn you, went and got me interested in learning make a game again. think im going to set myself a September chgallenge. One shootey space game. Scroller type. Have score, enemies, a couple power ups, gui, home screen. all basic. I’ll use inkscape shapes as place holders if i have to. but the real challenge will come from not using a follow along tutorial – but actually read the documents and do it myself.”
– Jim, August 31, 2023

Unfortunately, Jim opted to use Godot rather than GameMaker, so I was unable to assist him with the code. However, I did create some graphics for him:

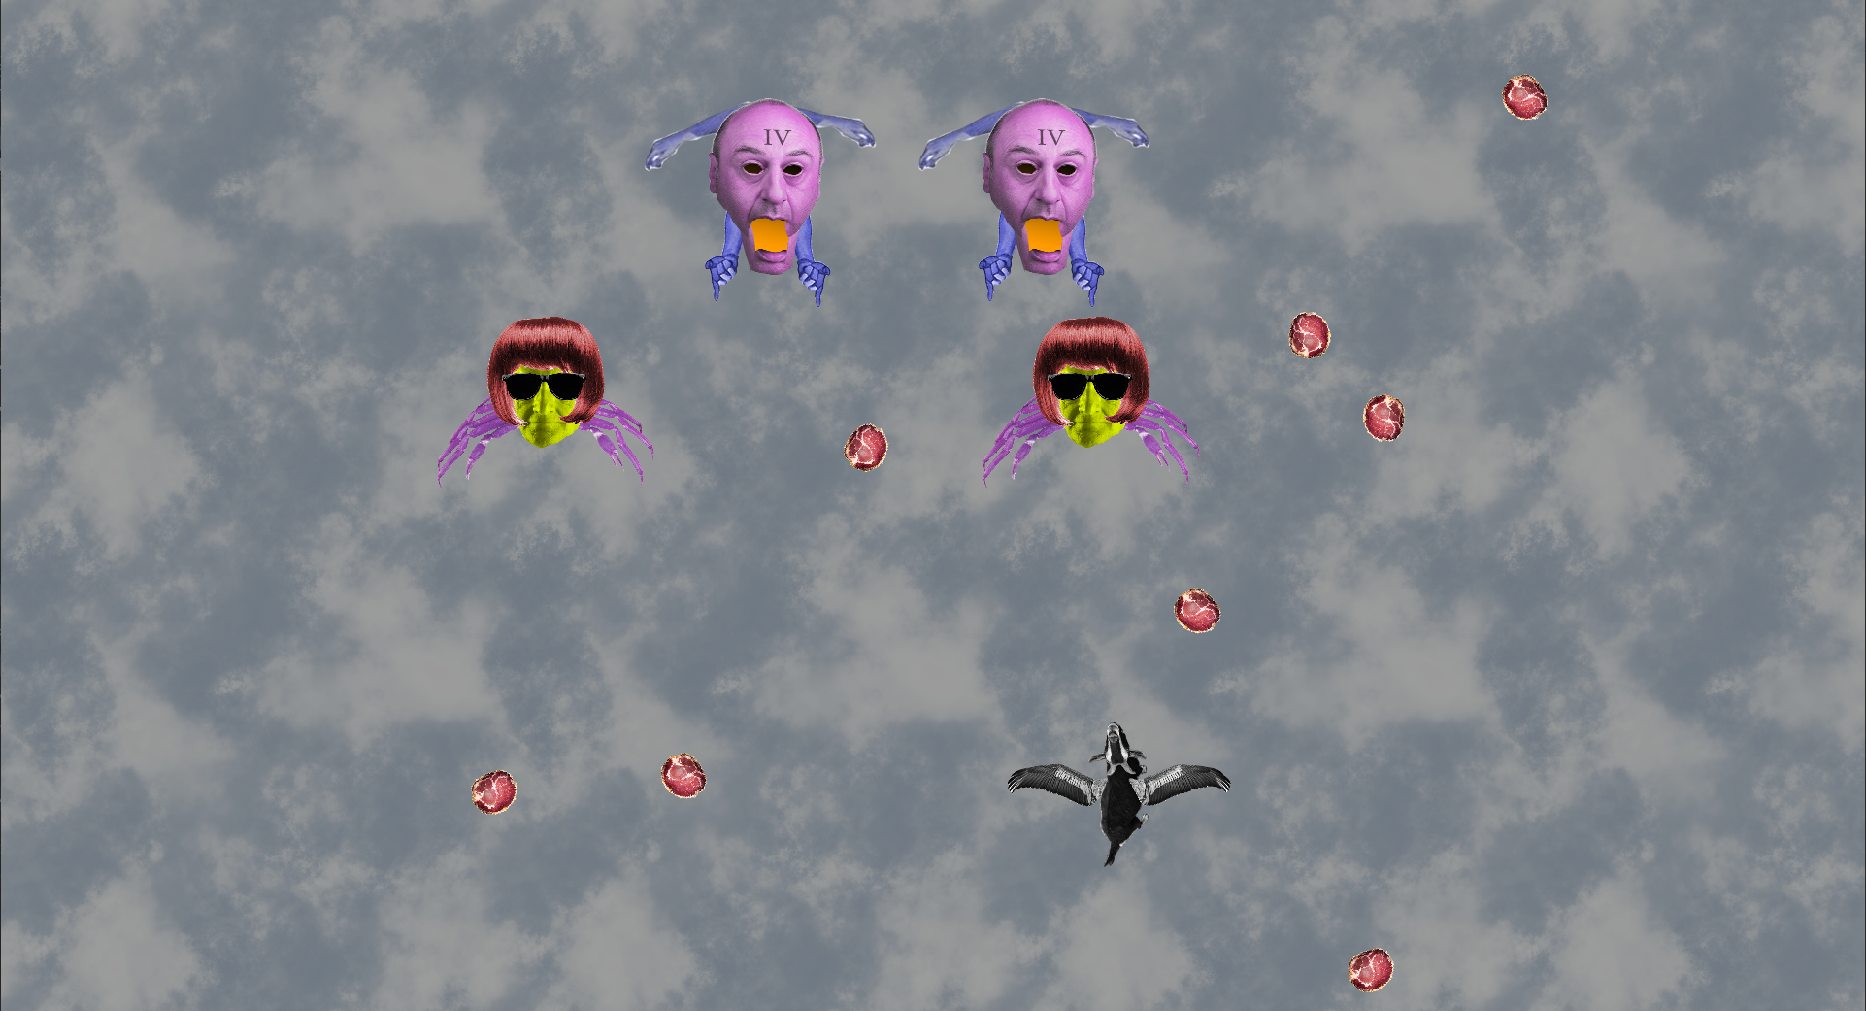
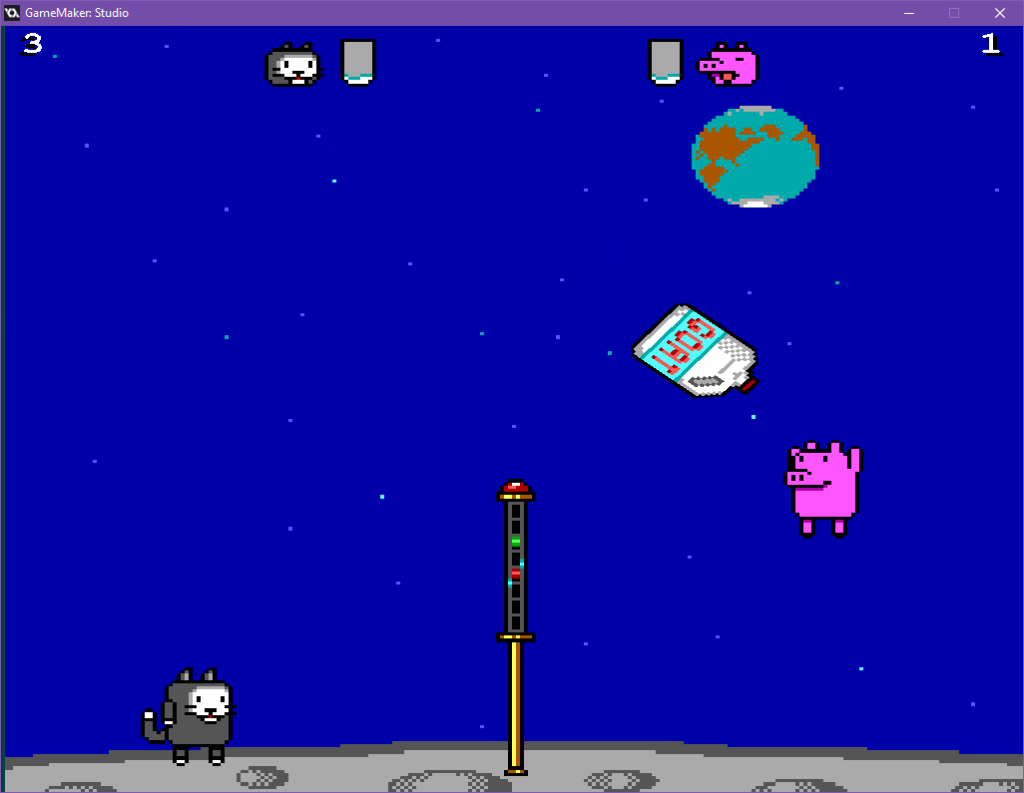
Although Jim never got a working prototype up and running, I managed to put together a quick and dirty GameMaker game using the assets I’d created for him.  The final result looked like this:

The style I was going for was a Terry Gilliam-style cutout animation, the sort of thing you’d find in a Monty Python episode. Jim had a terrible habit of never finishing anything he started, and this, too, was no exception. Still, it was an amusing diversion while it lasted!

Regrets

In December last year, I began working on a new SHMUP using modified graphics from Milk Smugglers. Over the Christmas holiday, I managed to get the basic engine, movement, power-ups, a few enemies, and other features working, but I ran out of time and abandoned the project.

I’m not sure if I’ll ever pick it back up. I might make it a tribute to his memory. On the other hand, it troubles me that he’d never get a chance to play it…

V-Toad Games Official Merch Store Launched!

Over the last couple of years, I’ve used Print-On-Demand (POD) services to make custom T-shirts, coffee mugs, and other items for friends and family, and I thought that maybe this year, I’d create something V-Toad Games-themed.

Then it occurred to me that if I was going to create some merch, why not make it available to anyone who wanted it? And so I’m excited to announce the launch of our official Merchandise Store, which can be accessed from the link in our website’s main menu or through this URL.

All proceeds will fund hosting costs for www.vtoadgames.com, software licenses, hardware, and other game-development-related expenses. As always, our games will remain free (name your own price with no minimum cost).

Enjoy!

Prebuilt Pandemonium

Background

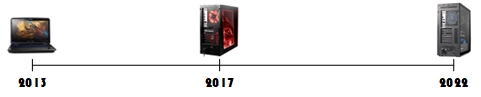
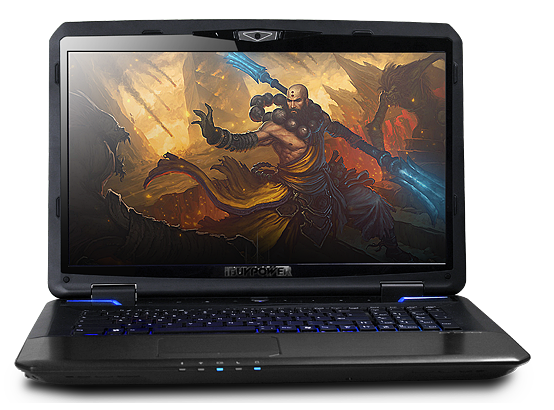
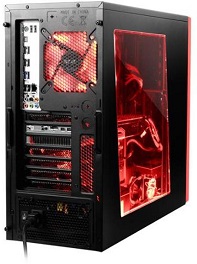
For the last 10 years, I’ve bought pre-built PCs rather than building my own. This began in 2013, when I was traveling internationally and needed something robust yet portable. I didn’t want to lug around desktops, so I bought a pair of iBUYPOWER Valkyrie CZ-17s, one for me and one for my wife:

They served us well for about 4 years, and while I considered replacing the internal GPUs with GTX 980s, upgrading to desktops made more sense since we were now homebodies.

Once again, we bought iBUYPOWER systems, and like their mobile workstation counterparts, they are still running strong today. My intent at the time was to get at least 3-4 years out of them, and so far, we’ve managed over 5.

Could I squeeze another 2-3s out of them? Probably, but not at a level of performance I’d be happy with. I considered the upgrade path, but in order to get into a 30-series video card, I’d need to replace the following:

  • The motherboard: the ASUS Prime Z270-K uses a PCIe 3.0 card slot (RTX 30 and 40 series cards utilize PCIe 4.0*)
  • The CPU: Core i7 7700K  processors use an LGA 1151 socket; new motherboards use the LGA 1700 socket.
  • The power supply: 650Ws isn’t enough for a 3080, I’d need at least 750W (although 850W would be better)

I could potentially keep the RAM (32GB DDR4 3200), case, and possibly the drives, but not the CPU AIO (it wouldn’t be powerful enough, even with an LGA 1700 socket adapter, assuming I could even find one)…in short, ~$1,840 worth of upgrades. In other words, I may as well buy a completely new system…

*Both 30 series and 40 series Nvidia GPUs can be used in PCIe 3.0 slots, albeit at reduced performance. 

The New Rigs

Once again, I went back to iBUYPOWER, and for about $2,167/system, I would get:

  • Intel Core i7 12700K @ 5 GHz (Turbo)
  • ASRock Z690 PG Riptide motherboard
  • 32GB DDR4 @ 3200MHz
  • NVIDIA RTX 3080 Ti 12GB of VRAM
  • 1TB M.2 NVMe SSD Primary Drive
  • Corsair RM850 850W – 80 PLUS Gold, Fully Modular power supply

I placed my orders on the morning of October 19th, 2022. A sales associate confirmed the orders later that day, and my card was charged. A couple of days later, the order went into the parts-gathering phase, where it says for days, then weeks…

Missed Deadlines

The scheduled ship date of November 2, 2022, came and went without a peep from iBUYPOWER. When I contacted them for an update, I was told that there would be a delay because the case model I selected was out of stock. They’d known this since October 21st, but rather than notify me and offer alternative options (e.g., a substitute model), they sat on it until I contacted them for an update.

I was told that they expected a shipment of new cases on Monday, November 8th, and that my build could continue once they were unloaded and scanned into inventory. When I didn’t hear anything at the end of the week, I checked back (again). This time, I received a canned answer citing organization-wide COVID-related delays, issues with the RTX 4090 power connectors, and so on. I asked if I could get a revised scheduled ship date and was told frankly that they couldn’t say when they’d ship but not to expect anything sooner than 7-10 business days (i.e., I would receive it sometime after November 24th, over three weeks later than the originally scheduled ship date…).

Should I Stay or Should I Go?

“Should I stay or should I go?”
– The Clash

I happily paid them over $4,334 of my hard-earned cash, with the good-faith expectation of receiving my merchandise the second week of November. Had I known that the true ship date would be closer to December 2nd, I would NOT have placed the order.

While I had no doubt that I’d eventually receive my order, I was not confident in what I would actually get… if they’re as busy as they claim to be, how do I know my systems will be built, tested, and packaged properly to ensure that I get what I paid for? What if a part is DOA? Am I to wait ANOTHER 5-6 weeks to get a replacement, with the Christmas rush around the corner?

###

As painful as it was, I decided to cancel the order and buy from someone else. After looking at a few other custom builders, I decided to take a chance with Alexander PCs, a boutique PC builder. I learned about them through a YouTube channel specializing in custom PC content.

I intended to purchase a read-to-ship system, but they didn’t have any on hand that supported an RTX 3080. Due to a misunderstanding (mine, not theirs), I purchased two systems that they had the parts for but were not yet assembled, and here’s what I ended up with:

  • Intel Core i7 12700K
  • ASUS TUF Gaming Z690-PLUS WIFI D4
  • Corsair Vengeance RGB Pro 32GB DDR4 @ 3600MHz
  • MSI RTX 3080 Gaming Z Trio 10GB LHR
  • 1TB M.2 NVMe SSD Primary Drive
  • Corsair iCUE 4000D case
  • Corsair RM850 850W

The RAM is slightly better, the video card is slightly worse, but it’s a big step up from my aging GTX 1080. I had to drop down to a Core i5 12600K processor and an RTX 3070 graphics card on my wife’s PC, but for the games she was playing, that was more than enough.

We placed the orders on November 10th and finally received them on December 7, just under 4 weeks later. All in all, I was happy enough with the purchase, but not something I’m looking forward to doing again.

Beaster’s Dungeon Revisited: Part II

Continued from Part I...

With Eric gone, I eventually re-coded everything, but never could work out how to implement the trap mechanic, so I shelved it and there it sat…until now…

###

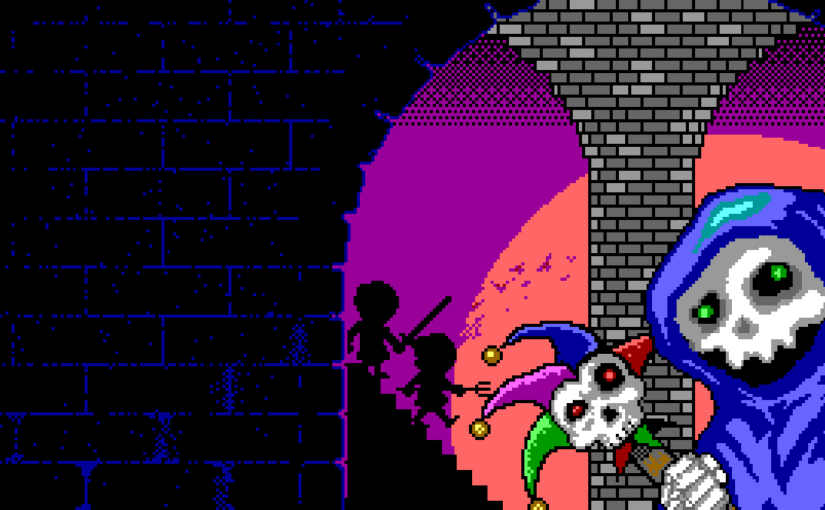
I was talking with a friend who was admiring some CGA-16 color palette pixel art, which lead me to showing him the artwork I’d done for Beaster’s Dungeon. He asked if I had any intention of picking the project back up, to which I replied that I might, albeit with a reduced scope. I explained the difficulties I encountered with the trap mechanic, specifically, getting the cursor to snap to a grid.

This lead to a discussion of where I got stuck, and in order to illustrate this, I fired up GMS and started creating a prototype to illustrate the problem. I reached out to my friend Jason (who did the programming for ‘Milk Smugglers’) for suggestions, and he linked a forum post containing the floor/ceiling functions.

In that post was another mysterious function called, move_snap. Here’s what I did for the prototype:

o_cursor Object

///step event

//set coordinates of the cursor to the mouse's x,y position:
x = mouse_x;
y = mouse_y;

//snap the object to nearest grid coordinate 
move_snap (16,16);

Why is this important? Because it allows for precise placement of objects in a map comprised of 16×16 pixel tiles (or any predefined ‘snap’). Around this, additional rules and checks could be incorporated to ensure traps could only be placed where they were meant to be!

At long last, I was finally able to implement the trap mechanic! The only thing left to complete the prototype was enemy path finding… This turned out to be far more complicated than any of the other mechanics combined.

Stay tuned for Part III!

I’m Still Here!

It’s the last day of 2018, and I thought I ought to do a quick retrospective to evaluate where I’ve been and where I’d like to go next year.

In late 2017, I’d decided to get back into game development. I’d returned to work and established myself in my new role. Once I’d caught my breath, I was hit with the itch to create again and took stock of my situation:

  1. There was just one of me, and that’s the way it would likely be (unless money was involved).
  2. If I had to go it alone, I was going to have to re-learn GML – I’d forgotten most of what I’d previously studied

I got back into the swing of things easily enough, but once again, game development took a backseat to other responsibilities.

Around June or so, I started on a spiritual successor to Porker – a Legend of Zelda-style action RPG. I’ve been working on it on and off as time permits, the majority of which has been spent building tiles and character animations.

In early August, I approached a friend and co-worker of mine to see if he had any interest in working together in game development. Being a professional developer, I figured he’d take to GML quickly seeing as how he already had a grandfathered copy of GMS.

We decided it was best to start with a simple game just to see how well we’d work together and aimed for a project that would take no more than 2 weeks.

We settled on a remake of Rhett Anderson’s Arcade Volleyball:

Arcade Volleyball for DOS gameplay animation

Weeks turned to months (about 4 so far) and what we ended up with was…well…very different :)…

It’s called Milk Smugglers – it’s about a pair of inter-dimensional travelers trying not to get caught with a contraband gallon of Grade A Goat’s Milk!

There’s a bit of programming that still needs to be done, but all of the game assets are finished (music, sound effects, artwork etc.).

So What Happened to Beaster?

The short answer is that my imagination exceeded my capabilities. I have a lot more growing to do before I’ll be able to tackle that project, and will return to it after completing Porker II and Milk Smugglers.

That said – I wish you all happy new year, and hope that 2019 brings with it some new releases!

Keeping the Lights On

A couple of weeks ago, I found a new job through a good friend of mine. It’s a technical role, pretty much what I was looking for…The pay could be better, but it’s good enough for now.

They have a lot of challenges, but none are particularly difficult to resolve. It’s just going to take time and money, and the business has to decide to move forward.

Needless to say, I’ve got about 2-3 months worth of 60+ hour weeks ahead of my friend and me to right the course. Once things are stable enough to be able to work only 40 hours a week, I can return to game development. Until then, I’ll just have to pick at it when time and energy permit…

Staying the Course[work]

In my last post, I began working my way through the free video lessons on www.gameprogrammingcourse.com and it’s associated YouTube channel.

It’s important to note that the YouTube channel is supplementary to the website, not the other way around; as such, if you arrive at the YouTube channel first (as I did) you might find yourself scratching your head when you get to the playlists, particularly where to start

If you’re looking for Level 01, that’s on his website here. There isn’t a video for this as you’re just downloading and installing GMS, the videos begin at Level 02.

###

It’s hard to believe that it’s only been 2 days since I started these courses, and I just finished Level 04, which wasn’t a lesson series, but rather a series of challenges designed to utilize all the skills I’d acquired in Levels 02 and 03.

Random Solutions

One of the problems we’d be wrestling with is game speed and it’s effect on action timing. Suppose you plant a brick wall in front a horde of advancing peasants.

Event > Collision > Obj_Peasant > Obj_BrickWall

//subtracts 1 hitpoint from the brick wall upon collision
with other {
hp=hp-1
}

Assuming you’ve given the Obj_BrickWall an instance variable called “hp” (i.e. hitpoints) and assigned a numeric value to it (e.g. 100), it would take one peasant about 3.2 seconds or so to break it down as he’s colliding with it 30 times a second, dealing 1 damage each time.

My solution to this was simple, but lacking – give the wall more hitpoints, say 1000 for instance. This isn’t a very elegant way to handle this, but it worked, and it took a peasant about 32 seconds or so to break down the wall, which is what I was looking for.

Then I completed Level 03, and in the process of doing so, learned about irandom_range (#,#). What this does is allow you to replace any integer with randomized range of numbers. For example, you could have the peasant do a savings throw (much like a tabletop RPG) to determine whether or not he landed a successful blow. That would look something like this:

//Utilizes a random number to determine whether or not a hit is scored,
//subtracts 1 hitpoint from the brick wall upon successful roll.


savingsthrow=irandom_range(0,100)

If savingsthrow=1 {
with other {

hp=hp-1
}
}

As such, the peasant has ~30 chances a second to hit the wall, dealing 1 point of damage on every successful hit. Towards the end of Level 03, and a few times in Level 04, this method was used as a makeshift timer of sorts to throttle the speed of an event by adjusting the range (i.e. bigger range = more time, smaller range = less time).

Looking ahead toward Level 05, I suspect that this will be replaced with a far more precise way of handling timing.

TANSTAFS: There Ain’t No Such Thing as a Free Salad!

Update – August 11, 2015: I received an email from GameSalad asking if I’d consider the Basic version for a $4 discount ($15/month). While I don’t take issue with  paying for a tool, I don’t think a subscription model is a good fit for the Basic version. I would rather pay a flat, one-time fee, and pay again for upgrades, if I wanted them.

I could even advocate paying a subscription for service (online publishing) and support, but if all I can do is publish to the GameSalad arcade, it’s just not worth it :(…

When I began using GameSalad, I had three major aversions to buying the ‘Pro’ version for Windows ($300/year):

  1. Stability
  2. Features (on the Windows version)
  3. Learning Curve

The Windows version was the bastard step-child of the Mac one, always several versions behind, plagued with bugs, lacking the same features as it’s Mac counterpart. While there is a robust community of developers, the vast majority are Mac users, and so due to the great disparity between the Mac and Windows versions of the application, many of the tutorials were using the Mac version, which simply wouldn’t work the same way (if at all) on the Windows one.

So what did GameSalad do?

Well, in my last post, Windows had finally caught up to the Mac edition with the implication that they’d stay synced. Even so, the Windows version was prone to crashes on startup, but a couple of updates later and that seems to have been tackled.

As to the learning curve, the new startup screen features a link to official tutorial videos!

Unfortunately, There Ain’t No Such Thing as a Free Salad…well, not anymore…

###

When I booted up GameSalad for the first time since patching, I was greeted with a 15 days remaining on my new ‘trial’ edition. No in-app explanation. Nothing in the ‘Help > About’. Zip. Zilch. Null…

Did I get a free trial of the ‘Pro’ version? What gives? Well, come to find out, their old CEO stepped down and the new one decided to start charging for the ‘Basic’ version ($19/mo).

So what did I do?

I uninstalled GameSalad. I know it’ll take me a hell of a lot longer than 15 days to learn how to use GameSalad. It’s initial appeal was that I could take my time and learn the tool at my own pace, and when I was ready, and had proven to myself that I was able to make (what I felt) was a product worth selling, I wouldn’t mind paying for the privilege of publishing it.

This is a good opportunity to change gears and maybe delve into Unity or Unreal…

GameSalad, Pyxels and New Beginnings

GameSalad Tosses It’s Salad

One of my biggest complaints about GameSalad in the past is that the Windows version seemed to be the bastard stepchild of MacOS one, and lacked much of the functionality, and the features it did share with it’s Mac counterpart sometimes behaved differently, making online guides hard to follow. Their latest update, announced a couple of weeks ago,  jumped from 10.5 to 13.14, which [I believe] finally brings the Windows version up to par with the MacOS one! This was exciting news for me, so I decided to download and install it over the weekend. As soon as i fired it up, a window popped up prompting me to login, followed immediately by a crash.

I couldn’t even log in because the application had already halted. Nothing in the event log to give me any clues as to what happened, no specific error message to chase down, it just had a heart attack and collapsed on my desktop… So, after uninstalling/reinstalling, and several reboots later, I decided to check the application to see if there was some kind of log, but alas, the only other thing of use in there was the updater, so I decided to give that a try.

Amazingly, after checking for updates and finding none (I was already on the latest release), it worked! Unfortunately, by then I’d lost interest in the messing with it and decided to move on to something else… Lessons learned? Break down and buy a used Mac? :|… nah. The only Apple devices (an iPad and AppleTV) I’ve ever owned were gifts, one of which I ended up giving away (the AppleTV), and other I use to play a time-killer games, watch videos and occasionally surf the web… Before I was ready to tackle GameSalad again, I decided to turn my attention to asset creation, which is something I needed practice with anyhow. So what’s next?

###

Pixel Art

There’s something beautiful about well-done pixel art that many people can’t appreciate. It’s more than just a retro look and feel, there’s a real elegance to cramming  lots of detail into a tiny 16×16 or 32×32 pixel space. Most people don’t realize just how small that is! But what I didn’t expect to find was that there were highly specialized tools for creating pixel art repeatable tiles you could use to create game assets. One such program I found while watching video tutorials was Pyxel Edit. It was a paid program, but $9 USD isn’t much to me, so I decided to fork over the cash (good deal for free lifetime updates). It seemed fairly easy to learn, and had a built-in animation tool.

There’s a learning curve, that’s sure, as the application itself doesn’t come with a lot of documentation. The help file is a list of keyboard shortcuts, and the buttons all have right-click tooltips, but that’s about it.  Nevertheless, there are great videos on YouTube (e.g. Achebit) which discuss a great many ideas such as color palettes, shading, design and so forth. As such, I figure it would be good practice to make a few tiles sets, experiment a little and see what I can come up with rather than trying painstakingly hand draw platforms. There are several advantages to this:

  1. Tiles can serve as [reusable] building blocks, which can be used to rapidly create levels
  2. I can create characters, enemies and objects using the same tool
  3. I can save time by adding variety via palette shifts and minor modification

Well, I’ve got some things to work on, but still need to go back to square one (no pun intended) and think about fun and simplicity…