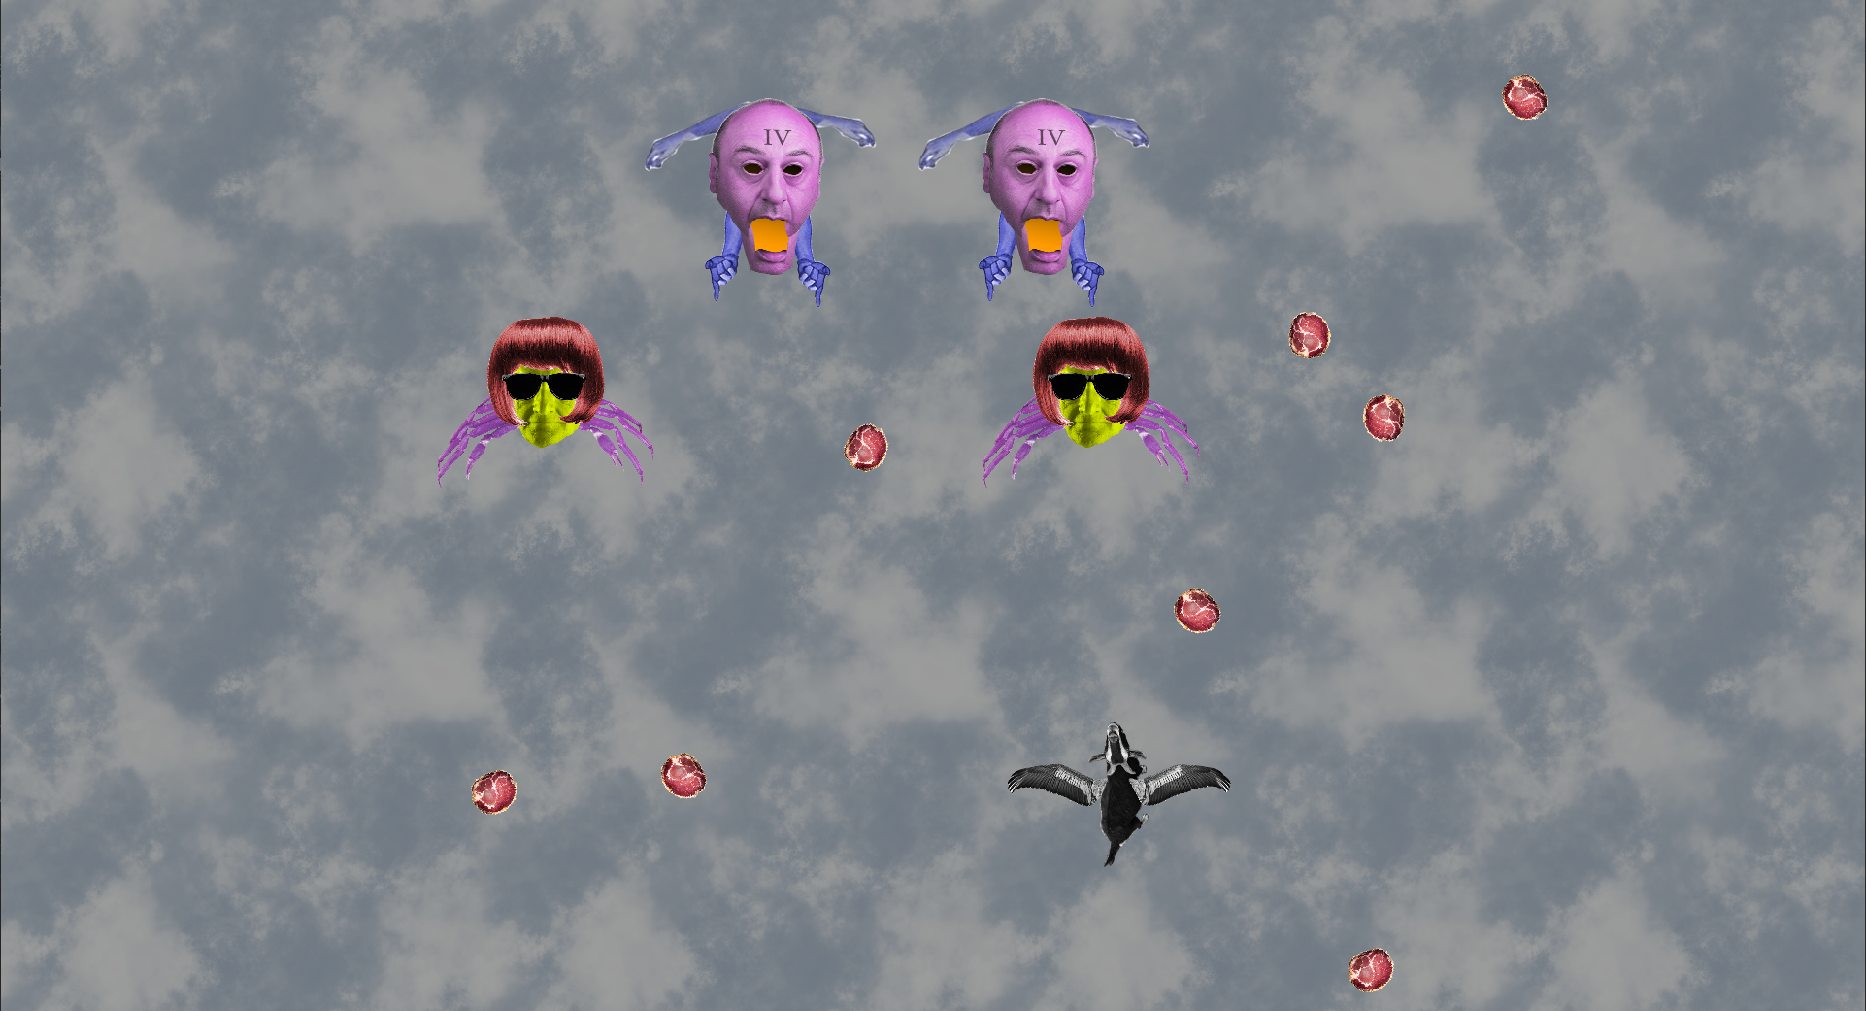
Wibsy the Game Designer (AKA The Idea Guy)

“You can draw any kind of picture you want on a clean slate and indulge your every whim in the wilderness in laying out a New Delhi, Canberra, or Brasilia, but when you operate in an overbuilt metropolis, you have to hack your way with a meat ax.”
– Robert Moses, 1976

People who are new to game development often harbor the mistaken belief that it is simply about coming up with neat ideas to implement; the ‘Wouldn’t it be cool if…’ guy, or simply WIBCI (we’ll call him “Wibsy”).

Wibsy is dangerous to your project in all his forms…

If Wibsy is tasked with creating artwork, he won’t be knocking down your vital assets list, and instead will spend hours painting Easter Eggs that most people will never see.

Wibsy, the programmer, won’t be working on basic mechanics (e.g., player movement, collision, etc.). He’ll put all his time into making a barrel that explodes a bridge (which means your artist now has to create barrel and bridge sprites) that appears exactly once and is never used again. But the worst kind is…

Wibsy the “Game Designer”

This is Wibsy’s final and most dreaded form! The Game Designer determines how the game works (its rules, mechanics, systems, goals, etc.). From these blueprints, the programmer builds your game, and the artist gets to work decorating it. These rules, mechanics, systems, and goals need to be well thought out and clearly communicated so that everyone shares the same vision for what’s being created.

Wibsy, the Game Designer, isn’t a good communicator, and instead expects others to understand his ideas intuitively…here’s a sample conversation between Wibsy and the programmer:

Wibsy: “In level one, I want the player to be able to jump, swim, and attack in every direction. In level two, the player will have a jetpack, but instead of top-down, it will ‘Metroidvania’ style. In level 3, I want a box stacking simulator with neat physics. In level 4…” 

Programmer: “Hang on a second – that would mean programming an entire game each level, essentially coding 30 games instead of just the one?”

Wibsy: “Yes. This is my vision, go and program it.”

Wibsy is not concerned with scope, budget, or time; that’s someone else’s problem! Never underestimate Wibsy’s unlimited capacity for ambiguity, distraction, and scope creep.


What you needed vs. what was designed…


So what can you do about it?

Dealing with Wibsy

The easiest solution is: don’t. But if you must, here are some suggestions:

1. Consider helping them – guide them to resources, give them suggestions, try to help them understand that there is no room for an ‘ideas’ guy in a project. Ideas are cheap, plentiful, and most of them are bad. Instead, bring something useful to the table and stay focused on the critical path.

2. Challenge them – force them to think their decisions through, ask them questions, and let them [hopefully] arrive at the right conclusion.

3. Constrain them – ideas are infinite, time and resources are finite. One way to limit scope is to introduce constraints, real or contrived. Examples could limit the project to one core mechanic or to a palette of 16 colors, etc. You’d be amazed at what a difference this can make – a good example of this is Micro Mages.

At the end of the day, it is up to Wibsy whether he (or she) wants to bring something of worth to the table or throw things at the wall, hoping something sticks.

AI Has Entered the Chat

I began writing this post back in July 2019. At the time, the earliest versions of GPT models existed, but it would be a few more years before they’d see wide, general use via web-based subscription models.

When it did, Wibsy finally got what he had always wanted: an infinitely patient sycophant who would gladly (and confidently) build whatever was asked without question or complaint!


So why is this a bad thing?

The Illusion of Competency

“Most kinds of power require a substantial sacrifice by whoever wants the power. There is an apprenticeship, a discipline lasting many years. Whatever kind of power you want. President of the company. Black belt in karate. Spiritual guru. Whatever it is you seek, you have to put in the time, the practice, the effort. You must give up a lot to get it. It has to be very important to you. And once you have attained it, it’s your power. It can’t be given away: it resides in you. It is literally the result of your discipline.

Now what is interesting about this process is that, by the time someone has acquired the ability to kill with his bare hands, he has also matured to the point where he won’t use it unwisely. So that kind of power has a built-in control. The discipline of getting the power changes you so that that you won’t abuse it.”
– Michael Crichton, Jurassic Park, 1990

Back in 2023, I was asked to troubleshoot a permission issue in a Microsoft Azure tenant. An Application developer asked GPT-4 to write a PowerShell script to catalog all assets in the tenant, but whenever he ran it, it failed with insufficient permissions.

He insisted he was running the script using his own account, and when I investigated, I found that the role he was granted was “Subscription Owner”. This is the highest permission level a user can have, and it grants them unlimited access to any resource in the tenant.

After reviewing the script, I found that it was creating its own functions and calling built-in functions with invalid parameters, which, as written, would always fail. When this happened, it wrote an error to the console declaring the user lacked sufficient permissions, regardless of why the script actually failed… In other words, it LIED!

Had the developer taken the time to read the script, he might have caught it himself, but instead he threw it over the fence and blindly trusted what it said, wasting everyone’s (mostly my) time. It would not occur to Wibsy to question what he was being told, and even if he could develop the skill to recognize when a mistake was made and ask AI to correct it, he would be in no position to judge the quality of its work…

To be continued in Part II: Wibsy the Slop Herder.

Big in Japan

A Bit Nostalgic

Around early May of 2024, Eric’s cousin Chris purchased Purgatory Purgers. I knew Chris in my early teens – we’d spent a lot of time together, most notably, in a local play (an outdoor performance of a “Midsummer Night’s Dream” in the park). I’d lost touch with Chris over the years, but became reacquainted with him through Eric a few months after publishing Purgatory Purgers.

Later that month, Chris started a YouTube channel called “Back to the Past Gaming,” where he started posting retro gaming content. The pseudonym he chose for himself was “ABitNosthalgic”, which seemed oddly appropriate, given our shared history.

The following month (June, 2024), Chris began making videos for Purgatory Purgers.

A direct result of Chris’ feedback was the publication of versions 1.4 and 1.5, which fixed more bugs and added some QoL features (e.g., controller support). He created about 22 videos in total, including all 3 of the ‘best’ endings. Unfortunately, Chris gave up YouTubing shortly after. As a thank-you for his time and help, I sent both him and Eric a Purgatory Purgers T-Shirt from the Merch Store.

Big In Japan

“Oh, when you’re big in Japan, tonight, big in Japan, be tight
Big in Japan, ooh, the eastern sea’s so blue
Big in Japan, alright, pay then I’ll sleep by your side
Things are easy when you’re big in Japan
Oh, when you’re big in Japan.”
– Alphaville, Big in Japan, 1984

The phrase “Big in Japan” is one of many obscure pop-culture phrases I heard growing up but never fully understood. According to Marian Gold of the band Alphaville, “That line has a certain meaning. It means that if you’re a complete loser, you’re telling other people, ‘I’m not a loser because in Japan I’m really big.’ It’s the lie of the loser, and it fitted perfectly into the story of these junkies, which the song is about, in a very tragic way.”

Early this year, Eric and I were chatting on Discord when he asked if we had any recent downloads of Purgatory Purgers, and to my surprise, we did. Apparently, he’d mentioned the game to some people, and one of them decided to check it out. Later that night, on a whim, I was searching YouTube for “Purgatory Purgers” and came across a Japanese YouTuber by the name of catlover_mimi, who had played it as part of a larger itch.io live stream:

Apparently, his channel specializes in playing free games from Itch.io, and he just happened to come across Purgatory Purgers!

Through the use of Closed Captions and auto translate, I was able to piece together (roughly) what he was saying. Here are some phrases I picked out:

  • “I feel like I’ve fallen into the ultimate trap!” (Downward Spiral)
  • “Lime Bath, the two of us are in a lime bath, it’s really good, oh my!” (The Bathhouse)
  • “Red one [Bob] has a pretty nice butt, it has a really nice butt…” (The Great Feast)
  • “Plump butt, plump plump…” (This Can’t Go On)
  • “Why does it look like this? It’s mysteriously cool” (Jeff Ending 2)
  • “It was an amazing game, wasn’t it?” (Feedback after beating the game)

It was a real pleasure watching him play the game, but more importantly, I can finally say, “I’m Big in Japan” :).

If You Give a Mouse a GPU…

Editor’s Note: For those that didn’t catch the reference, it’s a play on the ‘If You Give a Mouse a Cookie’ story. Essentially, if give a mouse a cookie, he’s going to want some milk to wash it down with… and straw to drink the milk… and and a napkin to wipe his face… and so on…

In the Beginning…

About 3.5 years ago, I replaced my aging GTX 1080 gaming desktops with a couple of 30-series systems. Between inflation, parts availability, and AI demands, the market wasn’t great, and it’s only gotten worse.

At the time, I’d planned to buy another iBUYPOWER system, but due to shipping delays, I had to cancel the order and spend over $500 per system more than I originally budgeted. I usually target the upper end of the previous generation of hardware, I feel I missed the mark this time around…

Not long (perhaps a week or two) after I pulled the trigger on our two PCs, and before they began the build, they’d upgraded the model I’d bought from 12th gen to 13th gen, but did not create a new item in their sales system, so I found about it because subsequent updates to my order read “13700K” and “13600K ” respectively rather than the 12th gen series I actually bought. I did reach out to them to see if I’d get a free upgrade, but that was too much to hope for…

By then, DDR4 (what these systems shipped with) was getting long in the tooth, and DDR5 had been around for at least two years. Beyond that, there were other issues with their packing, resulting in feet being shorn off, and while the system pictured in the ad featured strimmers, it turned out they wanted an extra $120 per system…

I used them once again to purchase a pre-built system to replace Jim’s aging laptop. They weren’t my first go-to (I started with Amazon, but had to abandon that route due to logistical issues), but to their credit, they went out of their way to accommodate shipping to Mexico. Unfortunately, Jim didn’t get much use out of it as he passed 3 weeks later… So far as I can tell, he was happy with the purchase, and the price was right ($~1,100, closer to $1,400 with shipping).

Even so, I wouldn’t make another purchase from them today, nor can I recommend them for reasons I’ll get into later…

Treat Yo’self [sic], as the Young People Say…

After a long and expensive home renovation, I decided to treat myself to a GPU upgrade (call it a late birthday present ^_^), so I started looking at 5080 series cards. I considered waiting for a 5080 Ti or Super to come out, but my research suggested they weren’t going to hit the shelves anytime soon, or at an attractive price point.
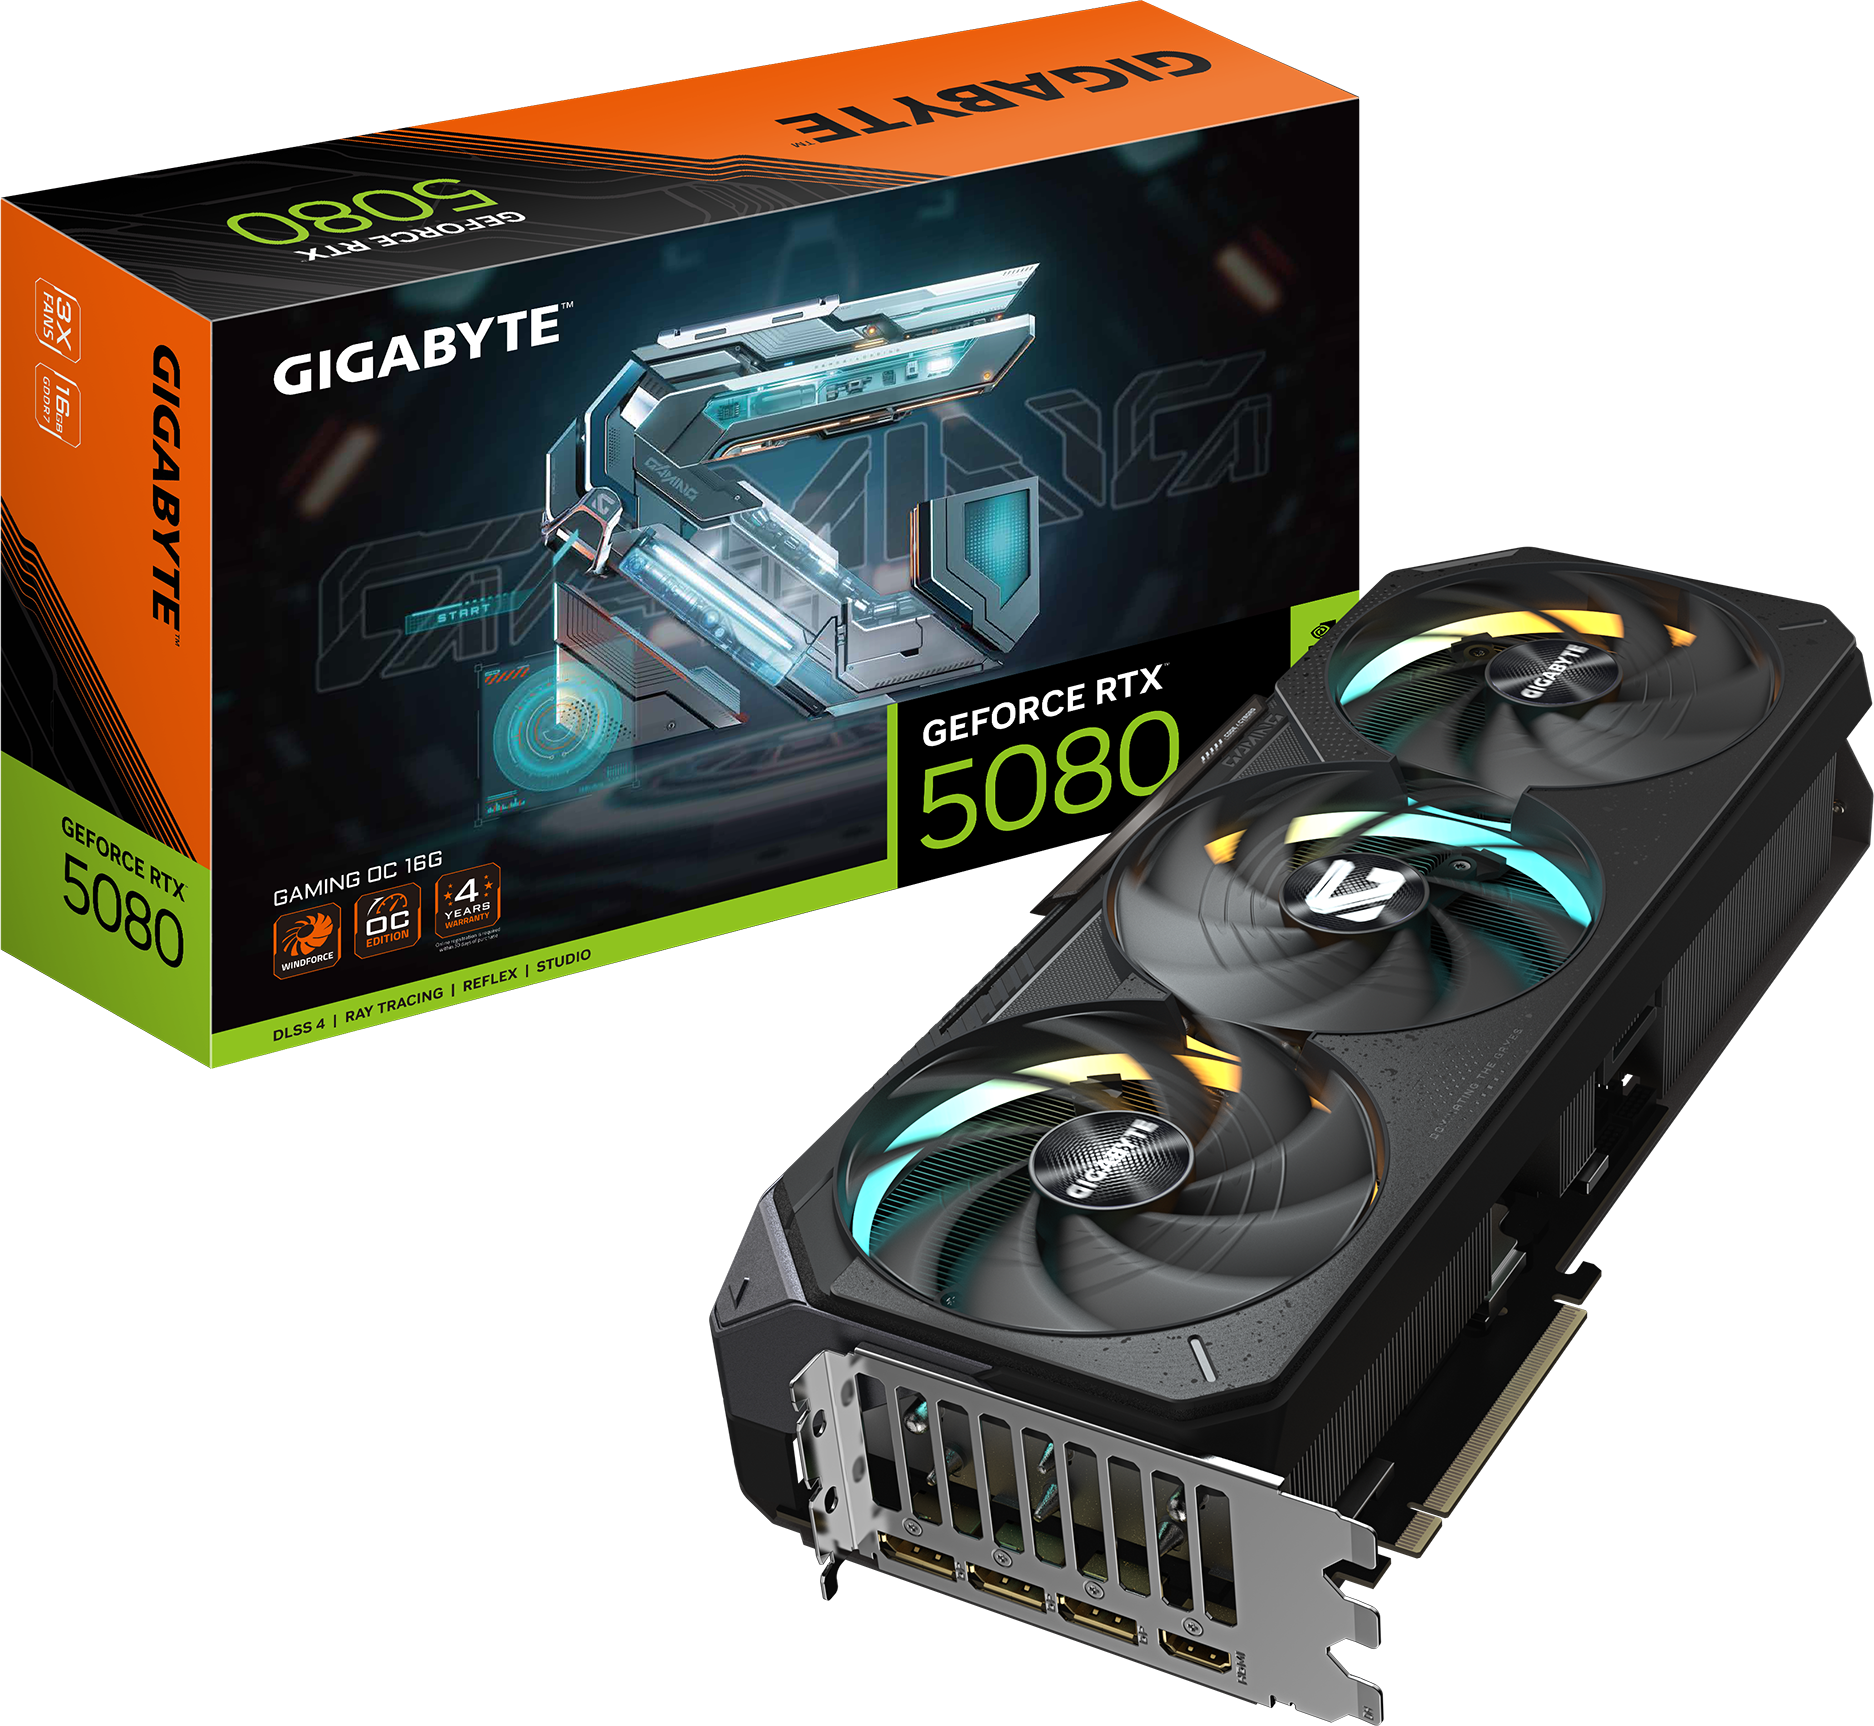
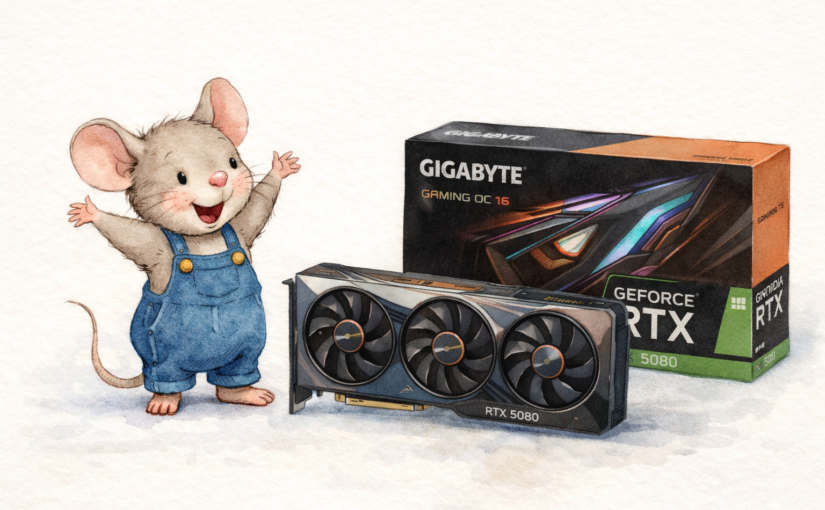
I settled on a GIGABYTE GeForce RTX 5080 Gaming OC 16G, which was a good combination of cost ($1,500 + tax), performance, cooling, and noise. I looked at some more expensive 5080s, but as far as I could tell, the performance was comparable (or even a little worse), and they were asking $200-500 more for slightly cooler/quieter fans.

I figured since I was splurging on a fancy new GPU, I may as well upgrade my RAM as well, but after going down the voltage/timing rabbit hole, I realize things aren’t like they used to be, and I can’t just slap another two identical sticks in the spare sockets and call it a day without risking a hit to performance and/or stability, but not before pulling the trigger on the purchase (another $300), which I’m just went ahead and returned unopened.

What I also failed to realize is that my 850W PSU would be the bare minimum for an RTX 5080 and would need a 12V-2×6 (16-pin) connector instead of the triple 8-pin connectors I’m using now for the RTX 3080… Yes, I could just use the adapter that comes with the GPU, but if I was already spending $1,500 on a GPU, what’s another $180 for some peace of mind… I ended up purchasing another Corsair RM1000x ATX 3.1 (1000W), which should give the card plenty of headroom…

Decisions, Decisions!

At this point, I started thinking about what it would cost to just go ahead and upgrade the motherboard, RAM, and CPU as well. If I were to go that route, and that’s a BIG if, I’d be looking at…

  • $200 for a new Z890 Motherboard
  • $350 for an Intel Core Ultra 7 270K Processor
  • $750+ for 64GB of DDR5 5600 CL28 RAM

In total, about $1,300 + Tax…

Of course, we haven’t even talked about my monitor yet!

I currently have an old Acer Predator XB241H, a 24″ 1080p 144Hz gaming monitor. I bought it in 2018, and it’s served me faithfully for years. Conventional wisdom suggests that lower resolution is better for higher frame rates, which is true, provided your CPU can keep up! My CPU cannot, and so I end up with a huge swing between high and low FPS…

Upping the resolution means the GPU has to work harder, balancing the equation of CPU, GPU, and Resolution. At first, I figured I may as well make the jump to 4K, but after talking it over with a friend, I was convinced to consider 1440p instead. I currently have three monitors on my PC in a TIE Fighter configuration:

While I’m gaming, I can have Discord on one side and a web browser on the other, and look things up as I need to while saving on horizontal space. The trouble is, I don’t have a lot of room on either side, since the triple-monitor stand I’ve had since 2014ish in Saudi Arabia was only intended for 21-24″ monitors, and most 1440p (and 4K) monitors are 27″ and larger.

I considered buying a 27″ 4K Gigabyte OLED monitor for $534 (heavily discounted open box special), but decided not to chance it, and after further consultation with my friend, I decided to go with an AOC Gaming Q27G4ZMN:
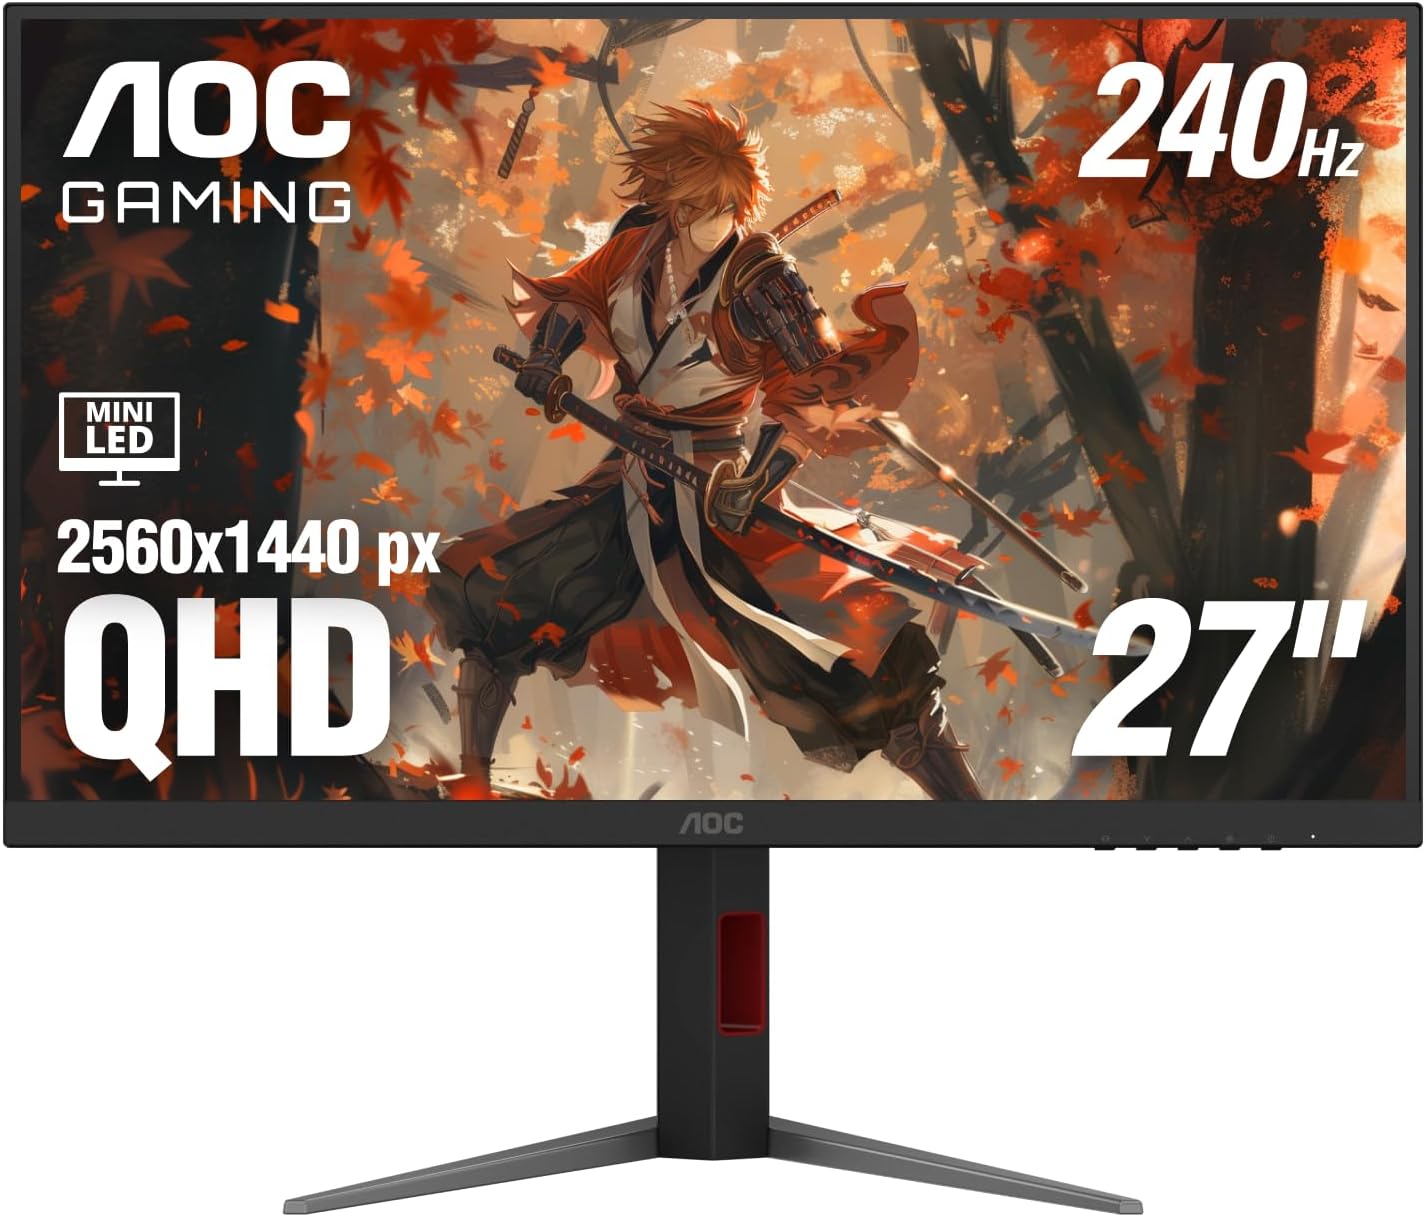
It was $300 for the 180Hz version, but I decided to pay an extra $30 and get the 240Hz model. This was a good balance of resolution for the size of the monitor, color range, contrast, refresh rate, and durability (OLEDs can, and do, burn in, and they’re about double the price). Of course, then I needed to spend another $65 on a bigger triple-monitor stand, but I’m sure I’ll find a use for the old one :).

Too Good to Pass Up!

The rest of the build was still nagging at me, and while I argued with myself back and forth, Newegg decided for me:
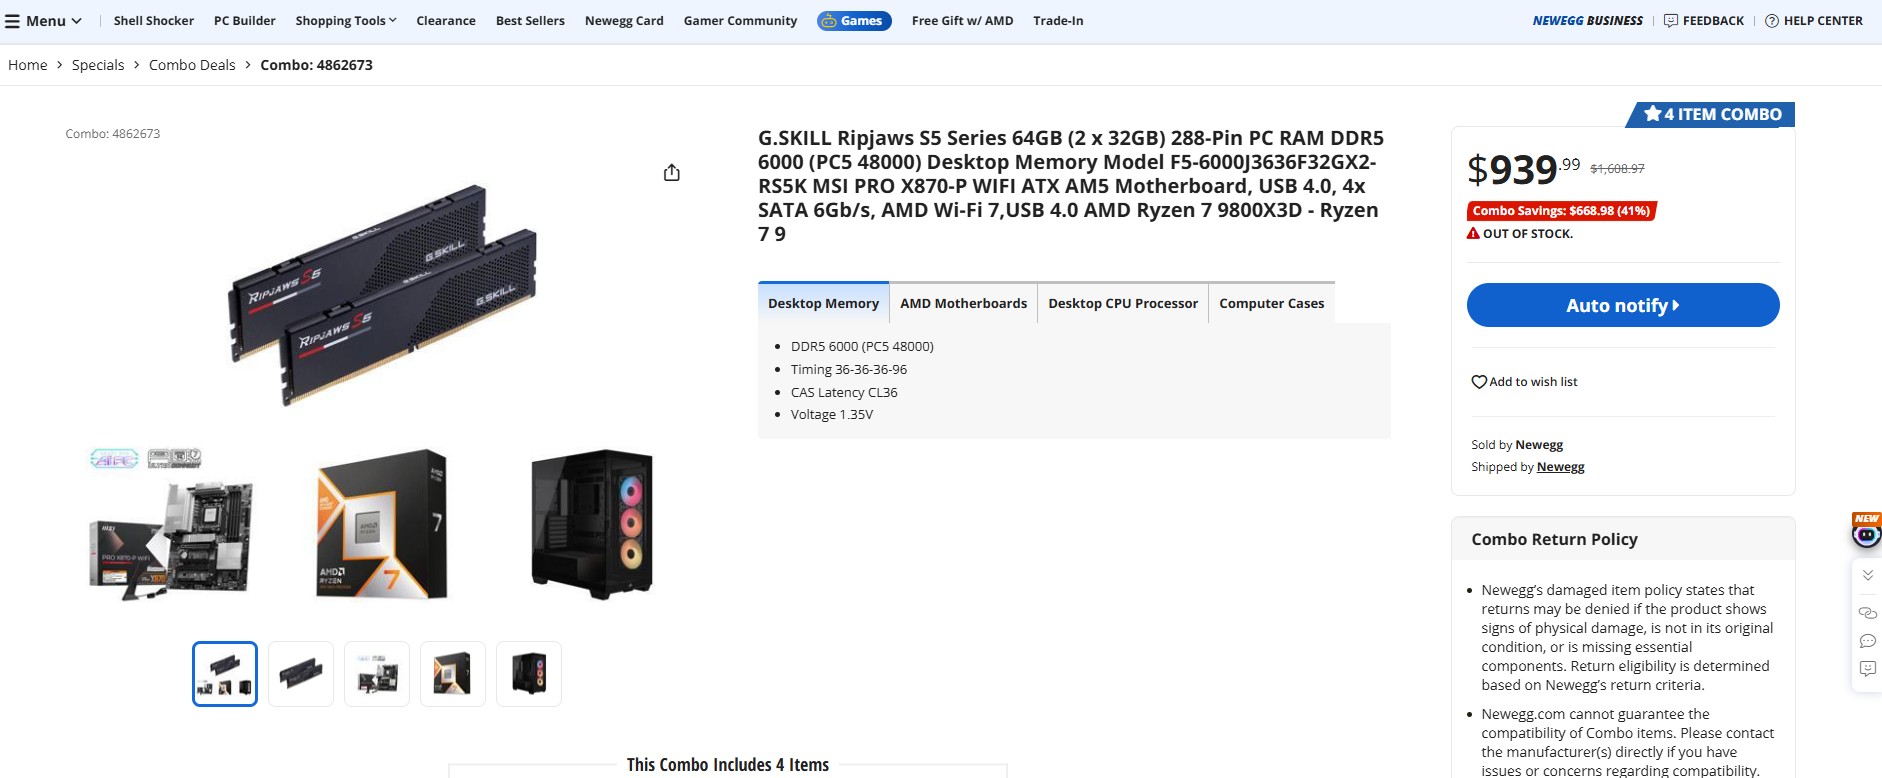
  • G.SKILL Ripjaws S5 series 64GB DDR5-6000 CL36 RAM ($885)
  • MSI PRO X870-P WIFI ATX AM5 Motherboard  ($180 on sale, not the best-in-class, but not bad!)
  • Ryzen 7 9800X3D CPU ($465)
  • Corsair 3500X RS-R ARGB case ($80)
  • MSI MAG Coreliquid A13 240 AIO CPU Radiator/Cooler ($85) – Free gift, not listed in the ad

That’s nearly $1,700 worth of kit for $940? Even Gollum couldn’t say ‘no’ to that!

4/17/2026 – NOTE: The astute among you will notice that the screenshot above shows that this combo is Out of Stock, which it is (at the time of writing), but it was available this morning when I placed my order :).

Aside: Intel versus AMD Processors

Throughout my 20s, I could not afford high-quality computer parts, so I built computers as cheaply as possible. That often meant the least expensive AMD Processors and Radeon graphics cards.
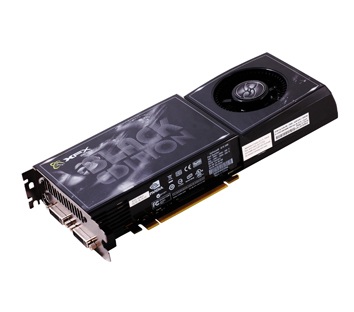
After graduating from college and a year or so into my first ‘big boy’ job, I’d spent some money and upgraded my desktop PC to a Core 2 Duo Q6600 with 6GB of DDR2 RAM and a modest 120GB SSD. I decided to spend $300 (a lot of money in 2008) on an XFX GeForce GTX 260 Black Edition video card. It ran at 75° C (which I was told was normal), and crashed more than I would like, even after two RMAs. This was my first taste of real GPU power! But it was a fickle beast, and even with my Antec 900 case with its ridiculous 200mm exhaust fan, two 120mm front fans, 120mm exhaust fan, and the option 120mm side fan, I STILL couldn’t keep the damn thing cool enough to keep it stable, and begrudgingly went back to a cheap, mid-range AMD GPU (a Radeon HD 5770) a couple of years later before ultimately sticking to Intel/Nvidia going forward.

“2Kliks” Philip Dyer did a great video a few years back that really articulated the history of Intel versus AMD far better than I have here, and it’s well worth the watch. In doing so, it seems to me my biases were justified, at least at the time! But times change, at least on the CPU front…

AMD’s Ryzen series has made a big comeback in the last few years, but nevertheless, I’ve stuck with Intel as my default.  Even when my research seemed to suggest that, for gaming, the Ryzen 7 9800X3D was one of the best processors money could buy, I dismissed this, instead, seeking out my familiar Core i7 equivalent, which I’d pegged as the gold standard for Desktop and Mobile CPUs. Sure, there was eventually a Core i9 series, but that just meant more cores, and I wasn’t even using all of the ones I had now…

I tell myself that more cores = better, and that the Ryzen X3D series isn’t as good as Intel Core Ultra for multitasking and productivity. What if I wanted to host my own LLM GML coding buddy, or spin up a few VMs to test new games on?

“Look, Nattie. That’s called ‘Copium’!”

The plain truth is, if it weren’t for the ridiculous prices of DDR5 RAM, or if there were an equivalent combo deal for an Intel 270K Plus for the same price (despite the Intel processor retailing for $100 less than the AMD 9800X3D), I would have bought that instead…

Fool, though I might be, I know a deal when I see one! Given how quickly these sold out, I feel sure I will end up with a more performant system despite my long-standing biases working against me.

What Are My Plans for the Rest of the Kit?

The existing Corsair iCUE 100i Capellix Elite is still nicer than the MSI one I got with the bundle, however, because I don’t have the box/accessories it came with, I would need a $12 AMD CPU Adapter Bracket and Standoffs so I can reuse it for the 9800X3D. The same goes for the Corsair 3500x case, which is objectively inferior to my Corsair 4000D (more on that below).

Although it will be more work, I figured the best long-term solution would be to put my old Intel System in the new case, which I could keep around as a spare… maybe use it as a server!

What Was the Damage?

All in, this little jaunt has cost me:

  • $1,500 for the RTX 5080 GPU
  • $180 for the 1000W PSU
  • $940 for the CPU, Motherboard, RAM, a spare case, and an AIO CPU cooler
  • $400 for a new monitor and stand

Total: $3,020 ($2,620 without the monitor and stand)

I wanted to get a sense of what this would cost from the builder who put together my current systems, and they were asking $5,198, or about twice what I paid…

To be fair, adding up the parts in their spec sheet came to $4,367.39, or about a 20% mark-up. They did come through for me for Jim’s PC, so I have to give them credit there. In any case, I wouldn’t use them again for myself, and can’t recommend them as a builder given how expensive everything is on its own these days…

No, sir! I’m going back to my roots and building my own from now on…

Coda

Primary System

The parts arrived, and the new CPU, motherboard, and RAM were installed in my old case. I’d purchased an AM5 adapter so I could utilize my old AIO. I also transferred both NVMe drives, and the OS took it like a champ, though I did have to remove some software I no longer needed.

I also took the opportunity to give the old case a thorough cleaning, getting into spots I couldn’t easily reach without a complete disassembly, and cleaned up the cabling. My old Corsair AIO included a Fan/RGB controller, but for whatever reason, I elected not to run all of my case fans through it, splitting them between the controller and the motherboard. This means that controlling fan speeds was also split between the iCUE software (used by the AIO) and Armory Crate. There was plenty of room on the controller, so I can’t imagine why it was done this way, and I won’t guess. In any case (no pun intended), it’s corrected!

I had to enable EXPO in the BIOS to get the RAM to run at 6000 MT/s instead of 4800, and spent several hours tinkering with the new monitor’s HDR settings to keep the brightness from blowing my eyeballs out…

Secondary System

I hadn’t realized how much I missed the fiddling pleasure of assembling a PC until I upgraded my primary system! I couldn’t bear to see my old parts go to waste, especially when I had most of the parts I needed to build a second system, save for a couple of odds and ends…

So I started by mounting my old CPU, motherboard, and RAM in the new Corsair 3500X. This case isn’t something I would have chosen for myself, and it seems to prioritize form over function; it looks nice in photos and is great for showing off your components, at the cost of a few degrees-worth of direct airflow.

The MSI MAG Coreliquid A13 240mm AIO is… fine. It didn’t come with a controller like my old AIO

I have to admit it makes for a handsome presentation, and the removable front panel gave me plenty of room for wiring up the IOs, fans, and RGB.  Power was another story…

I could have used my old PSU and my wife’s old EVGA RTX 3070 FTW3 8GB GPU for this build, but I gifted both to a friend to replace his MSI GeForce GTX 1060 Gaming 6GB GPU and Corsair RM650 650W PSU. He’d offered to give me his old parts, but I declined as they wouldn’t be very useful to me.

Instead, I bought another Corsair RM850 (identical to my old one). The cable management on the 3500X case was nonexistent, leaving me little room for CPU, GPU, and Motherboard power cabling. There was barely enough clearance to slide the PSU into its cubby, but I got there in the end.

###

That still left the GPU question… As a secondary PC, I didn’t want to spend an obscene amount of money on what would essentially be a spare system. So what were my options in the $300-400 range?

  1. Nvidia GeForce RTX 5060 8GB (~$330-360)
  2. AMD Radeon RX 9060 XT 8GB (~$340-380)
  3. Intel Arc B580 12GB ($310)

Nvidia would be the obvious choice, I would not begrudge spending $50 more for a much better-supported card, but the 8GB of RAM killed that option. PNY had an RTX 5060 Ti 16GB card for $490, but another $140 would get me an RTX 5070, but by then, I’m spending twice as much ($635+).

AMD was worse, slightly more expensive than the 5060, though you can get a 16GB RX 9060 XT for $460. Even so, I’ve had AMDs more of my adult life, and wasn’t going to rush out and buy another one.

Intel was a bit of a dark-horse candidate, and I’ve heard nothing but good things about their cards. I considered a used A770 16GB for $400, but opted for a new ASRock Intel Arc B580 Challenger 12GB OC for $310. Sparkle offers a 3-fan model of the same card, but they wanted $60 for it…

Since both of my NVMe drives were transferred to the new system, I picked up a $160 Kingston 1TB NVMe drive. My old motherboard had a nice NVMe heat sink, but I had to get another $5 thermal pad as the old one was pretty nasty. I got everything put back together, and it fired up just fine! I was able to install the OS, and it works great, but…

~~~

For a display, I was using my quadruple (2×2) HP N246v 24″ LCD 60Hz monitors, which work great for my work-from-home setup, but are atrocious for gaming… I still had my old Acer Predator HB241H 24″ LCD 1080p @144Hz gaming monitor…

My old triple monitor stand (SilverStone Technology ARM31BS)l is about 4″ too wide for my work [from home] desk, but a similar triple monitor stand as I’d bought for my gaming setup would work just fine! I could remove the two monitors from my double monitor stand and do another TIE Fighter configuration for my secondary machine with the 144Hz monitor as the middle/primary display, and keep my quad monitor setup as-is, granting two of the monitors for my work [from home] laptop, and two for the miniPC I bought for my second job, and control them both seamlessly using something like Mouse Without Borders. Yes, I currently have 10 monitors in my office, thanks for asking :).

While I’m at it, I’ll replace the DVI to DisplayPort adapters on my quad monitor setup with DisplayPort to HDMI cables (the quad monitor setup supports VGA, DVI, and HDMI… I told you it was old :), I’ll get an extra 140mm to use as an intake for the bottom of the case, and some cable extenders to pretty things up.

So add to the total…

  • $310 for the GPU
  • $160 for the 1TB NVMe SSD
  • $90 for the 850W modular PSU (renewed)
  • $140 for miscellaneous odds and ends (power cable extensions, second triple monitor stand, 140mm case fan, thermal pad for the NVMe heat sink)

Total: $560 ($700 if you count the optional bits, but some of that’s going to maintenance and long-over cable management 🙂

Worth it? Yes, I’d say so. Until next time!

Remembering Jim

Forward

On February 17th, 2025, my friend James Carlson (Jim) passed away just four days after his 50th birthday. Although Jim had many interests, one we shared, and I encouraged him on many occasions to cultivate, was Game Development.

The purpose of this post is to fondly recount the good times we’d shared, joking, plugging away at silly game ideas, and daydreaming about what it would be like to do this for a living…

I don’t think either of us really believed we’d make a career out of it… At best, I’d impart technical skills that might have helped him to escape the endless procession of entry-level, dead-end jobs he’d often lamented. At worst, it would have been a pleasant distraction.

In the Beginning…

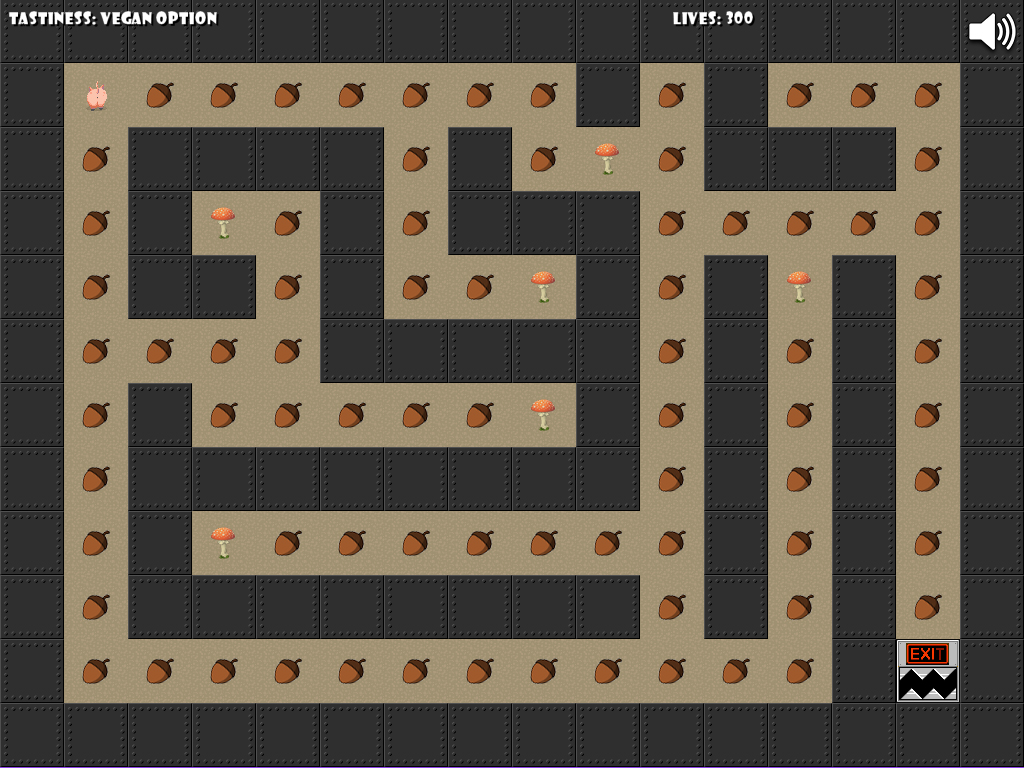
“We should make him eat acorns!”
– James R. Carlson, 2/13/1975-2/17/2025

Jim and I met online in late 2014 when he logged on to an MMO I was active on to tell us that his brother had died in a car accident. I befriended Jim, and we eventually began corresponding over email. Later that year, Jim announced that he’d hit rock bottom and dreaded the new job he was starting at a Pizza and Fried Chicken buffet restaurant. We brainstormed other career ideas he might pursue, and after a couple of false starts, he decided to try his hand at blogging.

I created a website (www.porkcircus.com) for him, and for the next couple of weeks, Jim posted, and I edited (formatted, corrected spelling and grammar, etc.). Jim had a real talent for off-the-wall commentary that would give Matthew Inman a run for his money… For the next couple of weeks, we posted articles, recipes, [mis]quotes, and so on. I had a backlog of post ideas, kept a regular publishing schedule, and got a lot of enjoyment out of it for a brief while.

Unfortunately, Jim’s interest in the project waned within a couple of weeks, and his contributions only accounted for about 1/7th of the total posts, not including the half-dozen he’d started but never finished.

2016 was a tumultuous year for me. I worked 80 hours a week trying to shape up the Project Management Office of a corrupt Saudi solutions broker, but ultimately failed. Unable to find a new job, I took my savings and returned to the US. Unemployed and with nothing but time, I decided to try to teach myself game development in earnest. After completing the GPC (or at least as much as I could), and as Eric had dropped out, I decided to engage Jim.

On January 28th, 2017, Jim and I spent about 6 hours on a Google Hangouts call, developing the first iteration of what would become Porker: The Quest for Tastiness. While Jim drank beer and shouted suggestions and obscenities, I furiously coded, photoshopped Creative Commons-licensed artwork, and edited royalty-free sound effects. Over the next couple of days, we had:

  • An Objective: Collect Acorns to increase your “Tastiness” score
  • A Win Condition: Complete all five levels
  • A Lose Condition: Lose all of your lives by colliding with dangerous obstacles

My goal was to publish a game, ANY game, no matter how simple, as long as it was complete and playable. I couldn’t rightly call myself a ‘Game Developer’ until I’d published a Game, and following the advice of the Extra Credits series on the topic, I did just that and moved on.

Fleeting Fame

A couple of weeks later, I discovered that someone had created a Let’s Play video for Porker, which inspired me to expand on it further. My mind raced with the possibility of it becoming a viral hit, but at the time, I’d been out of work for nearly a year, and my savings were dwindling. Somehow, around mid-April of ’17, I managed to complete and republish Porker. My “marketing campaign” didn’t go anywhere, and Jim had problems of his own…

Return to Reality

By May, I’d started a new job, and for the rest of the year, I was catching up on half a decade of advancements in Enterprise Information Technology… By December, I was dabbling with the GPC again, coming to grips with the reality of being a solo game developer, and itching to start creating again.

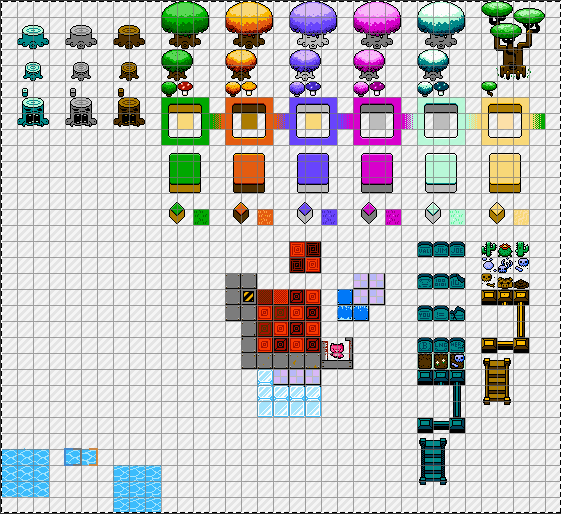
Jim and I flirted with the idea of a sequel, “Porker II: The Adventure Begins,” which was intended to be a top-down Legend of Zelda-style [primitive] Action RPG. I’d begun creating tilesets for it:

Unable to pique Jim’s interest, I partnered with a co-worker, Jason (an application developer by trade), instead, and we created Milk Smugglers. Unfortunately, it was never published for reasons not worth dredging up.

Intermittent Interests

Jim and I never formally resumed our work on Porker II, but over the years, we would occasionally kick around the idea and brainstorm what that might look like. James was also a big fan of Shoot ’em Ups (SHMUPs), and while I was beginning work on Purgatory Purgers, Jim took a passing interest in creating SHMUP…

“damn you, went and got me interested in learning make a game again. think im going to set myself a September chgallenge. One shootey space game. Scroller type. Have score, enemies, a couple power ups, gui, home screen. all basic. I’ll use inkscape shapes as place holders if i have to. but the real challenge will come from not using a follow along tutorial – but actually read the documents and do it myself.”
– Jim, August 31, 2023

Unfortunately, Jim opted to use Godot rather than GameMaker, so I was unable to assist him with the code. However, I did create some graphics for him:

Although Jim never got a working prototype up and running, I managed to put together a quick and dirty GameMaker game using the assets I’d created for him.  The final result looked like this:

The style I was going for was a Terry Gilliam-style cutout animation, the sort of thing you’d find in a Monty Python episode. Jim had a terrible habit of never finishing anything he started, and this, too, was no exception. Still, it was an amusing diversion while it lasted!

Regrets

In December last year, I began working on a new SHMUP using modified graphics from Milk Smugglers. Over the Christmas holiday, I managed to get the basic engine, movement, power-ups, a few enemies, and other features working, but I ran out of time and abandoned the project.

I’m not sure if I’ll ever pick it back up. I might make it a tribute to his memory. On the other hand, it troubles me that he’d never get a chance to play it…

V-Toad Games Official Merch Store Launched!

Over the last couple of years, I’ve used Print-On-Demand (POD) services to make custom T-shirts, coffee mugs, and other items for friends and family, and I thought that maybe this year, I’d create something V-Toad Games-themed.

Then it occurred to me that if I was going to create some merch, why not make it available to anyone who wanted it? And so I’m excited to announce the launch of our official Merchandise Store, which can be accessed from the link in our website’s main menu or through this URL.

All proceeds will fund hosting costs for www.vtoadgames.com, software licenses, hardware, and other game-development-related expenses. As always, our games will remain free (name your own price with no minimum cost).

Enjoy!

Objectless Grid Movement!

In the Beginning, There was the GPC

About seven and a half years ago, while working on Level 12 of John Janetka’s  Game Programming Course (GPC), I developed a novel way to handle orthogonal grid movement. The desired outcome was simple:

  1. Pick a target point to the left, right, above, or below your current position
  2. Move the player object toward the target point
  3. Stop when the player object’s x,y coordinates = the target point’s x,y position

When I first tackled this, I tried using an instance variable to set the target point, something like this:

/* 
If 'A' is pressed, set the targetx to be the player's x-32 pixels,
then move towards that targetx...
*/

if keyboard_check(ord("A")) {
    targetx=x-32;
    move_towards_point(targetx,y,4);
}

/*
When targetx is reached, stop.
*/

if x=targetx {
    speed=0;
}

When I tried this, I discovered that the player would keep moving to the right indefinitely. This is because (as written) targetx would always be 32 pixels ahead of the player’s x coordinate and because the player object’s x would never equal targetx, he’d never fulfill the condition to stop (i.e., if x=targetx {speed=0}).

A Novel Solution

My solution was simple, but flawed. Instead of using the player’s x,y coordinates, I could use a separate “target” object instead. Something like this:

  1. A target object (the red square above) is created in the direction you’re trying to move (e.g., left).
  2. The player object then moves toward the x,y coordinates of the target.
  3. The target object is destroyed when the two collide, and the player’s speed is set to zero.

You can find code examples here and here. This works fine (in isolation), but when you add a second (and third, and fourth…) object, the cracks begin to show…

Limitations and Drawbacks

Looking at the original code, you’ll see that I used a Collision Event with the target object (o_target):

//Destroy the o_target object on collision
with other {
instance_destroy()
}

//Stop the player
speed=0

The problem is that one object might collide with another object’s target block, knocking it off course, causing it to continue on its last heading with nothing to stop it.

So then I substituted out o_target for an instance of it, i.e.:

target=instance_create_layer(x-32,y,o_target)

I scrapped the Collision Event and instead used the place_meeting function in the End Step Event:

if place_meeting(x,y,target) {
    if instance_exists(target){
        speed=0;
        moving=0;
    instance_destroy(target);
}

While this worked, it also added a lot of [needless] complexity. Although players would never notice (or care) how complicated my code is/was, I knew this wasn’t well implemented, which caused a slew of difficult-to-track-down issues and many troubleshooting headaches.

Back to Basics

As I sat down to work on our next game, this problem still bothered me, so I decided to try something new on a whim. I’ve been aware of local variables since Level 9 of the GPC, but didn’t clearly understand when or why to use them.

Re-reading the GameMaker online Manual, it says,

“A local variable is one that we create for a specific event or function only and then discard when the event or function has finished.”

My instincts (even back then) were correct; the target should have been stored in a variable, but I needed to capture the value somehow, and then decouple it from the player’s coordinates.

Pass the variable, Bob!

That’s when it hit me: why not use a local variable to capture the target coordinate? If placed in a function, it would define that variable once and discard it when the function ended. To use it, we’d have to pass that value along to an instance variable to hold on to it. Here’s what I came up with:

/*
==========================
Objectless Grid Movement!™
==========================

Variables:
dist   = sprite_width-pspeed

pspeed = the speed (in pixels) the object is traveling

targetx = the local variable of the x coordinate we want to go to, used when moving horizontally. Set using var _left or var _right.

targety = the local variable of the y coordinate we want to go to, used when moving vertically. Set using var _up or var _down.
*/

// Accept input, then move towards the target coordinate
if keyboard_check(ord("A")) and moving=0 {
    moving=1;
    var _left=x-dist;
    targetx=_left;
    move_towards_point(targetx,y,pspeed)
}

if keyboard_check(ord("D")) and moving=0 {
    moving=1;
    var _right=x+dist;
    targetx=_right;
    move_towards_point(targetx,y,pspeed)
}

if keyboard_check(ord("W")) and moving=0 {
    moving=1;
    var _up=y-dist;
    targety=_up;
    move_towards_point(x,targety,pspeed)
}

if keyboard_check(ord("S")) and moving=0 {
    moving=1;
    var _down=y+dist;
    targety=_down;
    move_towards_point(x,targety,pspeed)
}

// Stop the player once he reaches his target coordinate
if x=targetx {
    moving=0;
}

if y=targety {
    moving=0;
}

This worked perfectly and will save me a Metric Crappe Tonne™ of time and aggravation later.

Further Improvement

I want to implement custom key binds that support keyboard and gamepad input. I’m reasonably sure I can accomplish the former, but I’m still researching the latter. More to come!

Purgatory Purgers: Version 1.5 Released!

Update Summary

  • Collecting 100% of the souls with Bob (the demon) is now possible!
  • Resolved clipping issues in the levels “Stilted Pond” and “Toad Hall.”
  • Gamepads, including PlayStation, Xbox, and Super Nintendo-style controllers, are now generally supported*. See the notes below for additional information.
  • Updated the Purgatory Purgers Manual to include gamepad button mappings

Special thanks to @ABitNosthalgic for suggesting that we make it possible to collect 100% of the souls with one character or another!

Gamepad/Controller Support Notes

*Most PC-compatible controllers with a Direction Pad (D-Pad), Start and Select buttons, and four face buttons should work. The game has been tested on the following devices:

  • Logitech F310
  • X-Box Elite Series 2 Wireless
  • Megafire 412-NO5 (generic PlayStation 2 Style Controller)
  • 8BitDo SN30 Pro (SNES-style controller)

@ABitNosthalgic reported that the Suily brand NES-style controllers did not work for him. While I haven’t tested this myself, the reviews seem to suggest that problems, particularly with the D-Pad, aren’t that uncommon.

Purgatory Purgers: Version 1.4 Released!

Update Summary

  • Resolved a bug (warning, spoilers!) that would destroy objects unintentionally when two blocks collided
  • Added a spawn/respawn animation and sound effect
  • Reworked the Passphrase mechanic (used to continue to a previously visited level) to display the Passphrase on the pause screen under the main menu as well as the Game Over screen.
  • Updated the Purgatory Purgers Game Manual to better describe the Continue/Passphrase mechanic and other menu features.

Special thanks to @ABitNosthalgic for catching the bug and Jason D for passphrase feedback!


Purgatory Purgers: Buggery

Warning: Spoilers Ahead!

This post discloses the locations of some of the secret rooms found within Purgatory Purgers. If you’d rather discover these surprises for yourself while playing the game, you may want to avoid reading further!

A Fresh Perspective

Players are often your best resource for identifying possible bugs, exploits, and missed opportunities (read: feature requests). The week Purgatory was released, I received a lot of feedback and, with it, fresh eyes to point out my mistakes.

I addressed what I could and tabled the rest, save for one elusive bug I could never pin down but appeared so infrequently that I couldn’t get a bead on it. Occasionally, an object or group of objects (e.g., a gem block, ethereal coins, etc.) would go missing from a room, and I couldn’t explain why nor duplicate the behavior. Unable to identify the culprit, coupled with the sporadic nature of the bug, I decided to leave well enough alone…

Recently, a new YouTube channel, “Back to the Past Gaming,” started a playthrough series for Purgatory Purgers. While watching ABitNosthaligic play through the fourth level of Purgatory Purgers, “Stilted Pond,” I was surprised to see that the secret room he discovered was empty:

He suggested it might have been an oversight, and while it’s certainly possible that I’d forgotten to populate the room, the problem was (unfortunately) not that simple… And so, after a 3-month hiatus, I decided to tear back into the code to uncover, once and for all, why this was happening!

First, Check the Obvious

Looking at the room layout in the GameMaker IDE, I could see the objects had been placed:

So why were they missing during his playthrough? I fired up the game, went straight to the offending level, and made a beeline for the secret room. Upon entering, there were the Ethereal Coins right where I expected them to be:

To try to duplicate the [unwanted] behavior, I did a normal playthrough, and lo and behold, the coins were missing for me, too! Progress, at last! But why? What exactly was happening to the coins? Were they failing to render? Were they being destroyed?

So, to begin my troubleshooting, I added the following code to the “obj_oneup” object’s Draw GUI Event:

// Am I here?
draw_self();
draw_text(20,20,"I'm still here!")

Whenever you use custom draw code (e.g., draw_text), you must precede it with “draw_self(),” or the sprite won’t be drawn. The purpose of the draw_text message is to print the string “I’m still here!” in the upper left-hand corner to let me know that at least one instance of the object still exists on the map. Simply put, these two lines of code tell me that the object is both visible and present.

I saved my work, then launched the game, and upon entering the first level, I could see the message right where I expected it:

After collecting the Ethereal Coins, the message disappeared as expected. So, I continued playing until I reached the offending level (Stilted Pond), and after some experimentation, I finally observed what was happening…

Next, Eliminate the Impossible

“When you have eliminated the impossible, whatever remains, however improbable, must be the truth.”
– Sherlock Holmes, The Sign of Four

Whenever I pushed one block into another block, all of the Ethereal Coins in the current room were instantly destroyed. This was true, regardless of level, but I couldn’t yet understand why…

The way I coded movement for blocks, enemies, and the player in Purgatory Purgers was a modified version of my grid movement system, explained here and here. In short, this is what happens when you “push” a block:

  1. An instance of an invisible 16x16px target object is created 32 pixels ahead.
  2. The block moves toward the target object.
  3. Upon collision, the target object is destroyed, and the block’s movement speed is set to zero, stopping it.

Because we’re using an Instance Variable, it has to be declared in the Create Event, e.g.:

block_target=0;

This variable would later be defined in the Step Event whenever the block was moved, something to the effect of,

block_target=instance_create_layer(x-dist,y,"Instances",obj_block_target);

In the example above, “block_target” refers to the Instance ID of the specific instance of the obj_block_target object we’re dealing with, and nothing else! So when obj_block collides with the instance of obj_block_target it created, i.e., “block_target,” only that instance should be destroyed, but somehow obj_oneup was being [mis]associated with “block_target.”

Block movement was one of the first features I coded, and later implementations used the place_meeting function in the End Step Event. So, simply recoding it to use “place_meeting” fixed the issue.

I still don’t fully understand this, and after hours of troubleshooting, I am relieved that this was resolved. I have since posted the fix to itch.io as version 1.4.

Purgatory Purgers: Playthrough!

I am pleased to share that @BacktothePastABitNostalgic, a new YouTube channel specializing in retro-style content, has started a playthrough series on Purgatory Purgers!

You can access the Playlist here or by clicking the image above.

Thanks again, ABitNostalgic, and I look forward to seeing the rest of the series!