Warning: Spoilers Ahead!
This post discloses the locations of some of the secret rooms found within Purgatory Purgers. If you’d rather discover these surprises for yourself while playing the game, you may want to avoid reading further!
A Fresh Perspective
Players are often your best resource for identifying possible bugs, exploits, and missed opportunities (read: feature requests). The week Purgatory was released, I received a lot of feedback and, with it, fresh eyes to point out my mistakes.
I addressed what I could and tabled the rest, save for one elusive bug I could never pin down but appeared so infrequently that I couldn’t get a bead on it. Occasionally, an object or group of objects (e.g., a gem block, ethereal coins, etc.) would go missing from a room, and I couldn’t explain why nor duplicate the behavior. Unable to identify the culprit, coupled with the sporadic nature of the bug, I decided to leave well enough alone…
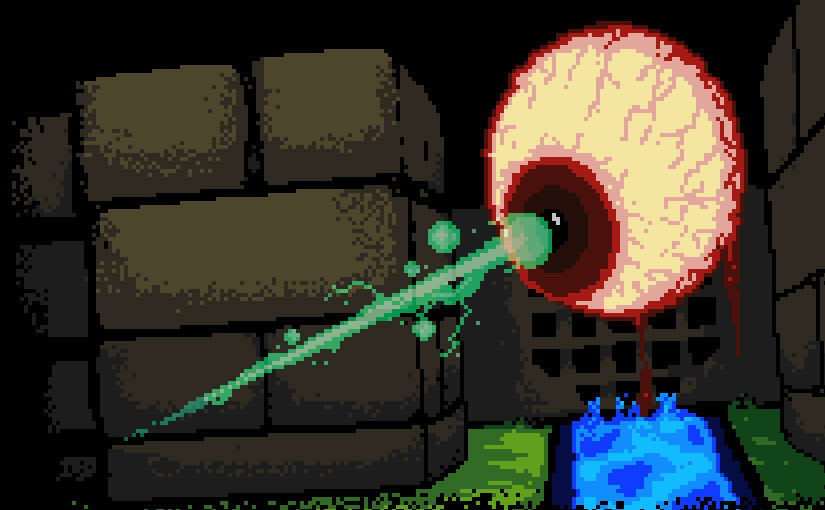
Recently, a new YouTube channel, “Back to the Past Gaming,” started a playthrough series for Purgatory Purgers. While watching ABitNosthaligic play through the fourth level of Purgatory Purgers, “Stilted Pond,” I was surprised to see that the secret room he discovered was empty:

He suggested it might have been an oversight, and while it’s certainly possible that I’d forgotten to populate the room, the problem was (unfortunately) not that simple… And so, after a 3-month hiatus, I decided to tear back into the code to uncover, once and for all, why this was happening!
First, Check the Obvious
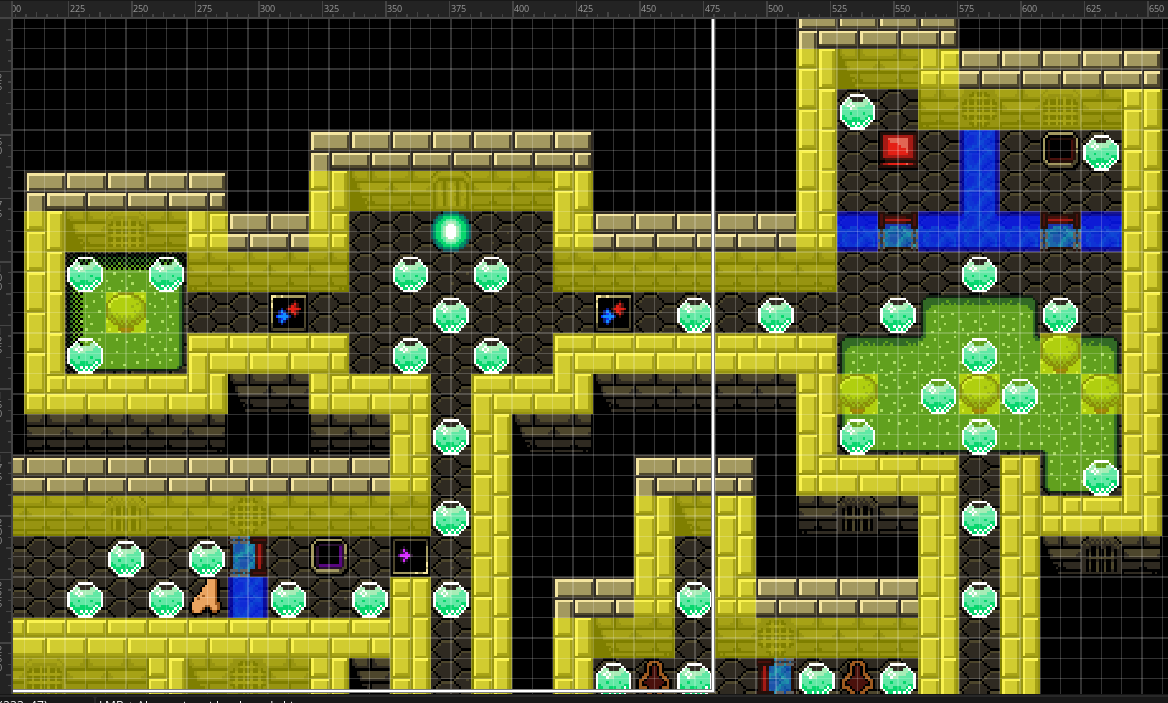
Looking at the room layout in the GameMaker IDE, I could see the objects had been placed:

So why were they missing during his playthrough? I fired up the game, went straight to the offending level, and made a beeline for the secret room. Upon entering, there were the Ethereal Coins right where I expected them to be:

To try to duplicate the [unwanted] behavior, I did a normal playthrough, and lo and behold, the coins were missing for me, too! Progress, at last! But why? What exactly was happening to the coins? Were they failing to render? Were they being destroyed?
So, to begin my troubleshooting, I added the following code to the “obj_oneup” object’s Draw GUI Event:
// Am I here?
draw_self();
draw_text(20,20,"I'm still here!")
Whenever you use custom draw code (e.g., draw_text), you must precede it with “draw_self(),” or the sprite won’t be drawn. The purpose of the draw_text message is to print the string “I’m still here!” in the upper left-hand corner to let me know that at least one instance of the object still exists on the map. Simply put, these two lines of code tell me that the object is both visible and present.
I saved my work, then launched the game, and upon entering the first level, I could see the message right where I expected it:

After collecting the Ethereal Coins, the message disappeared as expected. So, I continued playing until I reached the offending level (Stilted Pond), and after some experimentation, I finally observed what was happening…
Next, Eliminate the Impossible
“When you have eliminated the impossible, whatever remains, however improbable, must be the truth.”
– Sherlock Holmes, The Sign of Four
Whenever I pushed one block into another block, all of the Ethereal Coins in the current room were instantly destroyed. This was true, regardless of level, but I couldn’t yet understand why…
The way I coded movement for blocks, enemies, and the player in Purgatory Purgers was a modified version of my grid movement system, explained here and here. In short, this is what happens when you “push” a block:
- An instance of an invisible 16x16px target object is created 32 pixels ahead.
- The block moves toward the target object.
- Upon collision, the target object is destroyed, and the block’s movement speed is set to zero, stopping it.
Because we’re using an Instance Variable, it has to be declared in the Create Event, e.g.:
block_target=0;
This variable would later be defined in the Step Event whenever the block was moved, something to the effect of,
block_target=instance_create_layer(x-dist,y,"Instances",obj_block_target);
In the example above, “block_target” refers to the Instance ID of the specific instance of the obj_block_target object we’re dealing with, and nothing else! So when obj_block collides with the instance of obj_block_target it created, i.e., “block_target,” only that instance should be destroyed, but somehow obj_oneup was being [mis]associated with “block_target.”
Block movement was one of the first features I coded, and later implementations used the place_meeting function in the End Step Event. So, simply recoding it to use “place_meeting” fixed the issue.
I still don’t fully understand this, and after hours of troubleshooting, I am relieved that this was resolved. I have since posted the fix to itch.io as version 1.4.