Collecting 100% of the souls with Bob (the demon) is now possible!
Resolved clipping issues in the levels “Stilted Pond” and “Toad Hall.”
Gamepads, including PlayStation, Xbox, and Super Nintendo-style controllers, are now generally supported*. See the notes below for additional information.
Updated the Purgatory Purgers Manual to include gamepad button mappings
Special thanks to @ABitNosthalgic for suggesting that we make it possible to collect 100% of the souls with one character or another!
Gamepad/Controller Support Notes
*Most PC-compatible controllers with a Direction Pad (D-Pad), Start and Select buttons, and four face buttons shouldwork. The game has been tested on the following devices:
Logitech F310
X-Box Elite Series 2 Wireless
Megafire 412-NO5 (generic PlayStation 2 Style Controller)
8BitDo SN30 Pro (SNES-style controller)
@ABitNosthalgic reported that the Suily brand NES-style controllers did not work for him. While I haven’t tested this myself, the reviews seem to suggest that problems, particularly with the D-Pad, aren’t that uncommon.
Resolved a bug (warning, spoilers!) that would destroy objects unintentionally when two blocks collided
Added a spawn/respawn animation and sound effect
Reworked the Passphrase mechanic (used to continue to a previously visited level) to display the Passphrase on the pause screen under the main menu as well as the Game Over screen.
Updated the Purgatory Purgers Game Manual to better describe the Continue/Passphrase mechanic and other menu features.
Special thanks to @ABitNosthalgic for catching the bug and Jason D for passphrase feedback!
This post discloses the locations of some of the secret rooms found within Purgatory Purgers. If you’d rather discover these surprises for yourself while playing the game, you may want to avoid reading further!
A Fresh Perspective
Players are often your best resource for identifying possible bugs, exploits, and missed opportunities (read: feature requests). The week Purgatory was released, I received a lot of feedback and, with it, fresh eyes to point out my mistakes.
I addressed what I could and tabled the rest, save for one elusive bug I could never pin down but appeared so infrequently that I couldn’t get a bead on it. Occasionally, an object or group of objects (e.g., a gem block, ethereal coins, etc.) would go missing from a room, and I couldn’t explain why nor duplicate the behavior. Unable to identify the culprit, coupled with the sporadic nature of the bug, I decided to leave well enough alone…
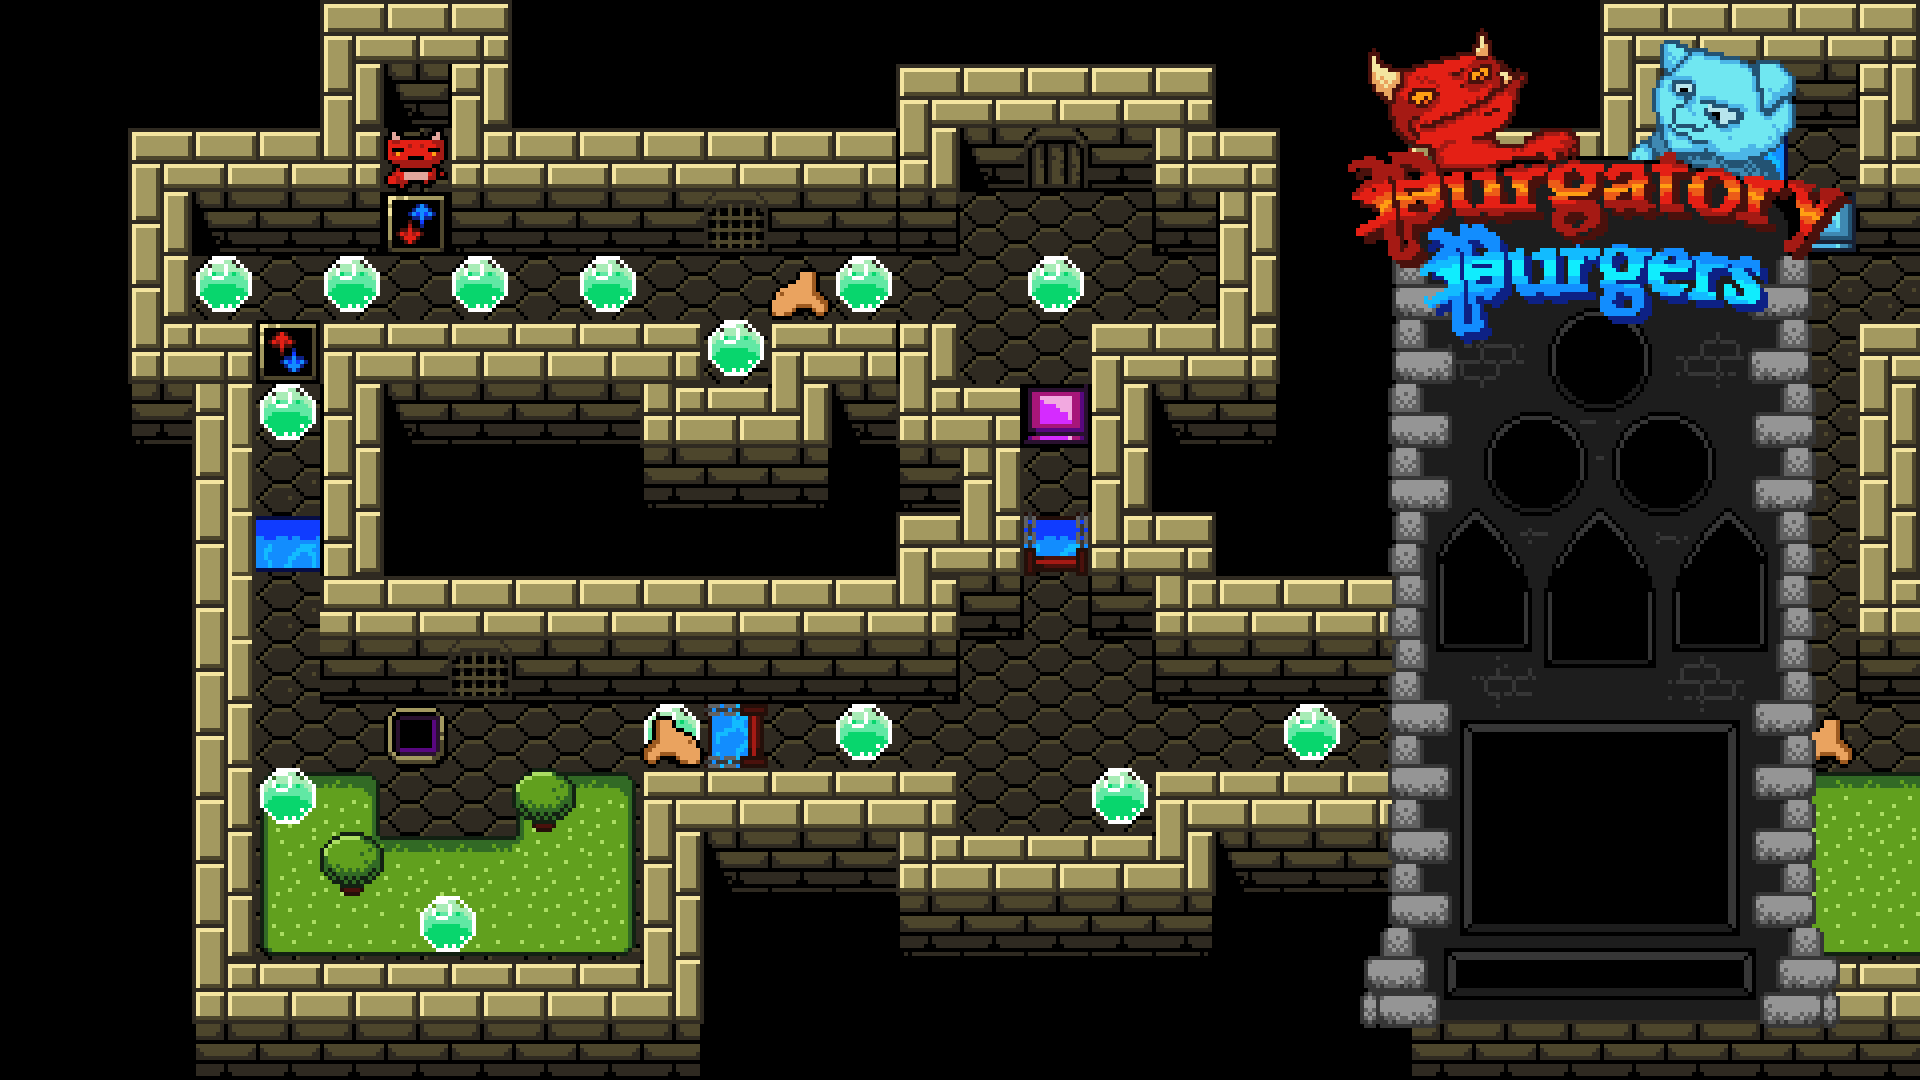
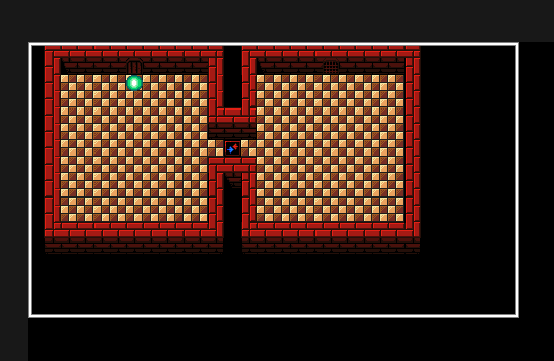
Recently, a new YouTube channel, “Back to the Past Gaming,” started a playthrough series for Purgatory Purgers. While watching ABitNosthaligic play through the fourth level of Purgatory Purgers, “Stilted Pond,” I was surprised to see that the secret room he discovered was empty:
He suggested it might have been an oversight, and while it’s certainly possible that I’d forgotten to populate the room, the problem was (unfortunately) not that simple… And so, after a 3-month hiatus, I decided to tear back into the code to uncover, once and for all, why this was happening!
First, Check the Obvious
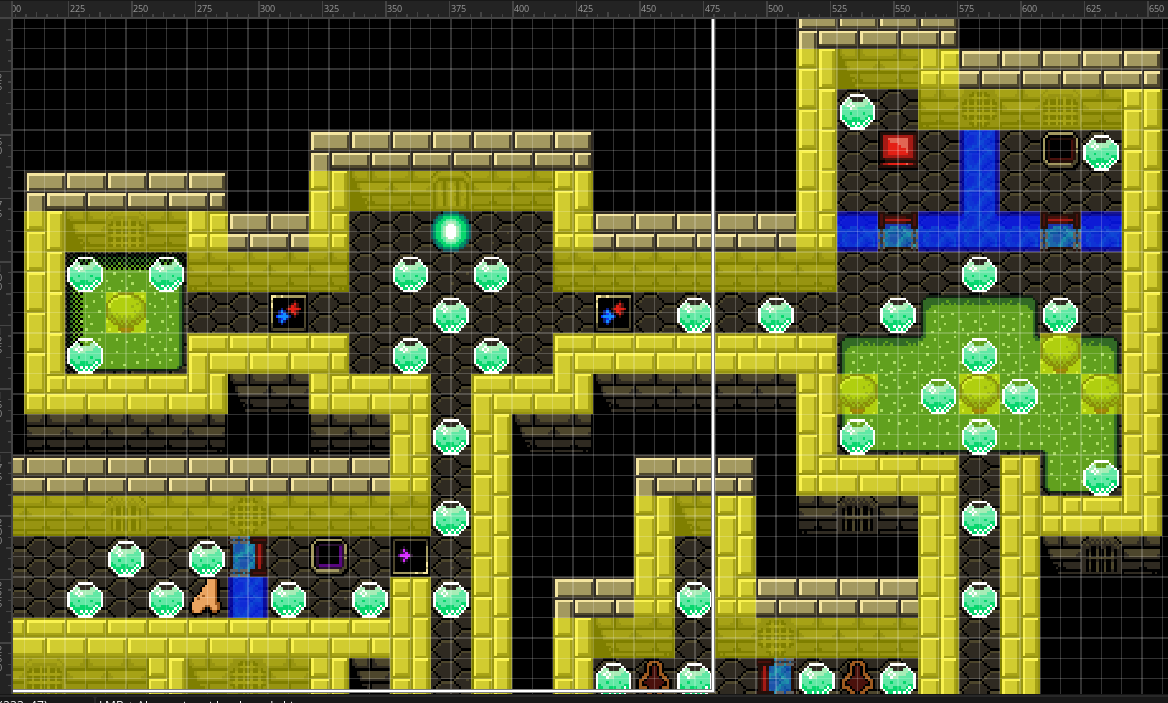
Looking at the room layout in the GameMaker IDE, I could see the objects had been placed:
So why were they missing during his playthrough? I fired up the game, went straight to the offending level, and made a beeline for the secret room. Upon entering, there were the Ethereal Coins right where I expected them to be:
To try to duplicate the [unwanted] behavior, I did a normal playthrough, and lo and behold, the coins were missing for me, too! Progress, at last! But why? What exactly was happening to the coins? Were they failing to render? Were they being destroyed?
So, to begin my troubleshooting, I added the following code to the “obj_oneup” object’s Draw GUI Event:
// Am I here?
draw_self();
draw_text(20,20,"I'm still here!")
Whenever you use custom draw code (e.g., draw_text), you must precede it with “draw_self(),” or the sprite won’t be drawn. The purpose of the draw_text message is to print the string “I’m still here!” in the upper left-hand corner to let me know that at least one instance of the object still exists on the map. Simply put, these two lines of code tell me that the object is both visible and present.
I saved my work, then launched the game, and upon entering the first level, I could see the message right where I expected it:
After collecting the Ethereal Coins, the message disappeared as expected. So, I continued playing until I reached the offending level (Stilted Pond), and after some experimentation, I finally observed what was happening…
Next, Eliminate the Impossible
“When you have eliminated the impossible, whatever remains, however improbable, must be the truth.”
– Sherlock Holmes, The Sign of Four
Whenever I pushed one block into another block, all of the Ethereal Coins in the current room were instantly destroyed. This was true, regardless of level, but I couldn’t yet understand why…
The way I coded movement for blocks, enemies, and the player in Purgatory Purgers was a modified version of my grid movement system, explained hereand here. In short, this is what happens when you “push” a block:
An instance of an invisible 16x16px target object is created 32 pixels ahead.
The block moves toward the target object.
Upon collision, the target object is destroyed, and the block’s movement speed is set to zero, stopping it.
Because we’re using an Instance Variable, it has to be declared in the Create Event, e.g.:
block_target=0;
This variable would later be defined in the Step Event whenever the block was moved, something to the effect of,
In the example above, “block_target” refers to the Instance ID of the specific instance of the obj_block_target object we’re dealing with, and nothing else! So when obj_block collides with the instance of obj_block_target it created, i.e., “block_target,” only that instance should be destroyed, but somehow obj_oneup was being [mis]associated with “block_target.”
Block movement was one of the first features I coded, and later implementations used the place_meeting function in the End Step Event. So, simply recoding it to use “place_meeting” fixed the issue.
I still don’t fully understand this, and after hours of troubleshooting, I am relieved that this was resolved. I have since posted the fix to itch.io as version 1.4.
Back in September ’23, I announced that Eric and I were working together again after a 7-year hiatus. We’d agreed to start small, and after some initial discussion, Eric committed to taking on the roles of Game Designer and Level Designer. I would do the programming, artwork, sound effects, and music.
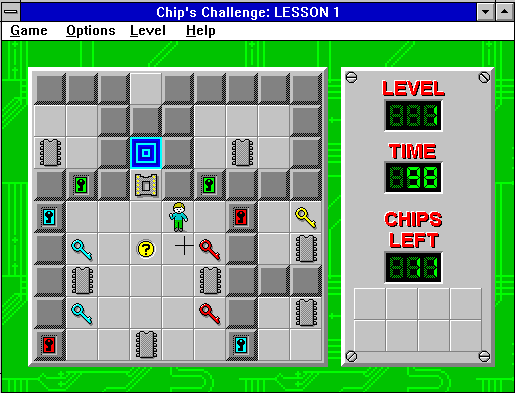
When we initially brainstormed game ideas, Eric fondly recalled the time he’d spent playing Chip’s Challenge on an old Windows 3.11 system and suggested we create something like that, starting with the core mechanic of pushing blocks into slots.
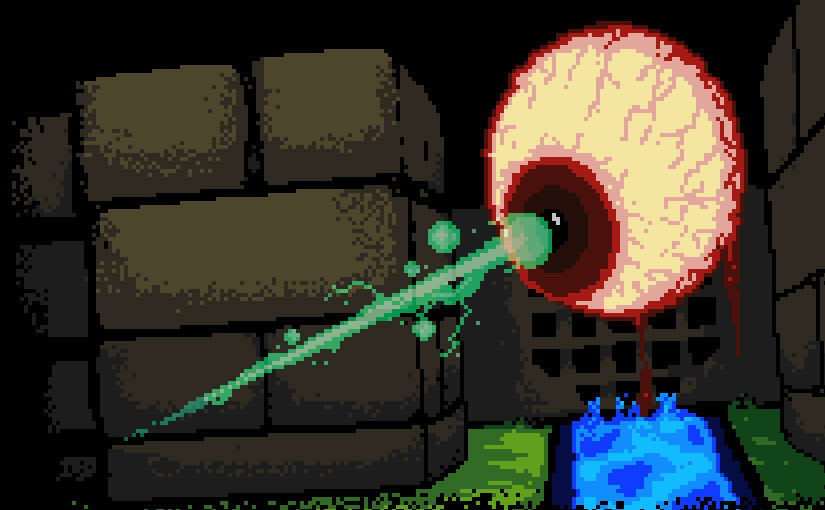
After some discussion, we settled on a Purgatory theme. Eric proposed two characters, an angel and a demon, each with their own unique abilities. The ‘demon’ (Imp) could push blocks, and the ‘angel’ (cherub) could fly over obstacles (e.g., water).
Eric didn’t remember any of the specifics of Chip’s Challenge, so I watched some gameplay videos and got a very rudimentary idea of how the game worked, focusing first on orthogonal, tile-based movement and then the “Sokoban” mechanic of pushing blocks into designated places.
I didn’t have a clear vision of the art style and started out with the intent of creating 32x32px tiles and character sprites. Here’s an early rendition of Bob:
Although he looks pretty good, the bigger the sprite, the more detailed it needs to be and the more time it would take to create. In addition to the player character, there are also the enemy sprites and tile sheets to consider.
Early sprite sheet designs were 32x32px tiles and single-height, meaning that the tops of the walls were on the same plane. This was simpler but didn’t look very good.
I eventually scrapped this all in favor of simpler, 16×16 tiles with fewer animation frames, akin to something you might see on the NES, albeit a slightly larger color palette (64 colors instead of 52, and support for alpha channel, which wasn’t something the NES could do).
In an effort to work in parallel, I’d asked Eric to block out level designs with primitive tiles that we could later replace as the finalized tile sheets were created.
This worked well initially, but as the tile sheet began to take shape, we encountered two issues that set us back:
Eric’s designs were more complex than what my simple tile sheet was capable of, and absent the correct tiles, Eric would ‘wing it’ with the ones he had.
The levels Eric created assumed features we hadn’t previously discussed. I was still working on the core mechanics and did not even have a working prototype of the basic gameplay yet.
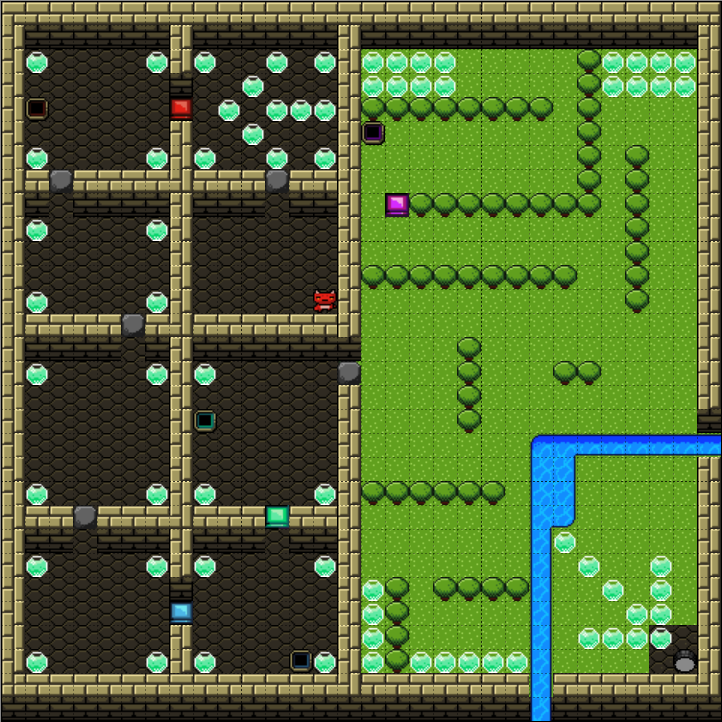
In order to get this under control, I knew that I needed a playable game, and by mid-September ’23, I had one. I asked Eric to build a simple test level so that we could playthe game. Here’s what that looked like:
The First Prototype
Having a working prototype can teach you a lot about your game. Is it fun? Does the core gameplay loop (i.e., the thing the player does in the game) work the way you expected? Is it complete?
I watched the Extra Credits video series on Making Your First Game. I’d watched dozens of GDC videos on game design. I knew that our focus needed to be getting the game to a playable prototype so that we could see what worked and what didn’t. I knew this – Eric did not…
How could he? He’s never made a game before. To him, game design meant thinking up cool ideas. That’s only natural, as that’s how a writer might approach the problem. A game designer needs to be able to articulate, in great detail, the logical systems that make up a game, the rules, for instance, and how to resolve problems you might encounter.
Take the angel for example. In our original discussions, we wanted the angel to be able to fly over water, so I focused on getting that mechanic working without thinking about why. In order to facilitate this, I had to create a test level and realized that simply moving to areas the demon couldn’t get to on his own wasn’t all that interesting – then it hit me…what about a bridge? What if the angel could lower bridges, allowing the demon and a block to reach places he couldn’t previously access?
This would not have occurred to me without actually playing the game.
Iterative Refinements
Initially, the movement system I created moved the character one space per key press. This worked fine on small levels, but with big, expansive ones like the test level he’d created, it was very fatiguing. To address this, we opted for continuous movement.
The more I played, the more I realized that half the fun of the game was exploration and collecting the souls, and the other half was the puzzles, but you had to have both. You can read more about Purgatory Purgers’ level design philosophy here.
As we talked through new features, I tried to corral Eric’s ideas into building on existing mechanics to create more value, using the example of secret rooms and passageways. The mechanic behind this reuses the water tile in a novel way. Eric suggested “hiding” the secret room, but there wasn’t an obvious way to do this due to the ‘skybox’ background we were using at the time.
By scrapping the sky tiles in favor of a plain black background, we could use an opaque black rectangle that’s destroyed on contact with the player to reveal the secret area. This was both easy to implement and highly reusable!
Creating the UI
We knew that we were going to need a UI for the game, so we discussed what should be in it, and Eric went to work on a simple mockup. Here’s what he came up with:
We initially discussed a scoring system in which the player earned points based on souls collected, gems slotted, completing a level, and number of moves made. Our game resolution was 480px wide by 270 pixels tall (1/4 scale of a target screen resolution of 1920×1080 in a 16:9 aspect ratio).
I found that even using the smallest font I could find (~5x5px per character), it would be impossible to cram all that information into such a small area. To get a sense of proportionality, I started with a simple shape and put it on the playfield:
As I began to play with designs, I arrived at something closer to the final one but found that placing it over the playable map didn’t look (or feel) good:
Moving it 16px to the right and adding a black background seemed to do the trick, but I also modified the camera (which was set to follow the player) to include a buffer equal to half the width of the level to keep the player centered on the screen – this would prevent the player from getting behind the black border (128px or approximately 8 tiles):
With the general layout done, I had to figure out how to populate the information it contained… More tweaking! I scraped the score (we didn’t have a solid design, and it felt a bit arbitrary), making more room for other elements. I also decided to stretch the UI a bit vertically to make more room for label text:
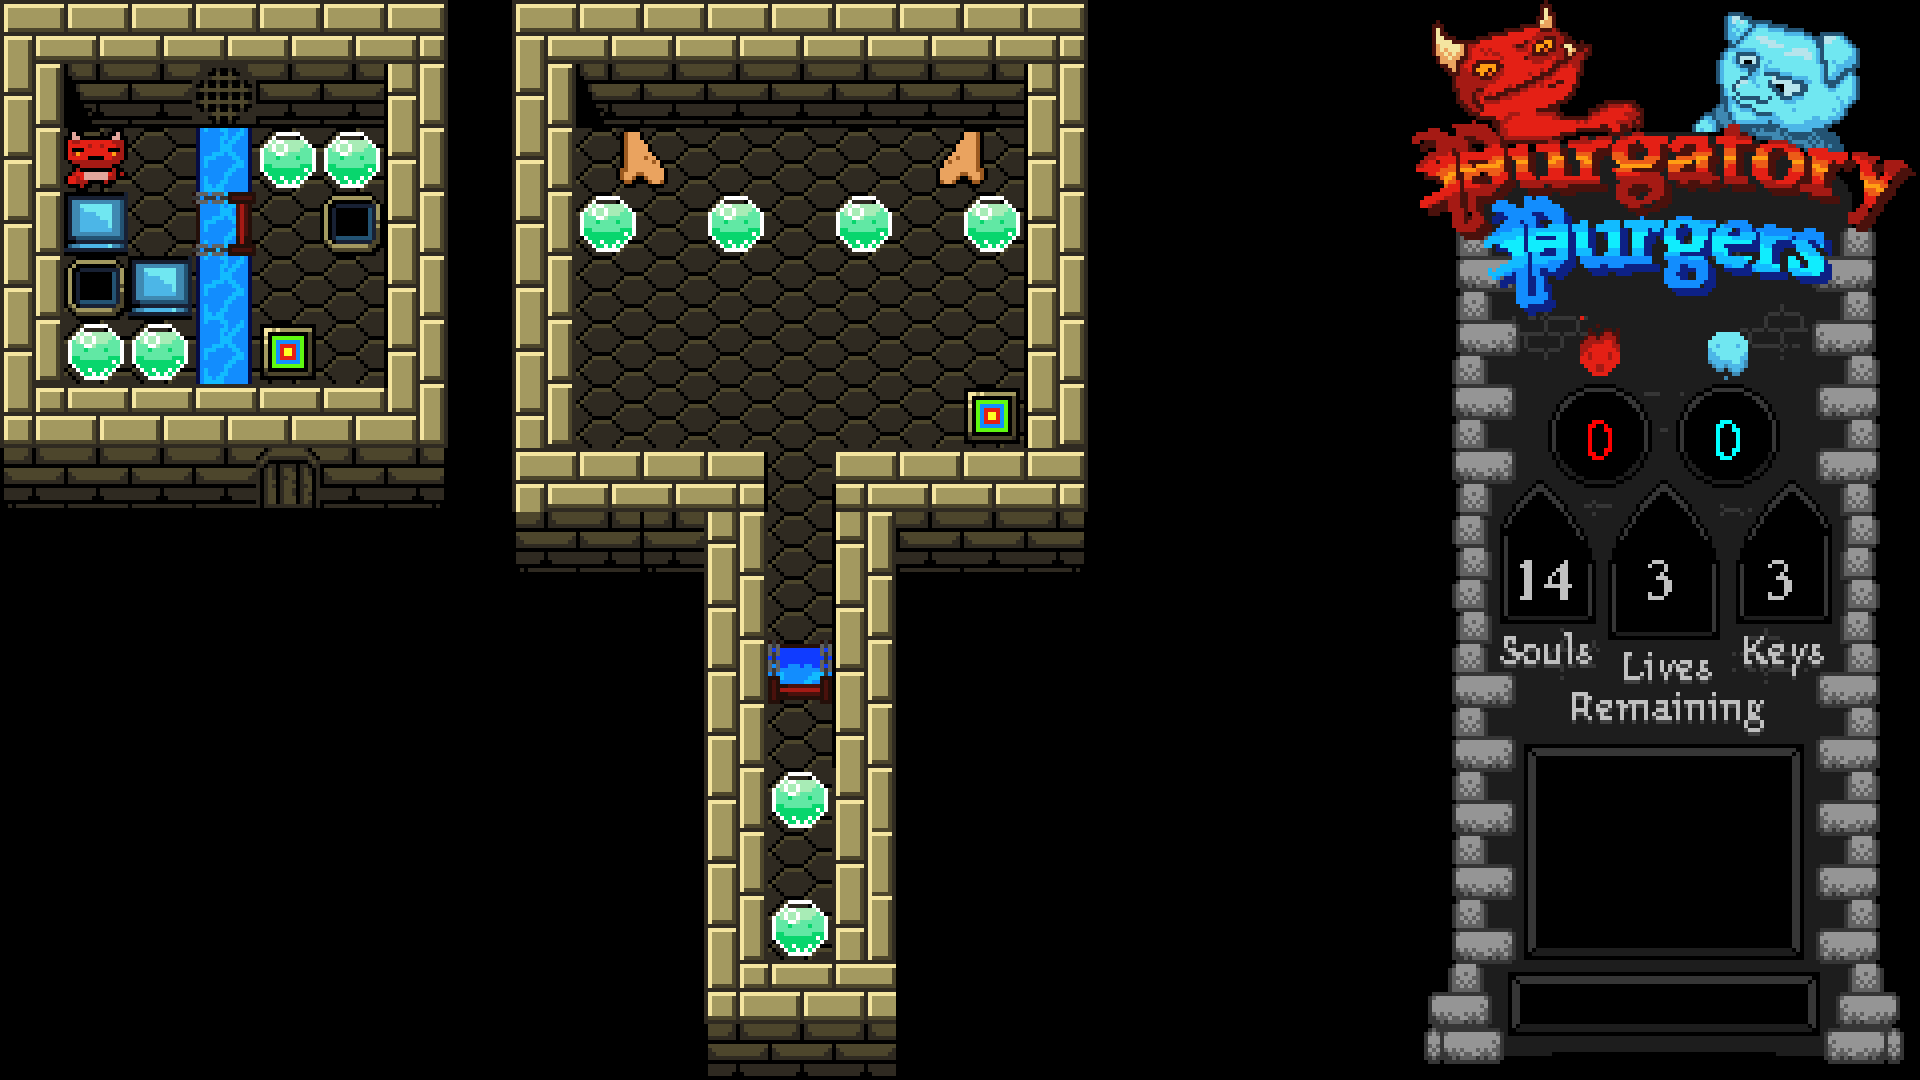
Finally, I added the animated ‘judged soul’ graphics, which brought it all together:
I noticed there wasn’t much room for the soul counters, so I incorporated some additional code to change the font once it reached the triple digits, but that came much later…
Mid-Development Hell
By October ’23, the core of the game was finished, save for creating a menu system, secret levels (and a system for accessing them), and additional levels to flesh everything out. Eric and I argued frequently.
We could not agree on a shared vision for the game, what a level should look like, or even the definition of Game Design!
For example, Eric spent what might have been several hours creating a very faithful rendition of the Pacman maze. While very well done (for what it is), it did not fit the theme of our game (not to mention possible copyright infringement).
Purgatory Purgers II: Copyright Infringement!
Then there were the logistical obstacles… I had Eric create the levels in Tiled, and then I’d recreate them by hand in GMS2. This meticulous process took hours because each level comprised several tile layers (e.g., Walls and floors, decorations, water, object instances, etc.).
As the month came to a close, I was nearing my deadline for completing a very difficult certification Exam for work, so I put my development efforts on hold for the next 2 months to focus on that.
The Last Mile
At the end of December, I passed my Exam and was ready to resume work on Purgatory Purgers. Over the next few weeks, I started investigating ways we could improve our workflow and allow Eric to create levels directly in GameMaker.
My first thought was to try to implement source control, but not knowing what I was doing almost ended in disaster. I kept at it and was eventually able to work out how to import room resource files.
Although we’d overcome the technical hurdles, Eric wasn’t used to using GameMaker as all of his previous work was mocked up in Tiled, and then (re)created by me. Naturally, Eric did not create levels as quickly as he could in Tiled, nor were they of sufficient detail to meet the current standard. This isn’t to say that my levels were perfect either, and in fact, after playing through the game over and over again, I ended up redoing my first level and making significant cuts to other levels I felt were too bloated.
“…[sometimes], You must kill your darlings.” – William Faulkner
I came to the grim realization that Eric and I had fundamental disagreements that wouldn’t get resolved in this project. Eric had lots of ideas, but the concept of testing them and killing off the ones that didn’t make the cut was abhorrent to him. He placed alot of value on his individual ideas as well as his ability to generate them. Still, he did not understand that the idea itself represented a tiny fraction of the overall effort required to execute it. Our imaginations are limitless; my time and abilities are finite. Sometimes, you must kill your darlings!
The only way forward was to create the remaining levels myself, along with the endings, menu system, and artwork, which I spent the next few weeks working on. By the middle of February ’24, I was done!
I took a few days to recover, then went back again to finalize it for release.
Publishing Purgatory
I originally intended to publish on GameJolt and Itch.io and advertise in the official GameMaker forums.
Unfortunately, I couldn’t edit the content on my GameJolt Developer page without encountering an “ERR_TOO_MANY_REDIRECTS” browser error. The platform is covered in ads, which suggests it’s either dead (or dying), so I decided to abandon it and move on to Itch.io.
Itch.io turned out to be a good choice. It is simple, easy to use, and straightforward. I captured a few screenshots and then spent about an hour creating a YouTube video to promote it. I spent a couple of days creating an old-school-style instruction manual and packaged it with the game.
Posts in the “Made with GameMaker” thread on the official forums require moderator approval. What confused me was that my post was initially visible to me and then disappeared later, leading me to believe it had been deleted. Thankfully, after reaching out to the moderators, I was assured that hadn’t happened, and a short while later, my post went live.
Reception and Payout
The only people who played and/or bought the game were a handful of personal friends, acquaintances, and a couple of kind folks from the Official GMS Forums. Jason D., John J., and others pointed out bugs and potential exploits, and I fixed what I could.
Overall, I spent about 480 hours on this project over 8 months. The proceeds were around ~4.2¢/hour (gross, 3¢/hour net).
Lessons Learned
Communication was a constant problem for Eric and me. Because we had different schedules, we could only speak in real time once per week. Between our weekly calls, I’d try to share my thoughts on progress with Eric through Discord messages. My DMs to him were too verbose, and his responses were too succinct.
It was difficult to discuss complex design topics this way. Often, a conversation would begin with, “Would it be possible to do [insert_feature_here]?”
I read somewhere about ‘Mu,’ the third answer to a Yes or No question, and it can be interpreted as “Your question cannot be answered because it depends on incorrect assumptions.”
A lot of what Eric was asking about sounded simple and straightforward, but it usually lacked sufficient elaboration to explain exactly how it would fit into the game. When I asked Eric if the juice was worth the squeeze, I was trying to convey to him whether he wanted me to pause work on implementing core game features for the one-off feature he was asking about.
From my perspective, Eric’s question was lazy and uninformed, and from Eric’s perspective, I was dismissive and impersonal. While we eventually talked it out, it took a lot of heated arguments to get to that point.
For me, Purgatory Purgers was never intended to be my magnum opus; instead, it was one more step towards learning how to be a game developer. Eric had more faith in the project than I did, but as far as I can see, that faith was more wishful thinking than anything else. Would I be upset if Purgatory Purgers was a runaway success? Absolutely not, but I also understand that some games, charming though they are, don’t have mass appeal and never will.
I guess the biggest takeaway is that my next game ought to be more memeable :).
Since then, Eric and I have been creating levels to round out the game, and with a little over an hour’s worth of content, I’ve been looking at some of the larger levels to see which parts I can cull so that the game doesn’t get dull/outstay it’s welcome.
Level design is difficult to do well. Purgatory Purgers’ level elements can be broken down into a few different components:
Features
At its heart, Purgatory Purgers is a puzzle-exploration game. Each level is a series of interconnected rooms of varying shapes and sizes and could include:
Gambits: Rooms with one or more dangerous enemies
Treasure Rooms: Filled with lost souls (the primary objective of the game/scoring system) and free lives
Puzzles: Moveable blocks, bridges, etc.
Secrets: Hidden rooms and passages marked by a small crack in the floor or an odd-looking bush.
These aren’t mutually exclusive and could be combined to form interesting and progressively more challenging areas.
Flow
A good level shouldn’t railroad the player down a specific route; instead, there should be 2-3 branching paths and reward players for exploration with additional lives and/or hidden shortcuts through the level.
Embellishments
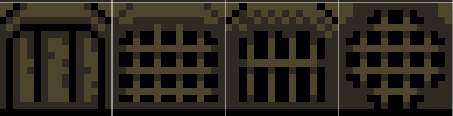
To bring the Purgatory Purgers levels to life, I created lots of additional tiles to add flavor and mystery to each set of levels. Locked doors, sewer grates, pools of water, grass, grates, blood spatters, arcane symbols, and even emptiness in the later levels.
Putting It All Together
A good level combines all of the above to form a cohesive package; the level is:
Good looking (i.e., makes good use of the available tileset and avoids excessive repetition)
Intuitive to navigate (it doesn’t require a lot of backtracking)
Sufficiently diverse in enemies, puzzles, and mechanics
Above all, fun to play (read: sufficiently challenging, but not too difficult)
I’ve been looking for a way to allow another user to create rooms for my existing project using templates I’d created with consistent instance, tile, and background layers.
After my experiment with source control ended in disaster, I decided to shelf that for the time being and try a simpler approach:
Procedure
On PC1, I Exported the as-is project as a .yyz file (File > Export Project > YYZ) and then saved the file to a network share.
On PC2, I downloaded the [MyProjectName].yyz file and Imported it (File > Import Project > Path\To\.yyz file).
I updated the project on PC2 by creating a new room, and then I saved the project.
I opened File Explorer on PC2 and browsed to the project’s rooms subfolder (i.e., C:\>Users\[MyUsername]\Documents\GameMakerStudio2\[MyProjectName]\rooms).
I located the corresponding folder to the new room I’d created, then copied the room2.yy file back to the network share.
Back on PC1, I created a subfolder in my project with an identical folder name and then copied the room2.yy file to that location.
I opened GameMaker Studio 2, right-clicked in the Asset Browser, and selected “Add Existing“. After navigating to the room subfolder from the previous step, I selected the .yy file and clicked “Open.” Nothing happened!
At this point, the rooms list didn’t update with the new asset, nor did I receive an error.
The Missing Step
After opening the game’s project file (.yyp) in a text editor, I could see a list of resources, including rooms, along with their relative paths:
After saving and closing the text editor, I fired GMS2 back up, opened the project, and after an agonizing minute or so of loading, the project opened without error!
To my delight, there sat the imported room in the asset browser. I double-clicked it, and there it was:
Alternatives Considered
Someone on the official forums had suggested having Eric submit asset packs – I have no idea what that means exactly, but he seemed to suggest this was less than ideal.
Eric’s original levels were created in Tiled, and then I’d manually recreate them in GMS2, which was inefficient and very time-consuming; however, I’d heard that there were tools that could convert a Tiled map to a GMS2 .yy room resource file but couldn’t get it to work properly with my project. This is because our maps utilize multiple tile layers sandwiched between an instance layer (where the objects live) and the background layer. Most of these tools assume you are working for a single tile layer to another single tile layer, and none of the address how to get the room.yy file back into your project.
Caveats and Disclaimers
In order for this to work, all of the resources used in the room (i.e., objects, sprites, tilesets, etc.) must be present and unchanged in both the source and destination projects
GMS2 is known to not play nice with Cloud-synced project folders, so make neither system