This would stop all previously playing audio and start the new music track, looping it until the next room was created.
Functionally, this works fine, but I wanted a more centralizedway of handling this so that if I wanted to make a change, I didn’t have to do it N number of places, equal to the number of rooms I created.
How It Works
I created an object called “obj_sound” and placed it in the first room, then I flagged it as ‘Persistent’ so that it would carry forward from room to room.
I added a Room Start event with the following code:
if room==rm_level1 {
audio_play_sound(snd_lvl1,100,true);
}

if room==rm_level2 {
audio_play_sound(snd_lvl2,100,true);
}
At the start of the room, it checks to see if the name of the room matches “rm_level1” (the name of the first room/level), and if it does, it plays the sound “snd_lvl1” at a priority of “100”, and sets looping to “true.”
Once that was working, we needed to be able to stop the previous music track before loading the next one. This can be done using a Room End event:
audio_stop_all();
This stops all audio before the next room is loaded, preventing tracks from playing over each other.
Conclusions
There are other ways this could be handled, however…
It works for what I need it to do (starts a looping music track that’s definable by room name).
It’s centrally controlled.
It does this in the simplest way I know of, and more importantly, I understand it!
As mentioned in a previous post, Level 4 of the GPC was not a lesson, but rather a series of challenges meant to reinforce what was taught in Level’s 2 and 3. This time, I elected to create a new game rather than modify an existing one.
I settled on a top down shooter/adventure game and added features and flourishes as I went along. I used my earlier conceived true grid movement code, but this time, I used a switch statement instead of a series of if statements (or at least fewer of them):
switch (keyboard_key)
 {
  case vk_left:
  case ord("A"):
     sprite_index=spr_player_walk_left;
     if moving=0 {
       moving=1
       instance_destroy(obj_target)
       target=instance_create(x-64,y,obj_target)
       move_towards_point(target.x,target.y,4)
      }
      break;
 case vk_right:
 case ord("D"):
    sprite_index=spr_player_walk_right;
    if moving=0 {
      moving=1
      instance_destroy(obj_target)
      target=instance_create(x+64,y,obj_target)
      move_towards_point(target.x,target.y,4)
     }
     break;
 case vk_up:
 case ord("W"):
    sprite_index=spr_player_walk_up;
    if moving=0 {
      moving=1
      instance_destroy(obj_target)
      target=instance_create(x,y-64,obj_target)
      move_towards_point(target.x,target.y,4)
    }
    break;
 case vk_down:
 case ord("S"):
    sprite_index=spr_player_walk_down;
    if moving=0 {
      moving=1
      instance_destroy(obj_target)
      target=instance_create(x,y+64,obj_target)
      move_towards_point(target.x,target.y,4)
     }
     break;
 }
While trying to figure out line of sight, I came a new function:
That was my first time using the collision_line, which I don’t think is covered at all in the GPC, though it might be included in his how-to’s somewhere…I came across it after watching a tutorial video by “GM Wolf” on YouTube:
This would have solved a lot of issues for me…for instance, in a previous project, I had an idea to create a trap comprised of two moving blocks which collided into and bounced off of each other. While everything worked fine, it would occasionally cause the block to get stuck in a wall. This happened because it’s movement caused it to overlap before it detected the collision, thereby getting stuck inside the wall, unable to go anywhere.
I solved this before using the place_meeting function, but was never introduced to the End Step Event, which would have been the right way to do it. Nevertheless, I can think of other uses for collision_line and am glad I learned of it!
All in all, I spent about 2 days (most of the weekend) working on this little mini-game, and here are some of the features I included:
Destructible walls that advance in damage by manipulating the image_index
Enemies that can navigate mazes (using John Janeka’s code from Level 12)
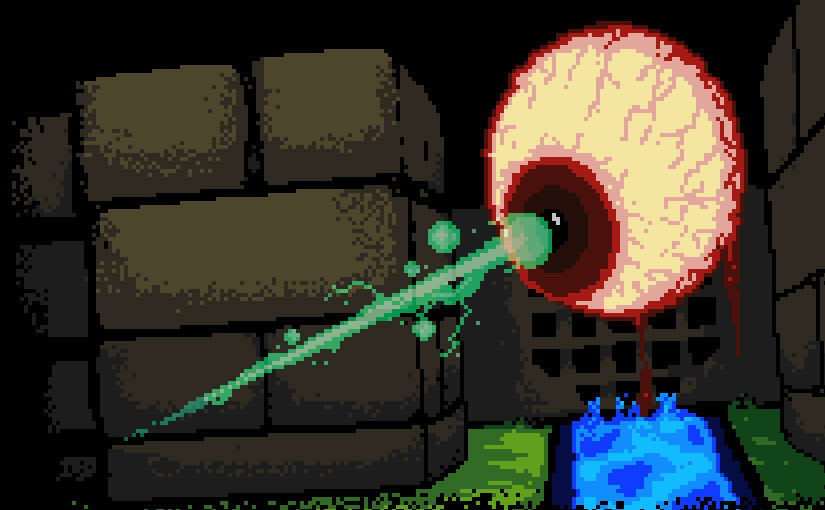
Line of Sight for enemies with projectiles
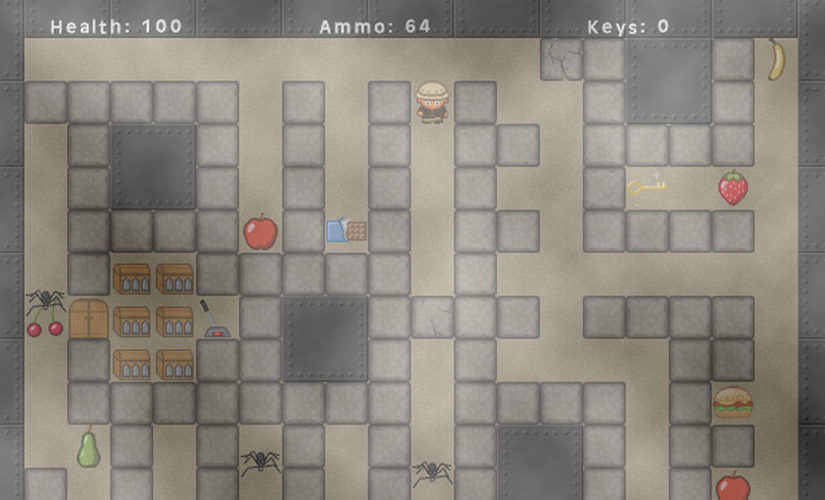
Health, ammunition and keys global variables that persistent between rooms
Lock and key mechanism
A switch that reveals the exit when touched
Randomized muzzle flare and smoke when firing bullets
Randomized impact splatters when an enemy is hit
Different sounds for each impact
Randomized health power up sprites to add variety using a single object
Exits that allow you to advance to the next room
Capped health at 100%
What I not did include were:
Fail condition/game over when you run out of hitpoints
Start screen
Game Over screen
All in all, it’s a neat little game though unfinished, and good practice for more serious projects to come!
With my files recovered, I’m free to concentrate on getting back to my second run through the GPC. I’m back to Level 3, and bits and pieces of the GML syntax are coming back to me.
For instance, when calculating variables, the course suggests something like this:
hitpoints = hitpoints + 1
This works of course, but he also suggests that hitpoints = +1 does not work, which is true, however, if you reverse that (e.g. hitpoints +=1), it does the same thing with fewer characters to type. A small, but useful time saver.
###
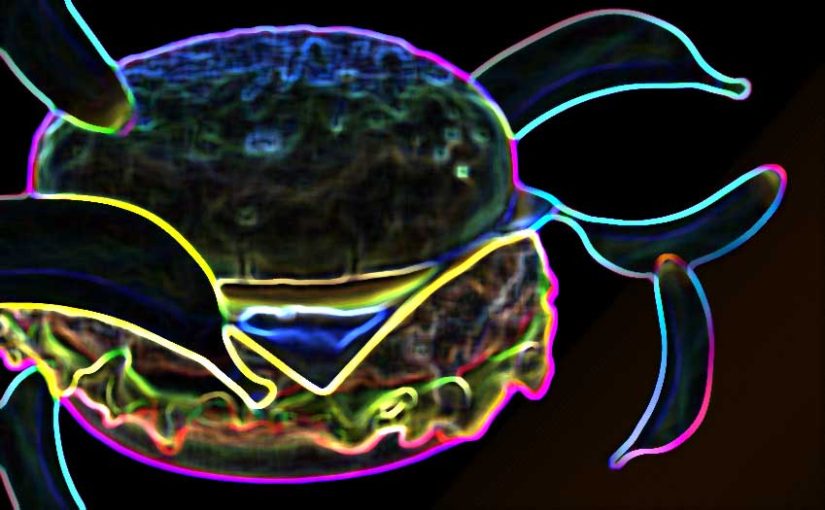
A Hamburger That Fires Bananas (Improved)
In GPC 3-03-A, he introduces a function that randomizes an integer:
irandom_range(0,100)
This allows you use a random number generator (RNG) to decide the outcome of a particular variable within a specified range (i.e. 0 to 100 in the code above). This is used to manipulate the direction that a hamburger fires bananas, and the speed at which they are fired.
I took this a step further by adding the following step event (pun very much intended) to obj_banana:
image_angle+=speed*10
This (in my most humble opinion) makes the bananas far more interesting/exciting to watch as it causes them to spin through the air at a speed consistent with their velocity – i.e. a fast traveling banana rotates faster than a slower moving banana.
Try it yourself!
Aside:I couldn’t help but giggle at the silliness of this lesson – you wouldn’t think a burger that shoots bananas would be so amusing but you’d be wrong! Very entertaining stuff 🙂
Switching Things Up
In Level 3, “Challenge 2 – Random Generation,” the student is required to write a series of if statements to randomly move the player character in one of 4 orthogonal directions.
In my first time around, I recall touching on Switch statements, which can be a good way to handle this very scenario. Here’s how that would look:
Instead of this:
num=irandom_range(1,4)

if num=1 {
direction=0
speed=4
}

if num=2 {
direction=90
speed=4
}

if num=3 {
direction=180
speed=4
}

if num=4 {
direction=270
speed=4
}
You could do something like this:
speed=4
switch (irandom_range(1,4)) {
 case 1: direction=90;
 break;
 case 2: direction=0;
 break;
 case 3: direction=270;
 break;
 case 4: direction=180;
 break;
}
This seems like a far more efficient and cleaner way to handle multiple (more than 3+) consecutive if statements, but is cheating at this stage as Switch isn’t covered in the GPC until much, much later*…
So why mention it now? Because I want to get in the habit of making my code clean and efficient.
And with that, on to Level 4!
*I can’t quite recall exactly when this was introduced… For all I know, it may not have even been in the GPC, but if I do come across it later, I will update this post with where you can find it.
After a long hiatus, we’re finally back with a long post, TL;DR be damned, dammit!
I say ‘we’ rather than ‘me’ because I’m now working with an old and dear friend of mine, Eric. I’ve since moved my old posts from veritastoad.wordpress.com to my own web server, and custom URL.
Eric and I have been friends for nearly two decades, and had collaborated on several projects dating back to my first attempts at video game development some 14 years ago. Dissatisfied, over-educated and unemployed, both of us were looking for a way out of grind. Never has there been a better time for indie game developers to jump in and make great games – we are hoping to follow in the footsteps of the likes of Derek Yu, Scott Cawthon, and Locomalito.
###
Division of Labor
As I’ve lamented previously, I am simply not a “triple threat”, which is to say that I while I am a mediocre artist and a decent composer, I am not a programmer. That’s where Eric comes in – with a degree in Electronic Engineering, Eric has had a lot of exposure to programming (or at least more than I have), and volunteered to try.
We still needed a game engine, and since GameSalad dropped it’s free-to-use model, we sought out other alternatives, eventually settling on GameMaker Studio.
###
False Starts, New and Colorful Beginnings
We had a brief false start around June of 2016. Creating graphics confounded me for reasons I couldn’t explain at the time, but now better understand (more on that later). My first attempts at pixel art were terrible, and I simply didn’t know how to go about creating a sprite sheet. While looking for free-to-use artwork to help me get started, I stumbled upon Locomalito’s sprite sheet for l’Abbaye des Morts on OpenGameArt.org, and through that, the game itself.
This lead to us trying out our hands at an unofficial sequel of l’Abbaye des Morts nominally entitled, Monk’s Revenge.Within about 2 weeks, we had a complete design document created, a few level iterations using the original sprites and some modified graphics.
The objective wasn’t to make money but to practice and learn.
Unfortunately, this project was interrupted by my relocation back to the US, and between that and Eric’s workload for his Master’s degree classwork, our progress was mired. When we picked things back up about a month ago, our mutual interest in creating Monk’s Revenge had since diminished in favor creating an original title. We’d learned all we needed to from it, and it didn’t seem worthwhile to move ahead knowing that it would always be shackled by licensing requirements as derivative work.
Instead, we hashed out a new game idea and Eric got to work on the new design document while I delved further into the alchemy of pixel art.
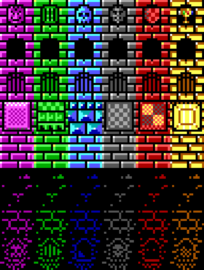
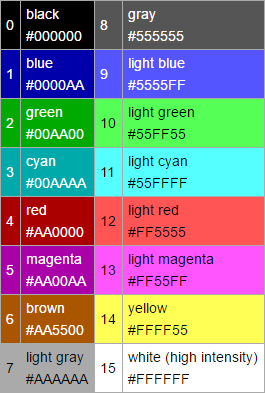
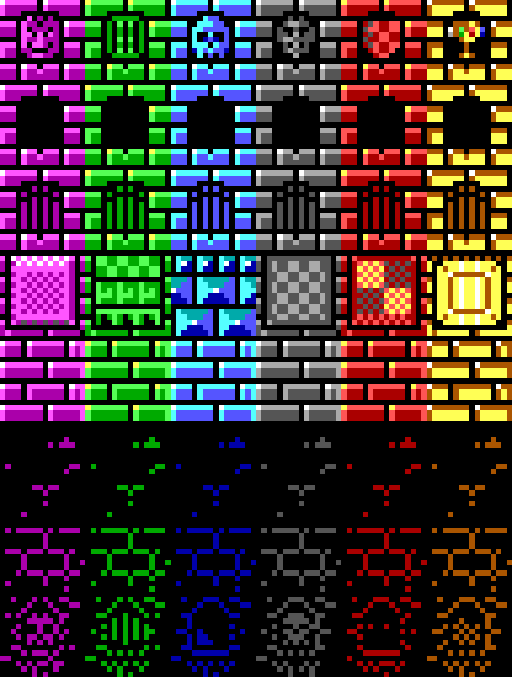
I studied tiles from my favorite 8-bit games growing up, and read up on old graphics modes for IBM Compatible PC’s (what I grew up with) and their limitations. One of Pyxel Edit’s built-in palette sets is “EGA 16” (which is actually the color set used for CGA backwards compatibility):
Having a limited set of options forced me to think about how the colors fit together, giving the art a genuine “retro” aesthetic. I started with a simple 16×16 pixel block (enlarged to 64×64 to show detail):
From there, I tried different color combinations and variations:
The building blocks of the world(s) we will go on to create were starting to take shape, and my confident in my ability to create pixel art was starting to grow.
Just as important to our new game’s visuals would be the game’s sound and background music. Using only 4 channels and the original NES pulses, noise, triangle and PCM voices, I could some great sounding 8-bit accompaniment for the action:
So there you have it!
So what’s next? Expect more updates as we wrestle with new challenges creating our first game, Beaster’s Dungeon!
I picked up a Wacom Intuos (digital stylus and tablet) today, I don’t have a great deal of desk space to work with, and am used to working on a small surface anyhow.
After unpacking it, plugging it in, and running the setup file on the installation media, I got it to work, but I noticed that everything I drew was squashed!
After a little troubleshooting, I figure out that I needed to configure the screen area needed to be adjusted as I have all 3 of my monitors linked through a TripleHead2Go box which allows me to treat them as a single display (handy when you want to run applications in 5760×1080 resolution :).
Once I adjusted the screen area in the Wacom utility, it worked great. I’m very much out of the habit of drawing, so I decided to start with something simple. I started doodling with big, roundish shapes, and filled in the sketch as a bulbous, bloated clown. I gave him scrawny arms and legs, and large, round head topped off with tufts of red curly hair. Here’s how he turned out:
Concept art of an evil clown character, first version to test my new stylus and tablet.
I will likely make some changes, perhaps give him a Jacobean Ruff and perhaps a hat. We’ll just have to see :).